How Can We Help?
Getting Started
Thank you for choosing mBuild modules!
If you use mBuild modules for the first time, read this page carefully and follow the instructions so that you won’t miss their functions.
Before you use mBuild modules
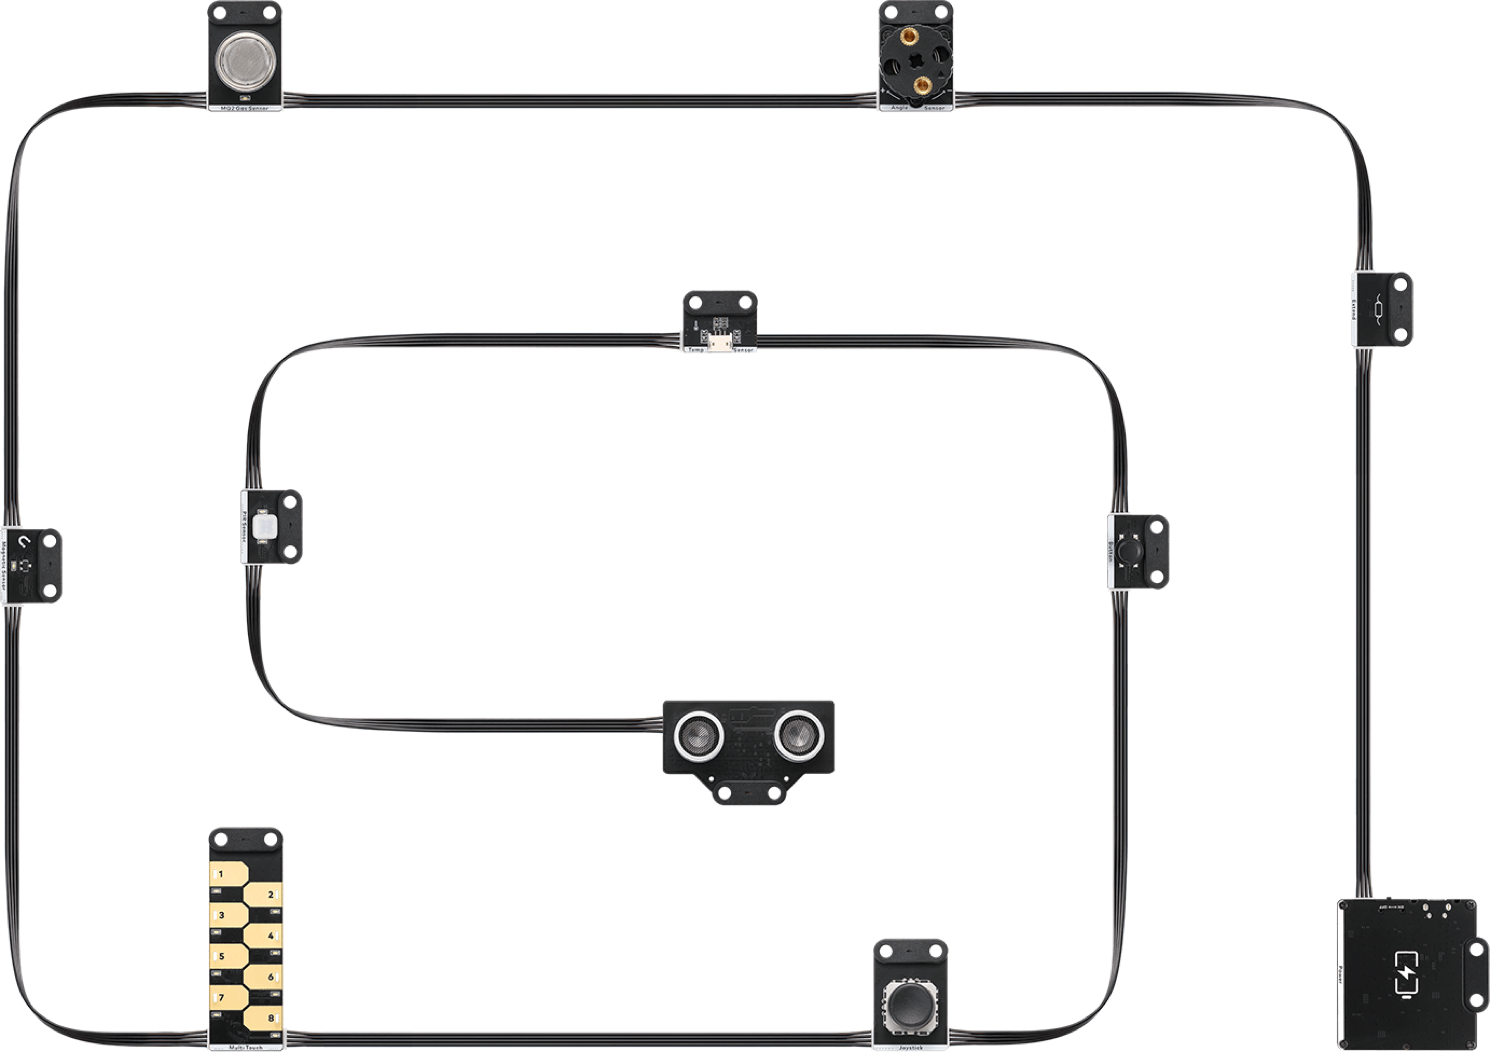
Know about the wiring
Most of the mBuild modules provide two mBuild ports and therefore can be connected to main control boards or other mBuild modules through 4-pin cables. Some also provide a Micro USB port, which allows a module to directly connect to a computer for power supply or communication. For example, after connecting the speaker module to a computer, you can store audio files on it.
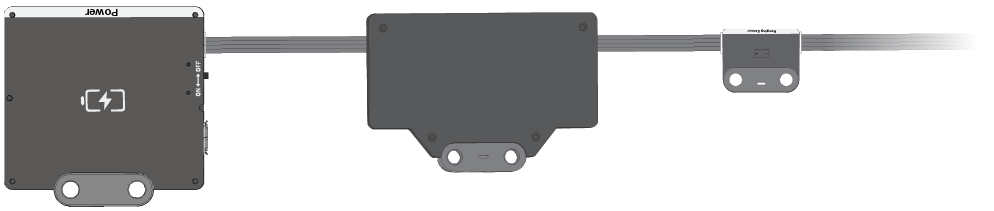
The following figure shows a 4-pin cable.

The following figure shows a connection example.
Provide power to mBuild modules
You can power mBuild modules in one of the following ways:
Way 1: use the power module
Connect the power module to the other modules through 4-pin cables. The power module is rechargeable. You can charge it by connecting it to a computer or charger.
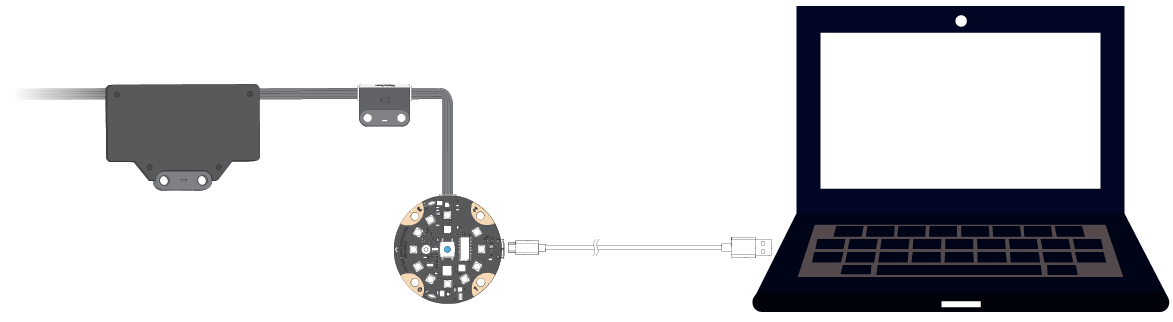
Way 2: use a computer
Connect the mBuild modules to a main control board, such as Halocode or CyberPi, through 4-pin cables and then connect the main control board to a computer.
Start programming
With mBlock 5, you can program mBuild modules to implement their input or output functions. mBuild modules can be programmed as a device or as extension modules of a main control board.
Obtain mBlock 5
1. Visit the mBlock website.
2. Select the version applicable to your device. For example, if you use a PC, you can download the version for PCs or use mBlock 5 on the web. For details, see Obtain and Install mBlock 5.
Block-based programming
Program mBuild modules as a device
In the following steps, mBlock 5 on the web is used.
1. Open the web version of mBlock 5 on your PC.
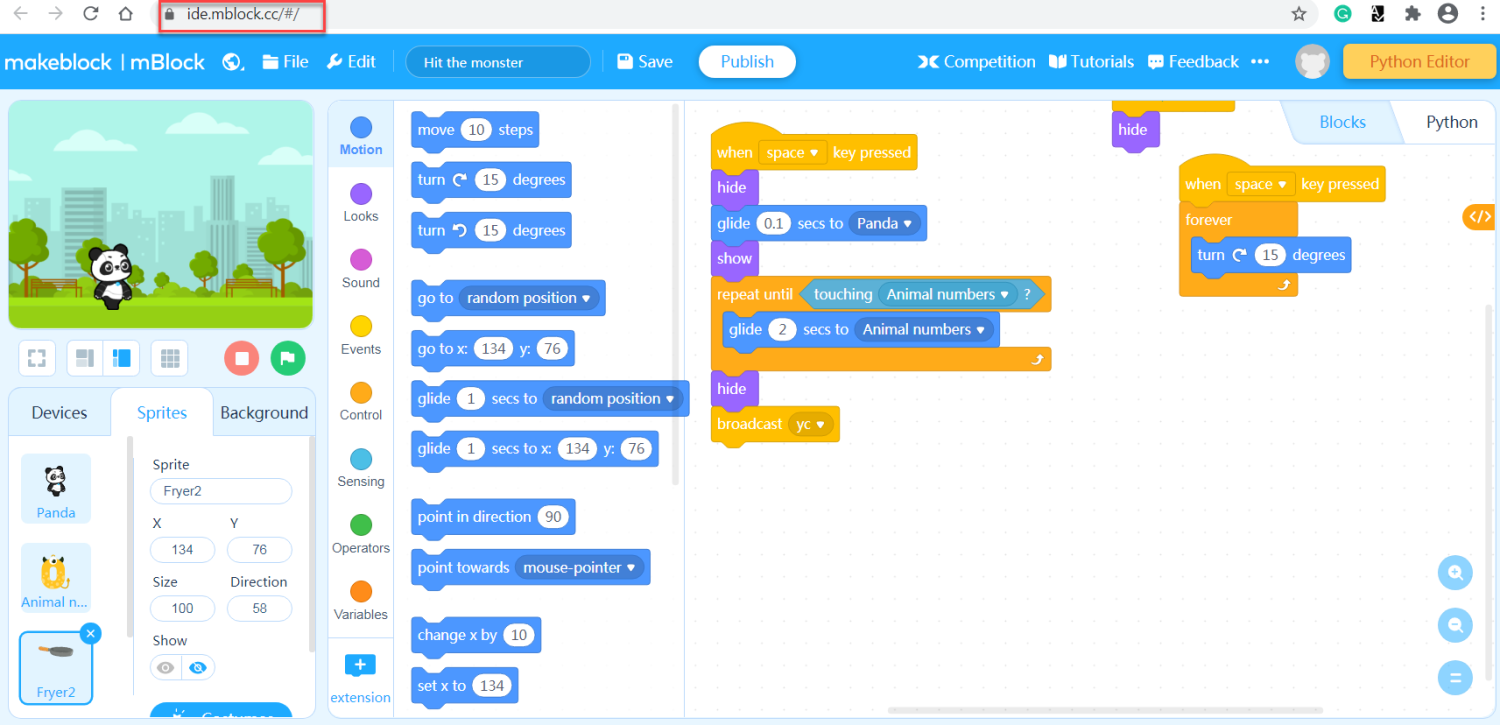
Choose File > New to start a new project.
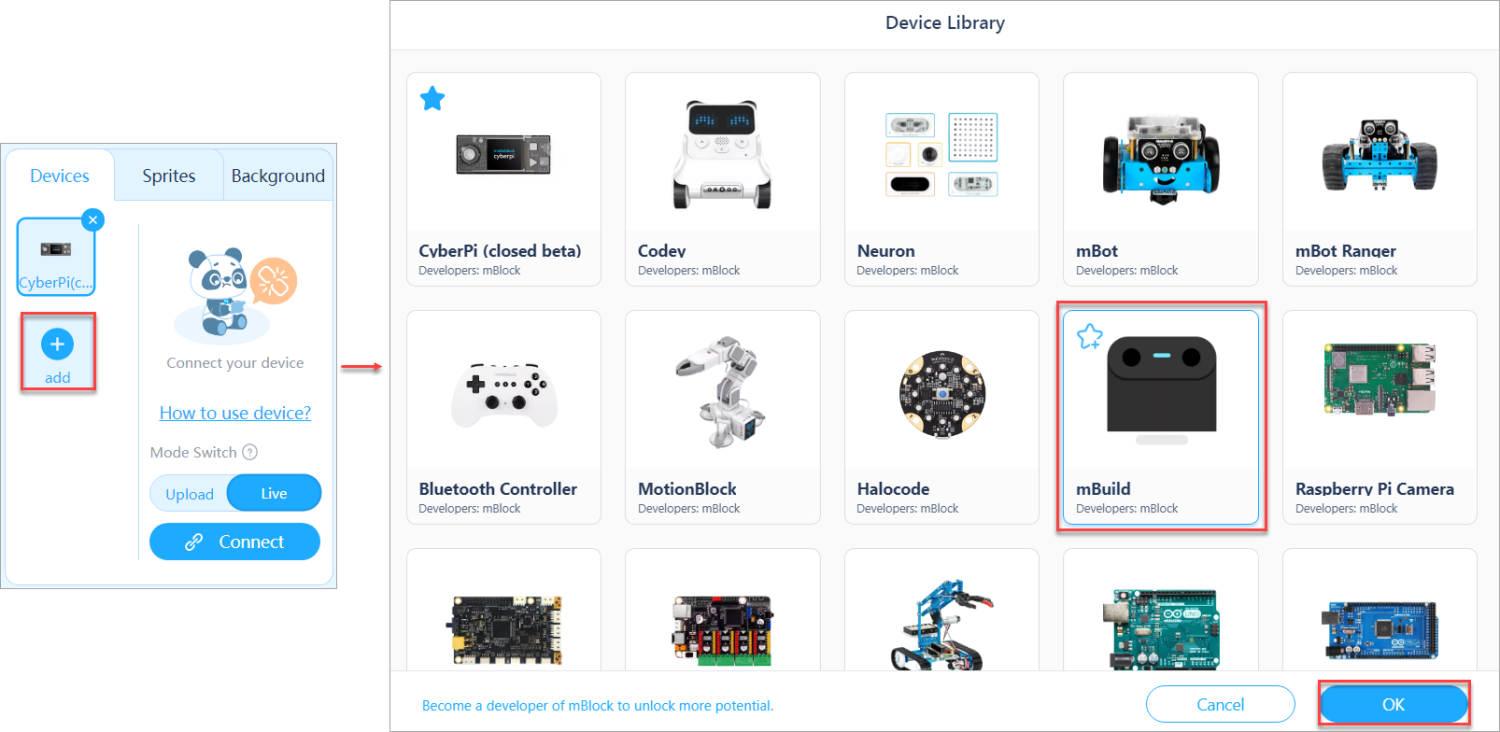
2. Click + add on the Devices tab and add mBuild from the device library.
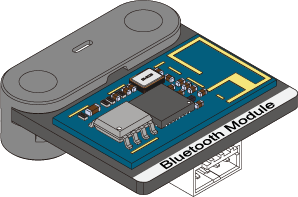
3. Connect the mBuild modules to mBlock 5 through the Bluetooth module.
Note:
To program mBuild modules as a device, you must connect them to mBlock 5 through the Bluetooth module.
(1) Connect the modules to be programmed in series and connect the Bluetooth module last.

(2) Turn on the power module, enable the Bluetooth function of your computer, and then place the module close to the computer until the indicator on the Bluetooth module keeps on.
Note: Currently, the mBlock 5 web version on Windows doesn’t support the connection of the mBuild Bluetooth module to it through system Bluetooth. If your PC runs Windows or if it runs another system but the Bluetooth module can’t be connected to mBlock 5 properly, you can use the mBlock 5 PC client (mBlock V5.2.0 recommended) or Makeblock Bluetooth dongle. For details about how to use Makeblock Bluetooth dongle, see the section “Connection through Makeblock Bluetooth dongle” in the mBlock 5 Online Help.
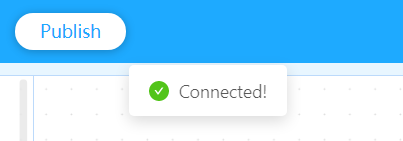
(3) Click Connect, choose Bluetooth in the dialog box that appears, and then click Connect.
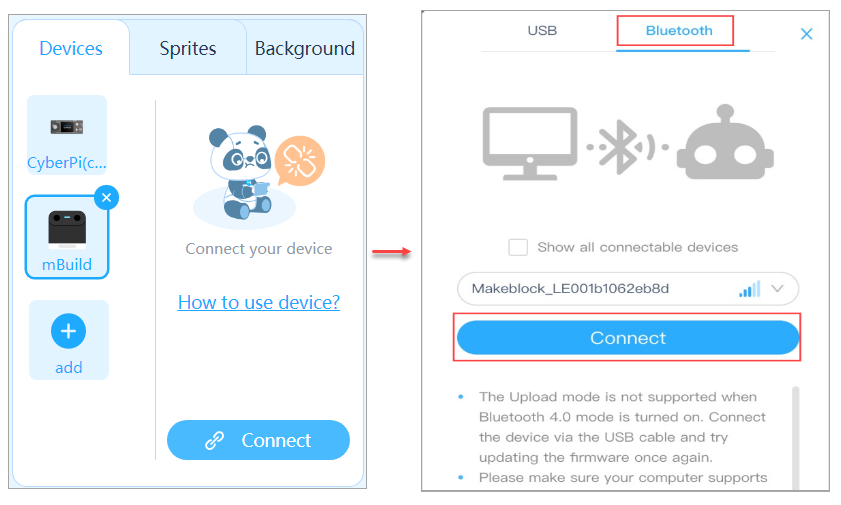
A message is displayed after the mBuild modules are connected, indicating that the connection is successful.
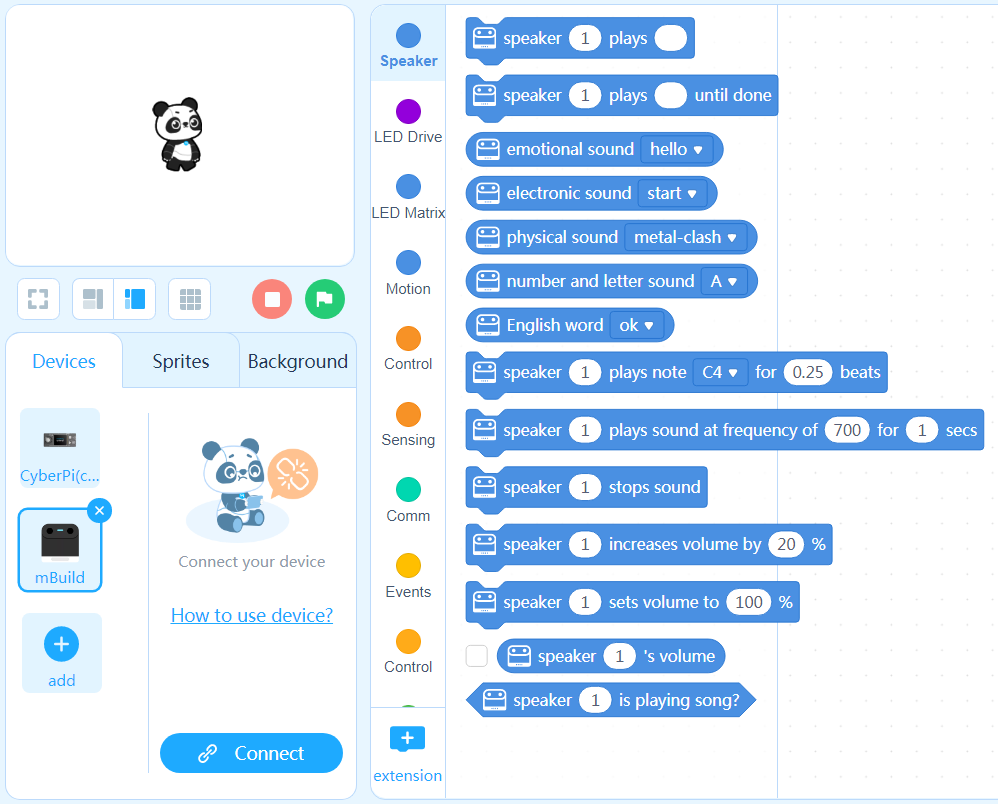
Now, you can drag and drop blocks to the scripts area to compile your program!
Example programs
Example 1
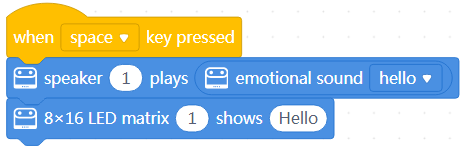
When you press the space key, the speaker says “hello,” and the LED matrix displays Hello.
Example 2

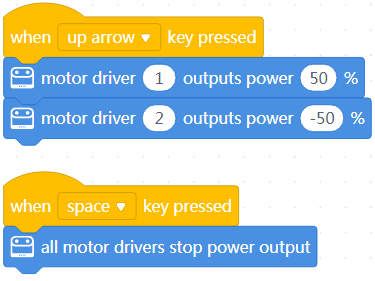
When you press the key, the two motor drivers provide power; and when you press the space key, they stop providing power.
Tips: After connecting the motor drivers to motors, you can control the motion of the motors through programming.
Program mBuild modules as extension modules of a main control board
In the following steps, Halocode is used as the main control board.
1. Click + add on the Devices tab and add Halocode from the device library.
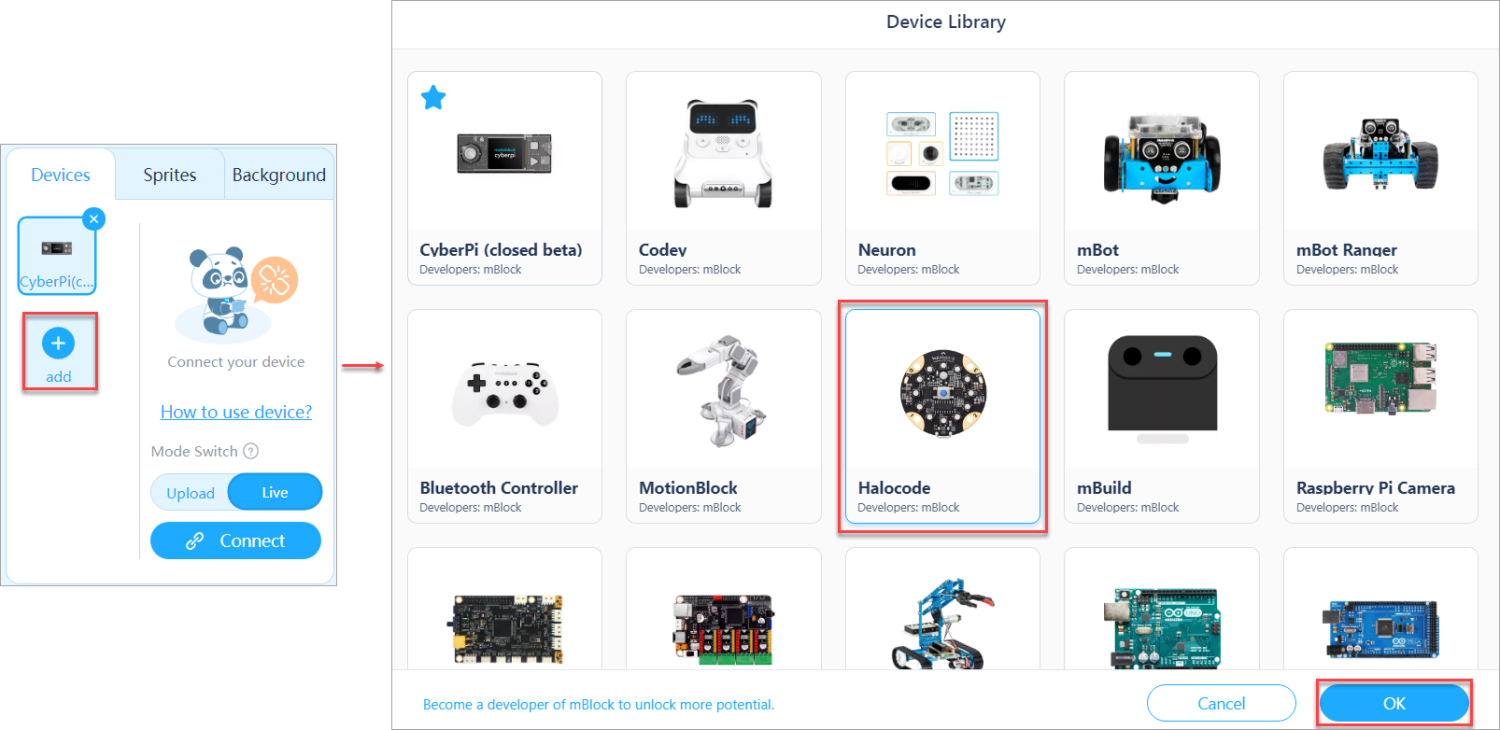
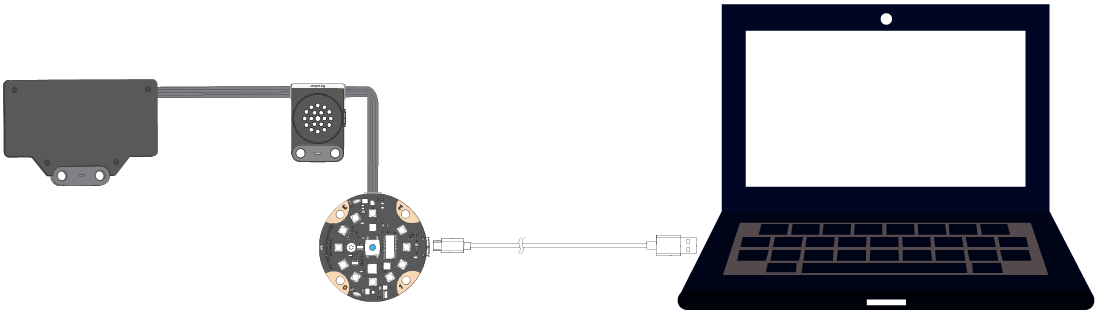
2. Connect Halocode and the mBuild modules to your computer through a Micro USB cable.
3. Click Connect and then click Connect in the dialog box that appears.
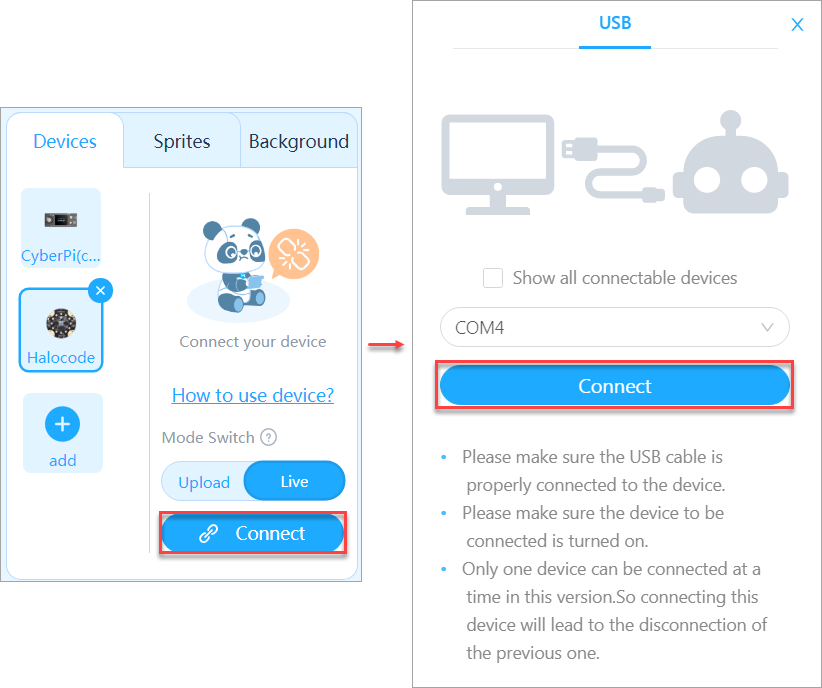
A message is displayed after Halocode is connected, indicating that the connection is successful.
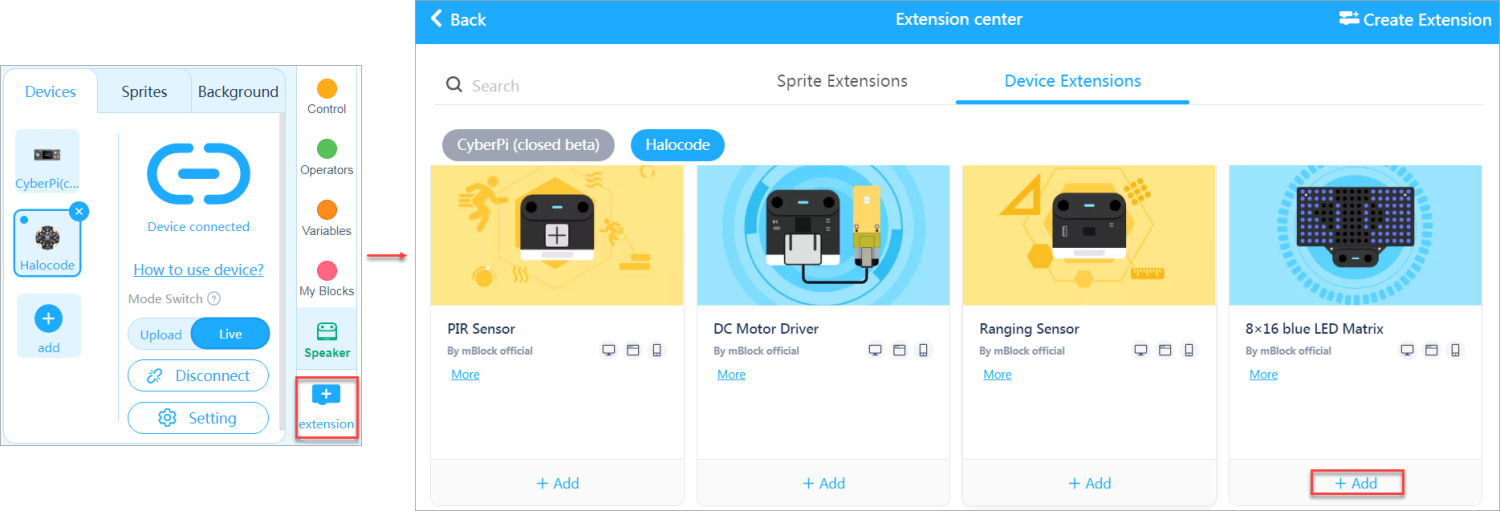
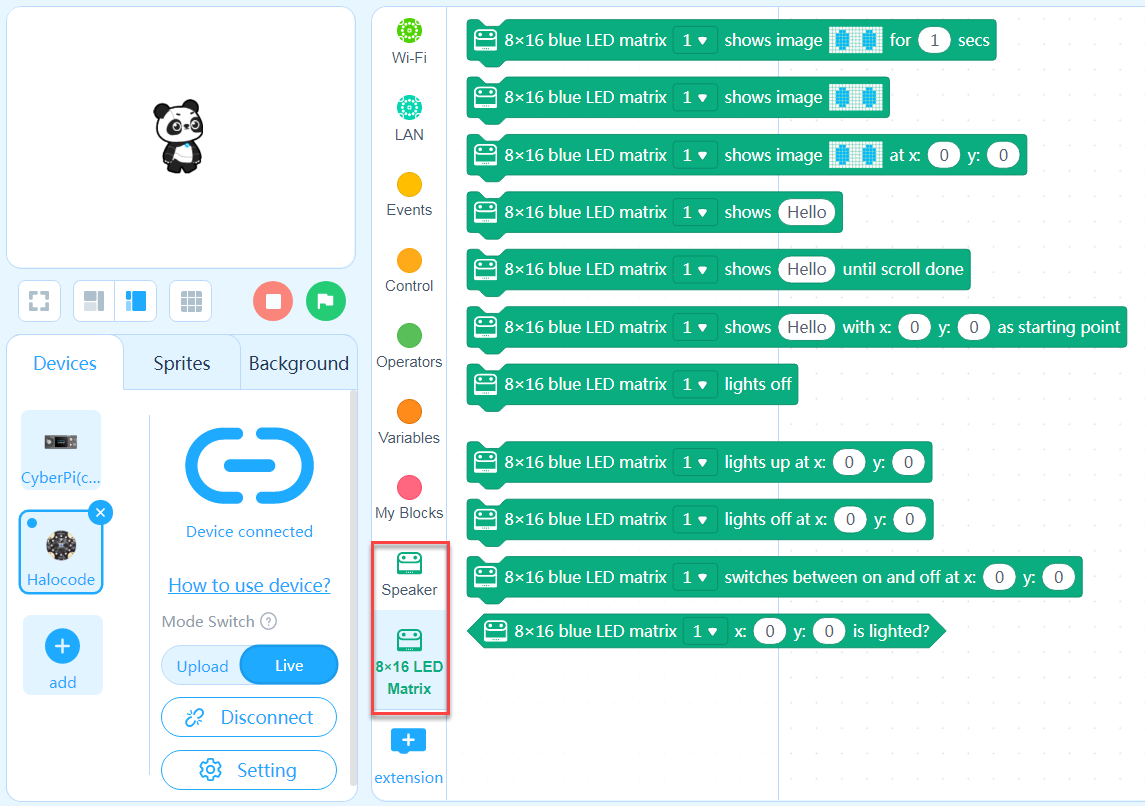
4. Add the Speaker and LED matrix extensions.
(1) Add the Speaker extension.
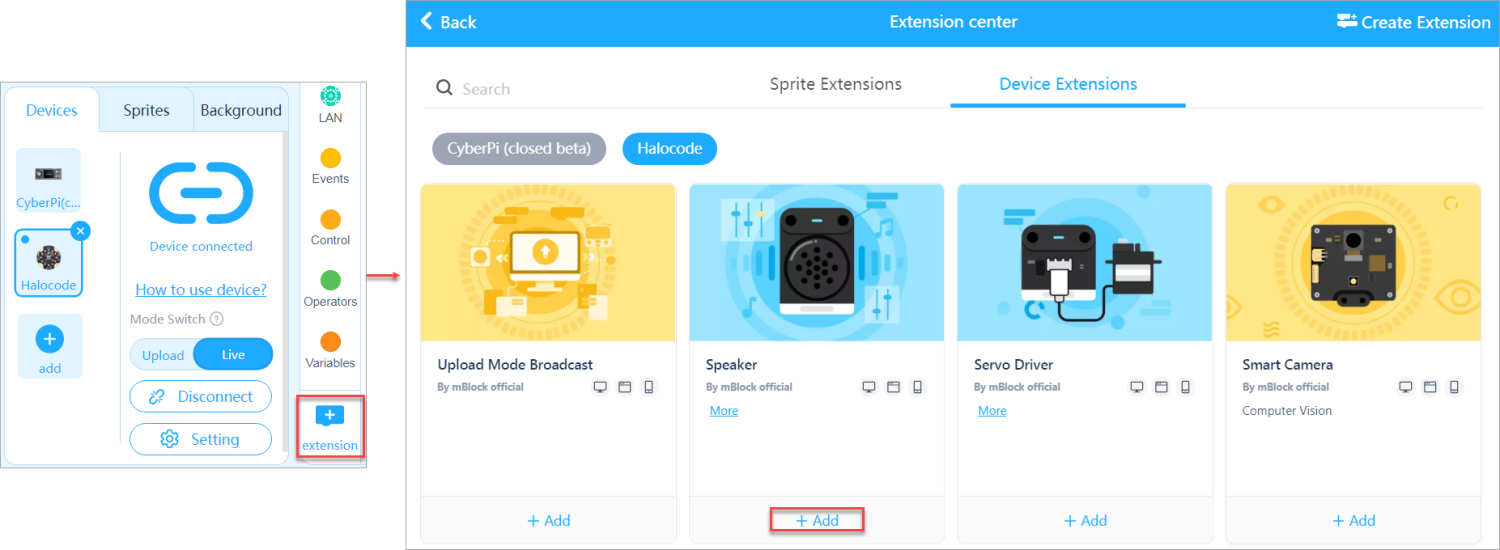
(2) Add the LED Matrix extension.
Now, you can drag and drop blocks to the scripts area to compile your program!
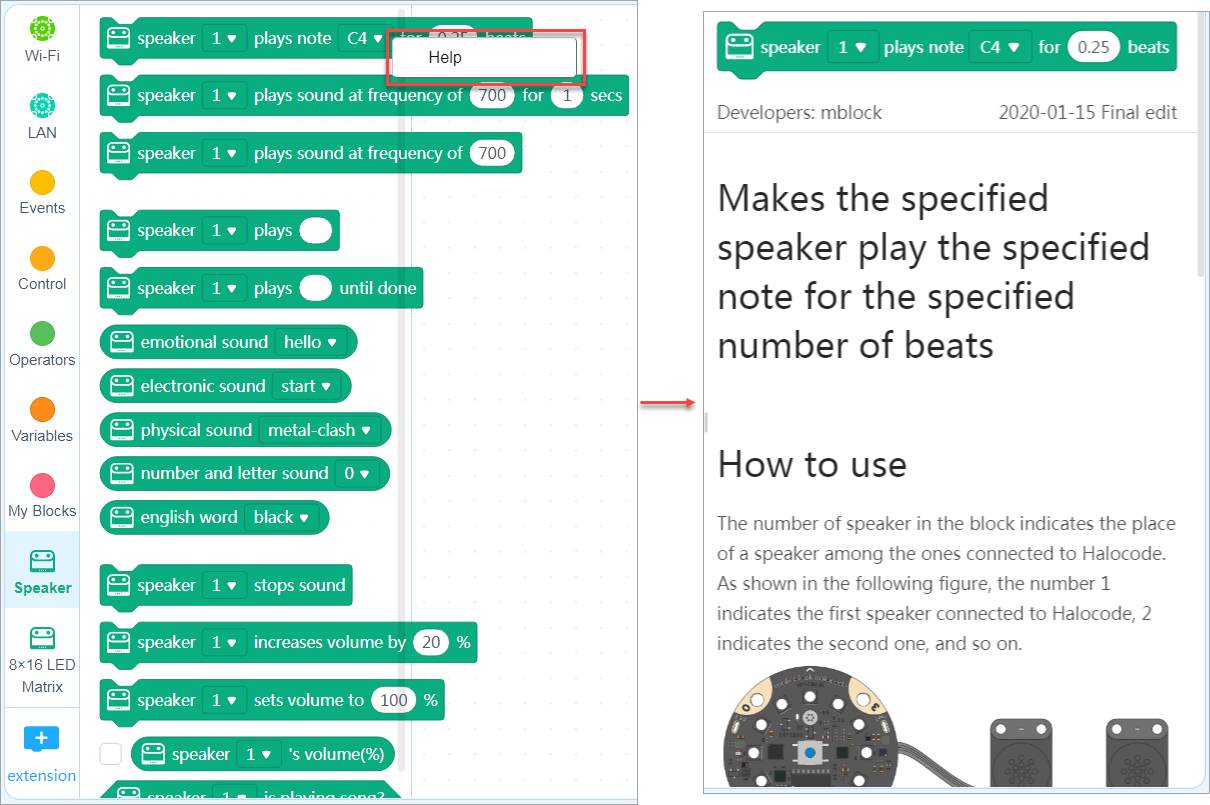
Block help
If you don’t understand a block when using it, you can right-click it and click Help that appears to view its help information.
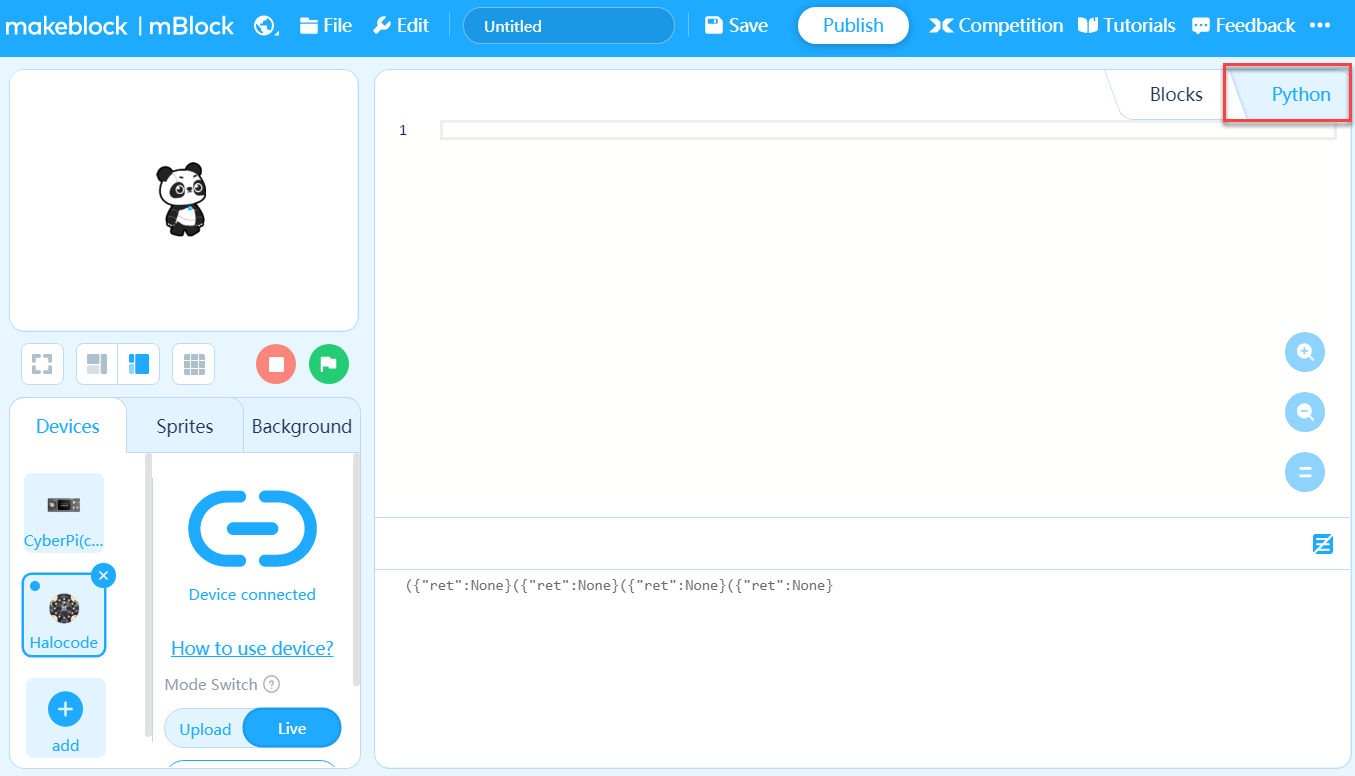
Python programming
You can also use MicroPython to program mBuild modules.
Set the programming language to Python.
For the Python API documentation of mBuild modules, see Python APIs for mBuild Modules.
Tips:
You can select mBuild modules and mount or install them on structures made of cut boards or mechanical parts as required. For example, you can install the motor driver modules on a car made of mechanical parts.
More information
For the functions and features of the mBuild modules, see Functions and Features.
For details about the technical specifications and functions of each module, see mBuild Modules.