How Can We Help?
[micro:bit] Create an Extension for micro:bit
For the official micro:bit Python API documents, visit https://microbit-micropython.readthedocs.io/en/latest/.
Extension Builder of mBlock 5 allows developers to create extensions. With Extension Builder, you can enable mBlock 5 to support new devices, add new sensors for current devices, or develop enhanced functions for blocks. The following describes how to use Extension Builder to create an enhanced extension for micro: bit in detail.
Extension Design Thinking
Before creating an extension, you need to think about the functions you want to develop for micro:bit. Comparing the micro:bit blocks supported by mBlock 5 with the official micro:bit API, you can see that some APIs are not implemented on mBlock 5, for example:
API for image displaying (https://microbit-micropython.readthedocs.io/en/latest/tutorials/images.html)
Python:
1 from microbit import *
2 display.show(Image.HAPPY)
API for external music modules (https://microbit-micropython.readthedocs.io/en/latest/tutorials/images.html)
Python:
1 import music
2 music.play(music.NYAN)
Using the music API as an example, the following describes how to convert API statements into blocks.
Creating an Extension for micro:bit
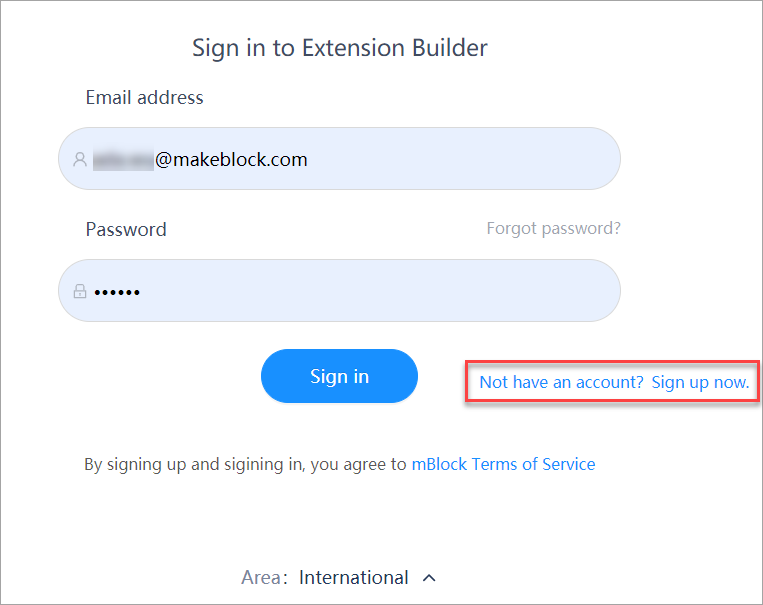
Step 1: Sign in to Extension Builder
Visit https://ext.mblock.cc.
Note: If you do not have an Extension Builder account, you can simply sign up one. The account can be used in all Makeblock product systems, including the mBlock community, mBlock 5 on mobile terminals, mBlock 5 on PCs, and mBlock 5 webpages. With the account, you can synchronize your projects and use the AI services of mBlock 5.
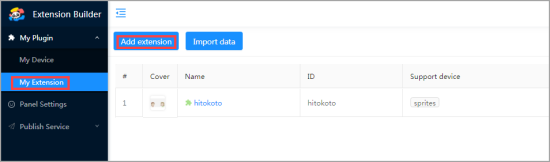
Step 2: Create an extension
After signing in to Extension Builder, choose My Plugin > My Extension in the navigation tree on the left side.
Note: On Extension Builder, My Device refer to specific hardware devices, distinguished from sprites; and My Extension refer to extensions that must be used in combination with hardware devices or sprites.
For details about the concepts of device and extension, see “What types of extensions can you develop with mBlock 5 Extension Builder?”
In this development example, we click Add extension, instead of Add device, to create an enhanced extension for micro:bit.
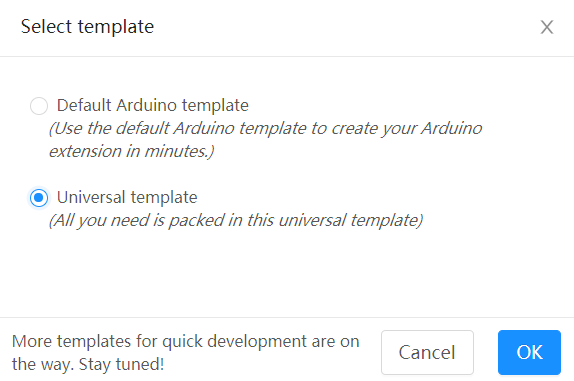
Select Universal template in the dialog box that appears, and click OK.
Step 3: Enter basic information
Enter the ID of the extension to be created. Do not use one that has already been used, for example, microbit.
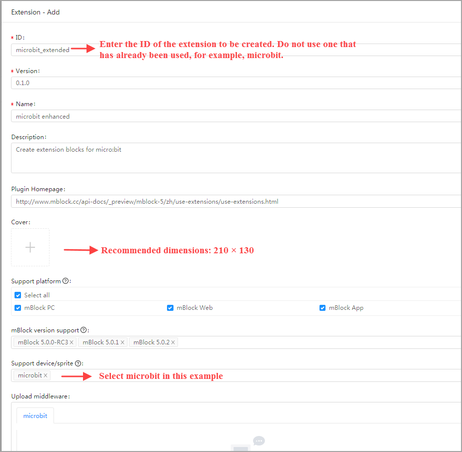
After entering the basic information, click OK.
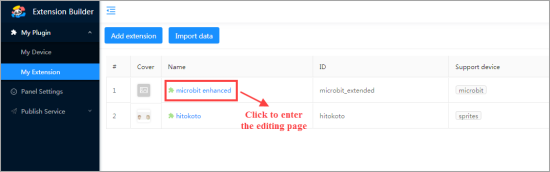
The extension list is displayed, and you click the extension name to enter the editing page.
Step 4: Set the category and blocks
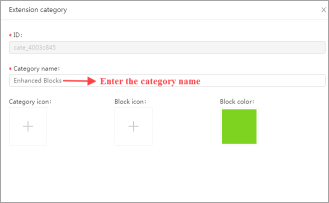
Click Add category to set the category.
The Extension category dialog box is displayed for you to enter the information. You can use the default ID.
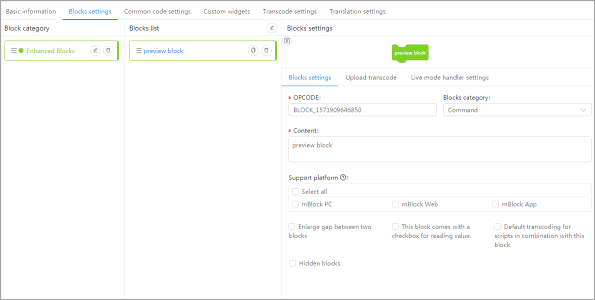
Click + at the bottom of Blocks list to add a block.
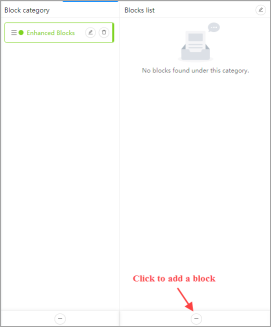
A new block is displayed, as shown in the following figure.
Step 5: Design the block
The following uses music blocks as an example. First, choose the API we need. To see the API document, visit https://microbit-micropython.readthedocs.io/en/latest/tutorials/music.html. You can fine the following API statement:
Python
1 import music
2 music.play(music.NYAN)
The API statement contains a parameter with a list of parameter values, as described in the following:
- music.DADADADUM
- music.ENTERTAINER
- music.PRELUDE
- music.ODE
- music.NYAN
- music.RINGTONE
- music.FUNK
- music.BLUES
- music.BIRTHDAY
- music.WEDDING
- music.FUNERAL
- music.PUNCHLINE
- music.PYTHON
- music.BADDY
- music.CHASE
- music.BA_DING
- music.WAWAWAWAA
- music.JUMP_UP
- music.JUMP_DOWN
- music.POWER_UP
- music.POWER_DOWN
(1) Enter play music, a space, and then @ in the Content field. A drop-down list box is displayed, containing all parameter types supported by mBlock 5. In this example, we choose Dropdown.
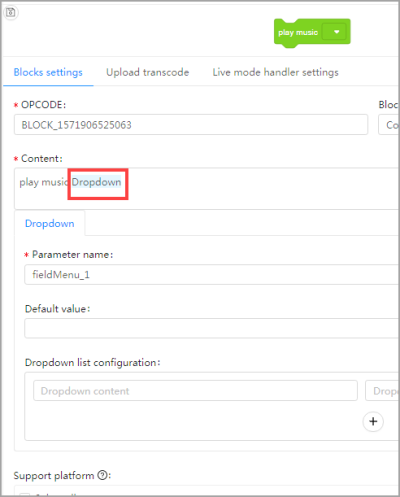
Press Enter. The block is displayed, as shown in the following figure.
![]()
(2) Set Parameter name to musicType. The parameter name will be used later.

(3) Click + to add parameter values in batches.
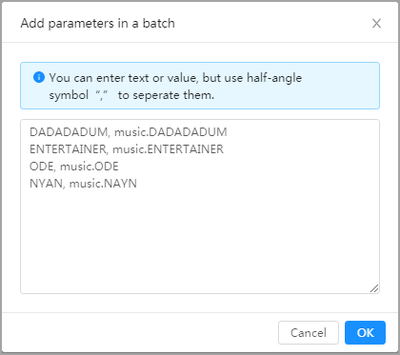
Click OK.
The configuration is displayed, as shown in the following figure. The boxes on the left side display the descriptions of the parameter values, and those on the right display the actual values.
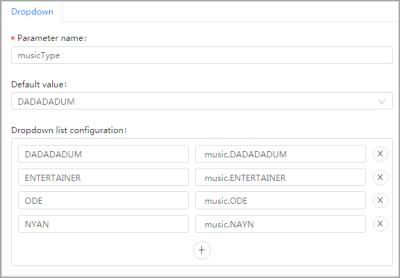
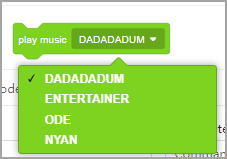
The block with a parameter and multiple parameter values is created, as shown in the following.
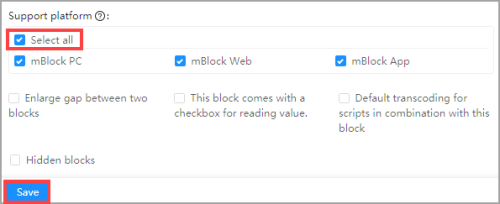
(4) Select the support platform(s) and click Save. Make sure that you save the configuration.
Step 6: Set transcoding information
In this example, we compile only offline operation statements. After a block is added, a line of Python code is generated. All Python code can be uploaded to micro:bit for execution.
Before compiling code, you need to set the language into which blocks are to be converted.
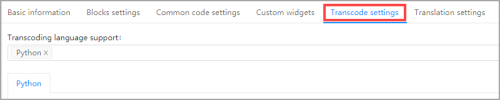
(1) Click the Transcode settings tab, set Transcoding language support to Python, and click Save at the bottom.
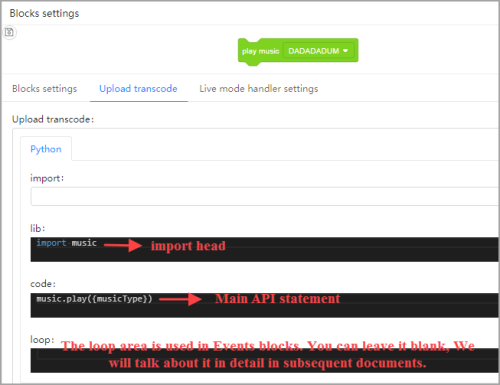
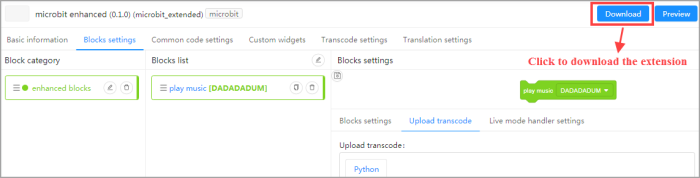
(2) Click the Blocks settings tab, and click Upload transcode.
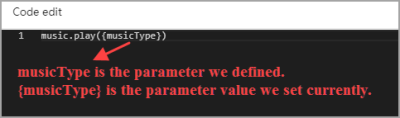
(3) Double-click the black area, the Code edit page is displayed on the right side.
(4) Enter information, as shown in the following.
Note:
- The API statements you enter are actually the character strings into which the block is to be converted. mBlock 5 will combine all lines of code and upload them to micro:bit.
- The lib editing area is provided for entering the introduced Python module. Refer to the API document. You can leave it blank if there is no such information.
- The code editing area provides the special syntax symbol, braces {}. You can enter a parameter name in them to obtain the parameter value you set.
(5) Click Save at the bottom.
The code into which the block is to be converted is compiled.
Test the micro:bit extension
After performing the preceding steps, we have created a simple extension. Now, let’s test whether the extension works properly.
Step 1: Download the extension
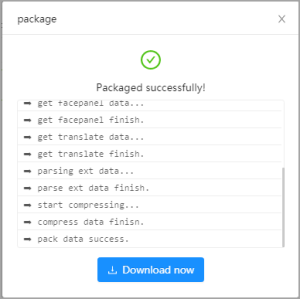
The file microbit_extended.mext is obtained.
Step 2: Drag the file microbit_extended.mext to mBlock 5
A message is displayed, indicating that the extension is successfully added.

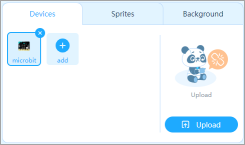
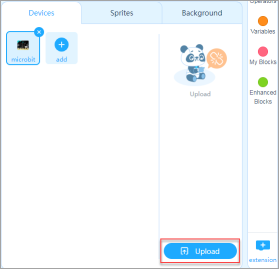
Click the Devices tab and click + add to add the micro:bit device.
You can see Enhanced Blocks in the Blocks area.
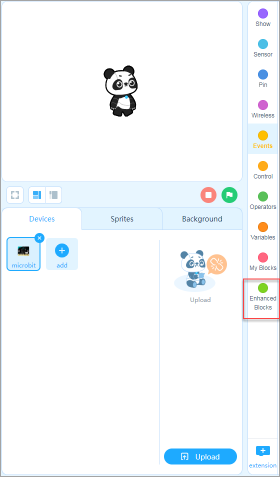
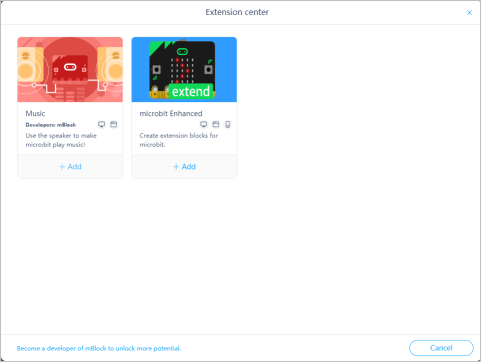
Click + extension at the bottom of the Blocks area.
The extension we created is displayed in the extension center.
Step 3: Test the block
Drag the block to the Scripts area, and click the icon on the side bar for displaying code conversion.
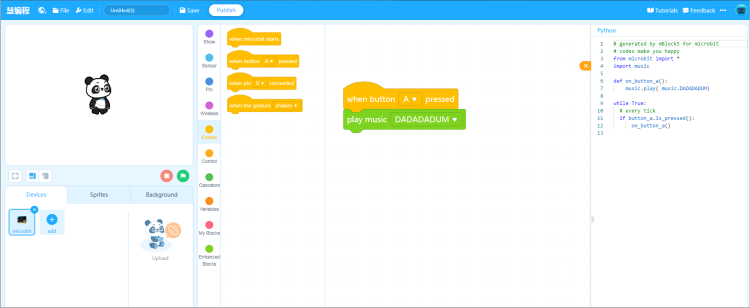
The block and its corresponding API statement we have created can be used properly.
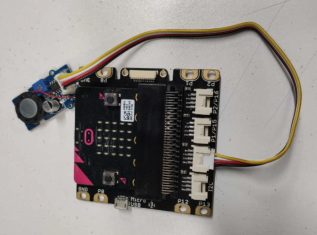
Connect the micro:bit device to mBlock 5, and connect a buzzer module to the P0 port of micro:bit.
Click Upload.
After the code is successfully uploaded to micro:bit, you can test the hardware function of micro:bit. Press button A and see what happens.
Summary
Main steps
You may find that creating an extension is not as difficult as you thought before. The main steps are described as follows:
Plain Text:
1 Determine an API statement > Configure blocks > Set transcoding information > Load the extension to mBlock 5 > Upload a program to the device
You can create an image block by referring to the preceding steps.

Extension Storage Path
The extensions you drag to mBlock 5 are stored in a local directory of your PC.
Plain Text:
1 For Windows: C:\Users\username\mblock\exts\
2 For Mac: /Users/username/mblock/exts/
Download and import the micro:bit extension package
The extension we created in this example has been published. You can download it and drag it to mBlock 5 to use it.
You can also import the.mext file you have downloaded to Extension Builder to view parameter configuration. For details, see “Importing an Extension into Extension Builder.”
Try creating an extension for micro:bit by yourself. After creating one, you can publish it to the official mBlock 5 software to share it with other mBlock 5 users.