How Can We Help?
FAQs on mBot2
Hardware
1. Are the encoder motors used on mBot2 the same as those on mBot Ranger?
Yes.
2. Can I remove CyberPi from the mBot2 shield and use it as a remote control?
CyberPi is the main control board of mBot2. If you take it off the mBot2 shield, mBot2 can’t move any more. If you’ve got multiple CyberPis, however, you can fit one the mBot2 shield, and then use a second one as a remote control to control mBot2 based on its main control board, that is, the CyberPi connected to the mBot2 shield.
3. What is the capacity of the built-in battery of mBot2?
2500 mAh
4. How long does it take to fully charge mBot2 and how long can mBot2 operate after it is fully charged?
| Battery life
Supplies power for mBot2 with loads, such as servos and motors, in common application scenarios. |
2.5 hours–5 hours
When mBot2 keeps moving or keeps operating with loads: 2.5 hours |
| Upper limit of battery life
mBot2 operates in the sleep mode with the screen off. |
More than 24 hours |
| Time to fully charge the battery | 1 hour–2 hours |
5. Can mBot2 operate without CyberPi?
No, the mBot2 shield can’t work without CyberPi, its main control board. You need to program and control mBot2 through CyberPi.
6. Does the ultrasonic sensor 2 used on mBot2 transmit and receive signals?
Yes, the eye-shaped part on the left transmits signals, and the one on the right receives signals. For details, see Ultrasonic Sensor 2.

7. What is the detection range of the ultrasonic sensor 2 used on mBot2?
- Detection range: 5–300 cm
- Detection error: ±5%
8. Can I change the light color of the LEDs on the ultrasonic sensor 2?
No, you can’t.
The LEDs can be lit up only in blue.
9. How many LEDs are provided on the ultrasonic sensor 2?
Eight programmable LEDs.

10. What can I do with the LEDs on the ultrasonic sensor 2?
You can program the ultrasonic sensor 2 to control how many LEDs are lit up and how bright they are.
11. What’s the function of the quad RGB sensor?
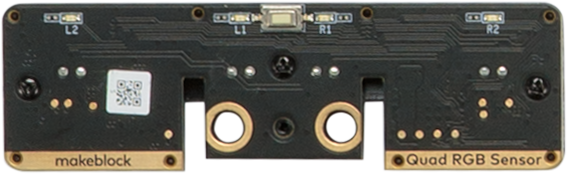
The quad RGB sensor integrates the functions of a color sensor, light sensor, and light following sensor. For details, see Quad RGB Sensor.
12. Are there any parts shared by mBot and mBot2?
| mBot | mBot2 | |||
| SKU | Name | SKU | Name | |
| Wheel hub | 83014 | Plastic Timing Pulley 90T (4-Pack) | 8.36.2053 | 90T Wheel |
| Tyre
※ |
87033 | Slick Tyre 64*16mm (4-Pack) | 8.70.6023 | 90T Tyre |
| Head-replaceable screwdriver | P2210001 | Cross&2.5mm HEX Screwdriver 2.0 | P2210001 | Cross&2.5mm HEX Screwdriver 2.0 |
| Mini wheel | 87010 | Mini Caster Wheel | 87010 | Mini Caster Wheel |
| Motor ※ | 81320 | TT DC motor 6V/200RPM | 81340 | 180 Optical Encoder Motor |
※ ① The screws used for installing the wheels can’t be shared.
② The encoder motors used on mBot2 can’t be used on mBot.
13. What is the maximum number of servos that can be connected to mBot2?
mBot2 provides four ports that can be used to connect servos, but you can connect it to more servos through the mBuild port.
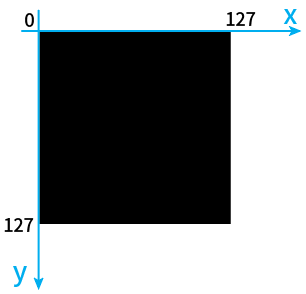
14. What is the size of the screen on mBot2?
128 × 128 (pixels)
x-coordinate: 0–127
y-coordinate: 0–127
15. Is mBot2 equipped with a buzzer?
No, but its main control board, CyberPi, is equipped with a speaker that can function as a buzzer.
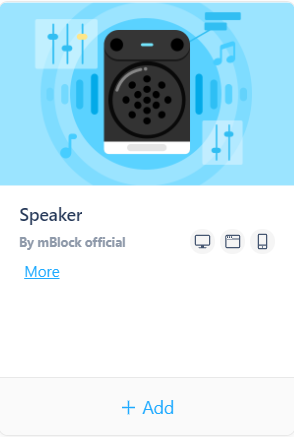
16. Can I use the speaker on CyberPi of mBot2 to play a MP3 file?
No, you can’t.
The speaker on CyberPi can play only the default audio files or the sounds you record. Recorded sounds are stored in a RAM file. If you want to program mBot2 to play an MP3 file, you can usethe mBuild speaker module. It supports a maximum MP3 file of 16 MB.
For details, see Speaker.
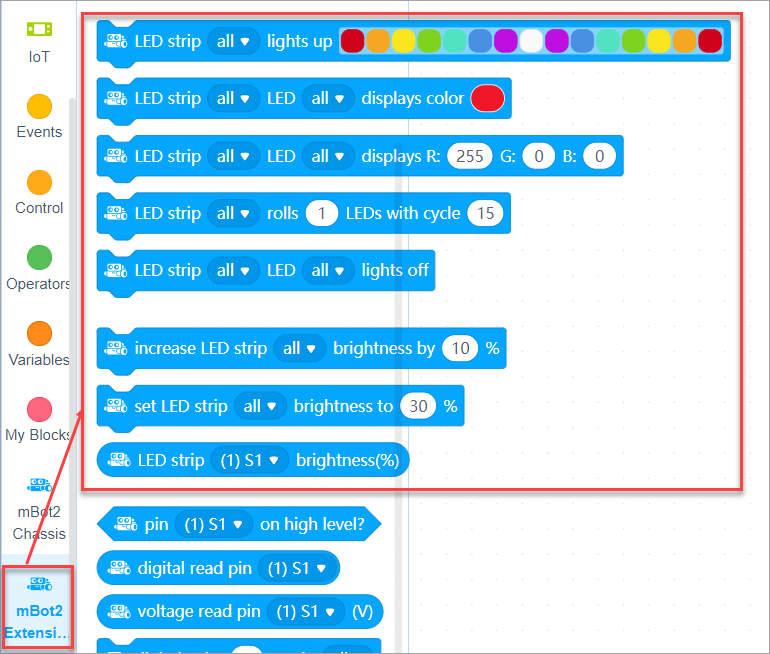
17. How to connect an LED strip to mBot2 and program it on mBlock 5?
If the LED strip you use is a 3-pin one, you can directly insert it into port S1 or S2 of the mBot2 shield. You can also use the LED strip module and LED driver developed by Makeblock.
After connecting an LED strip to the mBot2 shield, you can program it on mBlock 5 using the blocks shown in the following figure.
18. Is mBot2 equipped with an IR sensor?
No, it isn’t.
You can purchase an mBuild IR sensor to extend the functions of mBot2.
19. Can I use TT motors to connect to ports M1 and M2 on the mBot2 shield instead of the encoder motors installed on mBot2?
Yes, you can use TT motors instead of the encoder motors to get mBot2 moving.
20. After I update the firmware, the mBot2 or pocket shield doesn’t work. What can I do?
Try performing the following steps:
- Connect CyberPi to the mBot2 shield (pocket shield) and turn on the shield.
- Use a USB cable to connect CyberPi to your PC and open the mBlock 5 web version.
- On mBlock 5, add CyberPi from the device library.
Note: If a green icon is displayed in the upper-right corner of the CyberPi device image, click it to update the device to the latest version.
- After you connect CyberPi to mBlock 5, mBlock 5 may prompt you to update the firmware (a message in yellow). Click it to update the firmware.
Note: It is recommended that you stay on the mBlock 5 page during firmware update.
After the firmware is updated, the mBot2 or pocket shield can work properly.
21. Are there any electronic versions of mBot2 building instructions?
Yes, you can visit mBot2 building to download an electronic version or view the 3D building demonstration online.
Software
1. How do I add mBot2 on mBlock 5?
1. Open mBlock 5.
2. Use a USB cable (Type-C) to connect mBot2 to your PC and turn on mBot2.
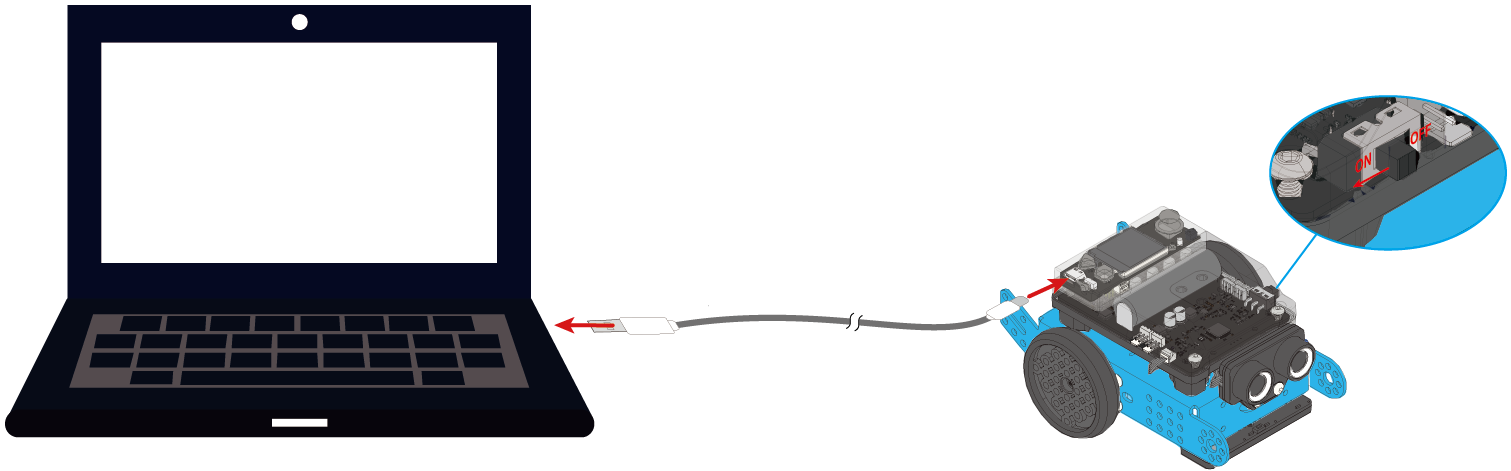
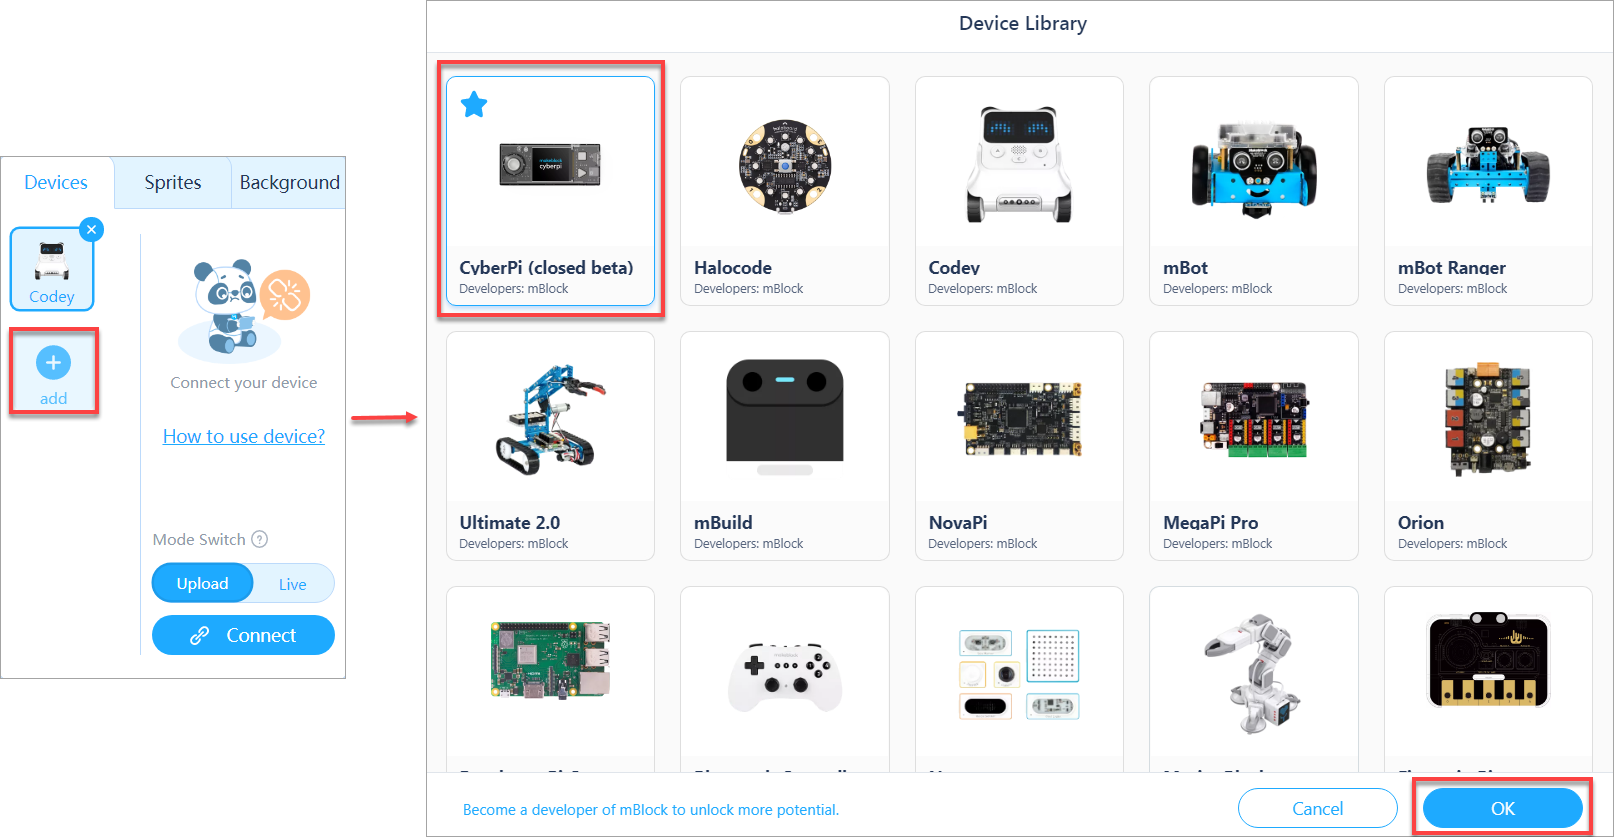
3. Click + add on the Devices tab, select CyberPi in the device library, and click OK.
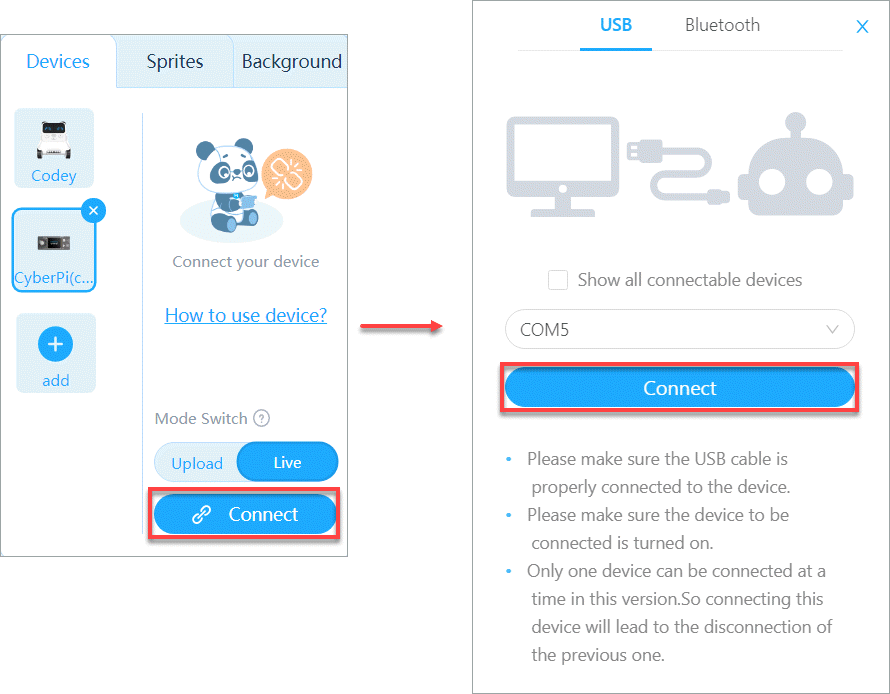
4. Click Connect to connect CyberPi to mBlock 5.
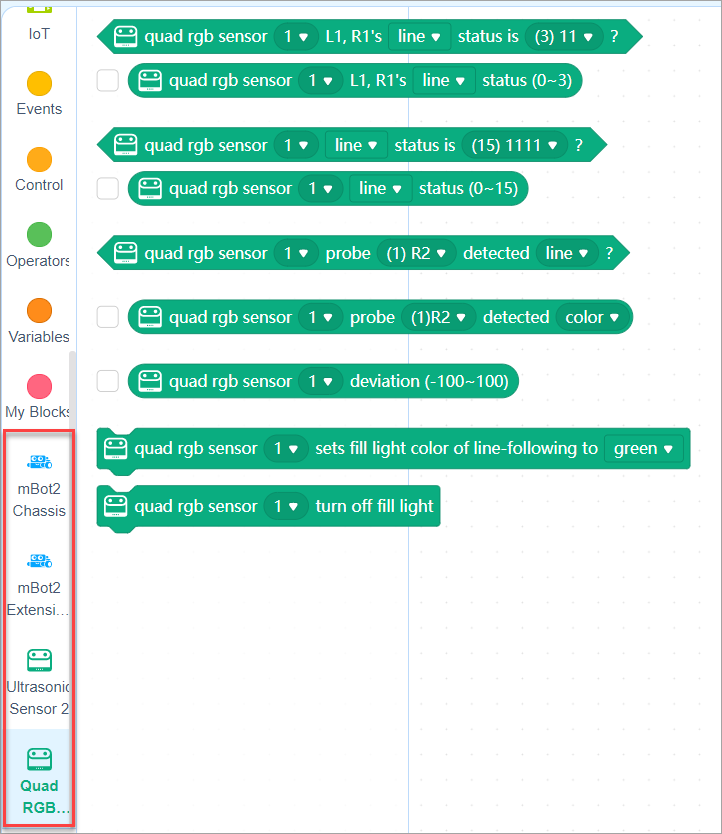
5. Enter the extension center and add the mBot2, Ultrasonic Sensor 2, and Quad RGB Sensor extensions one by one.

After adding the extensions, you can see the blocks available for mBot2.
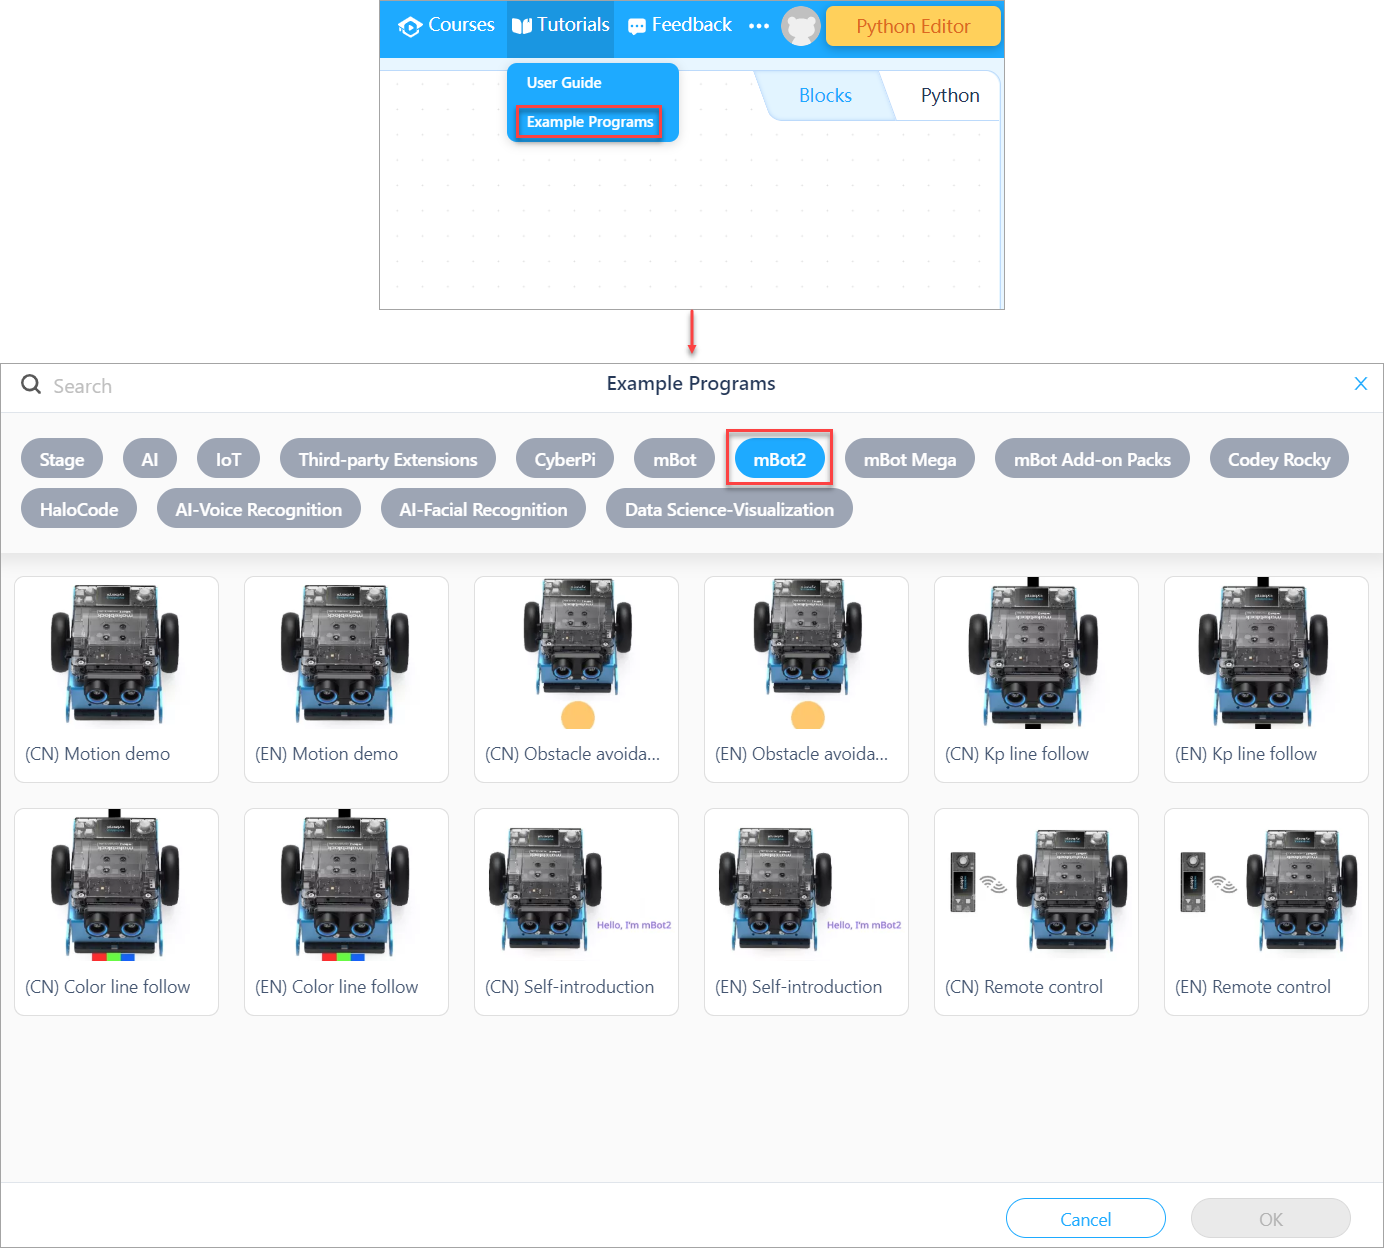
2. Are there any example programs provided for mBot2?
Yes, there are.
On mBlock 5, choose Tutorials > Example Programs and click mBot2 to view example programs provided for mBot 2.
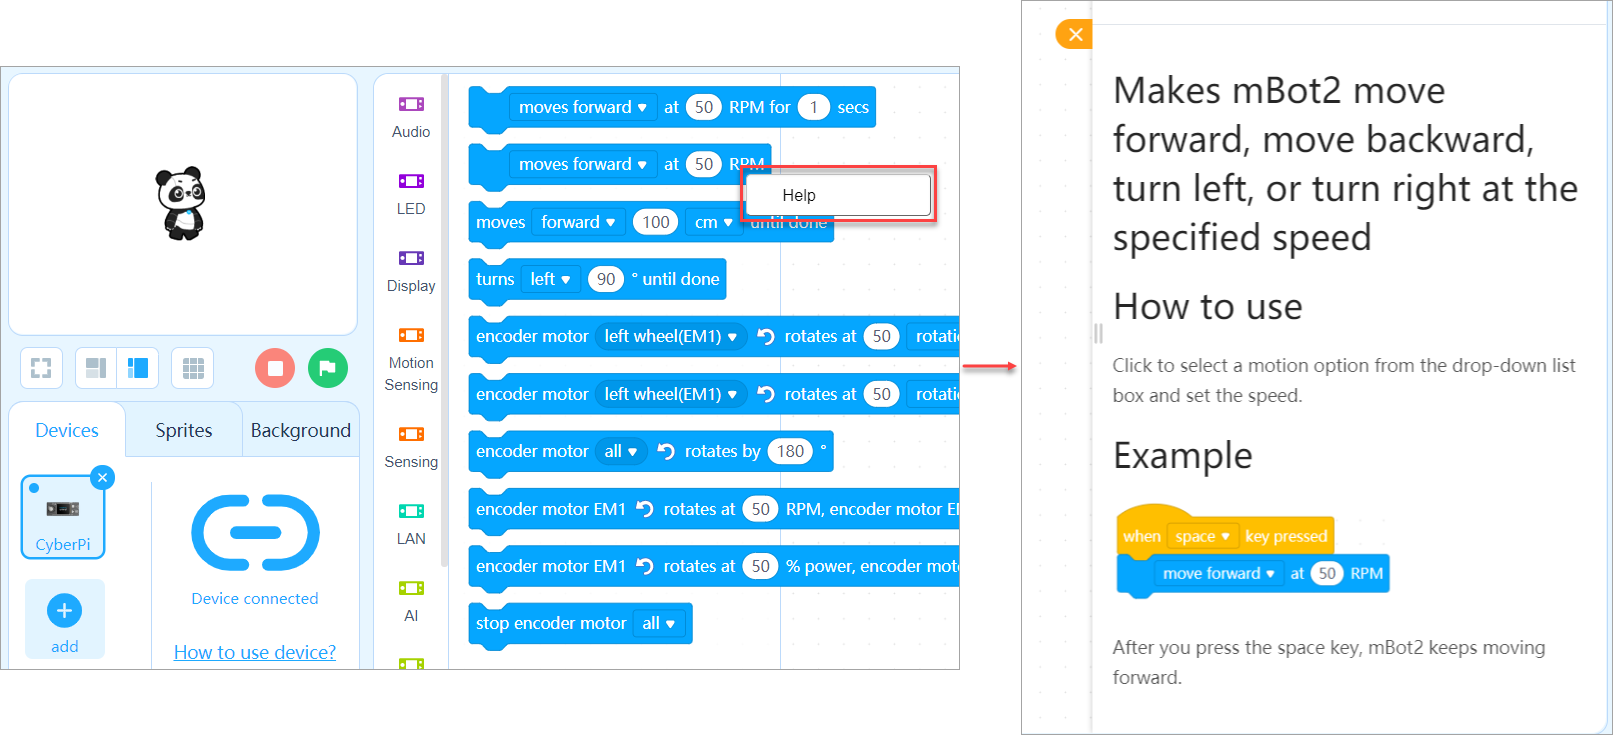
3. How to use the blocks? Is there any help information?
If you don’t understand a block when using it, you can right-click it and click Help that appears.
4. How do I learn Python programming?
You can learn Python programming in the following ways:
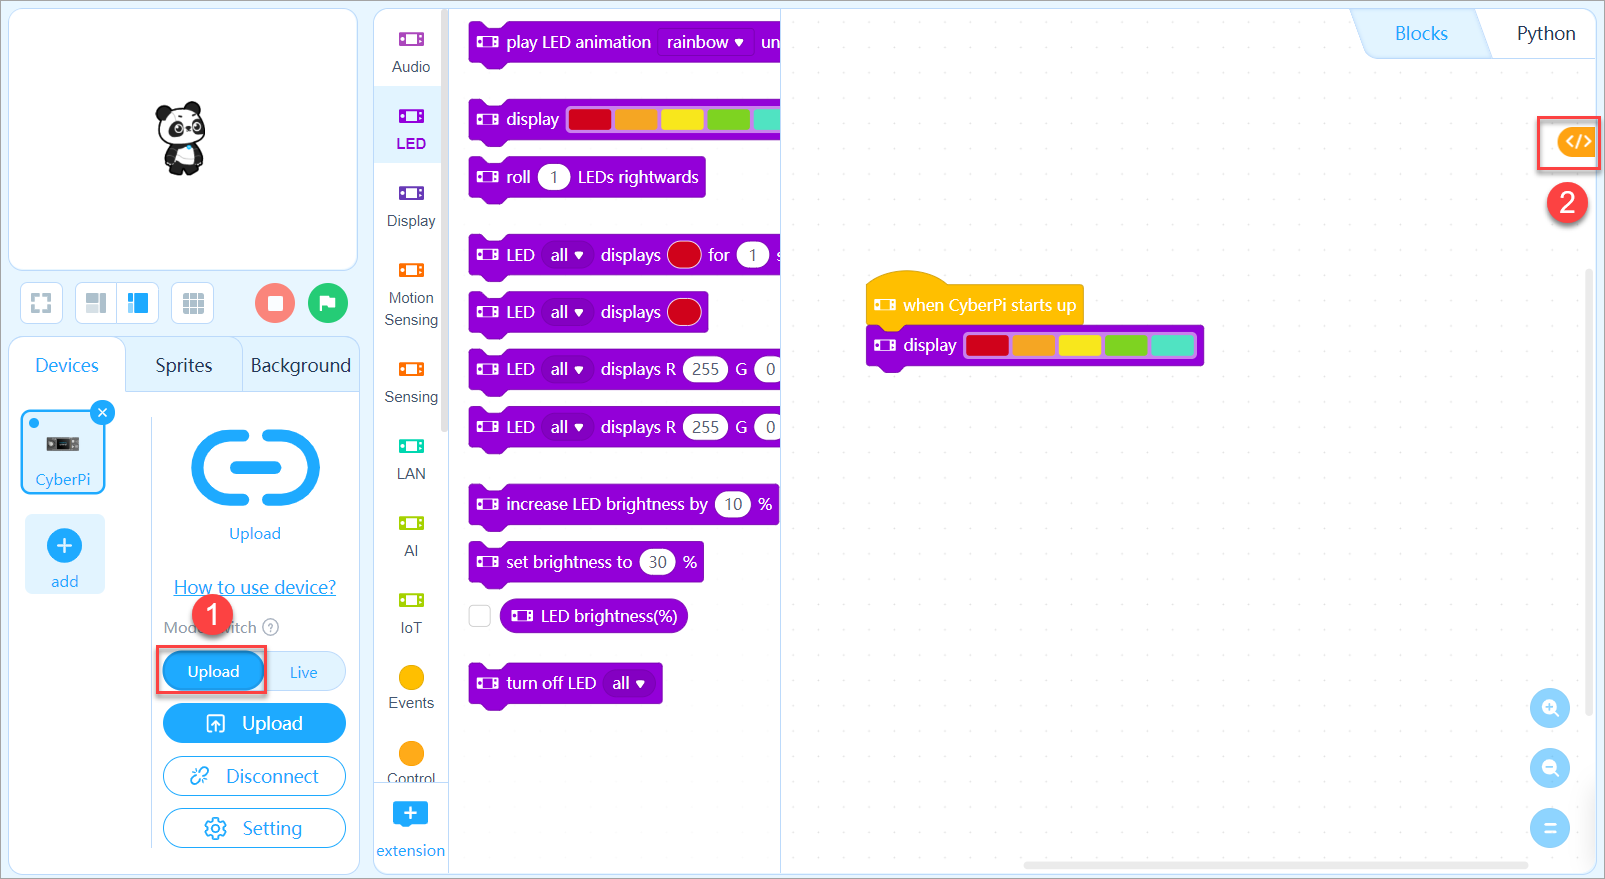
Way 1:
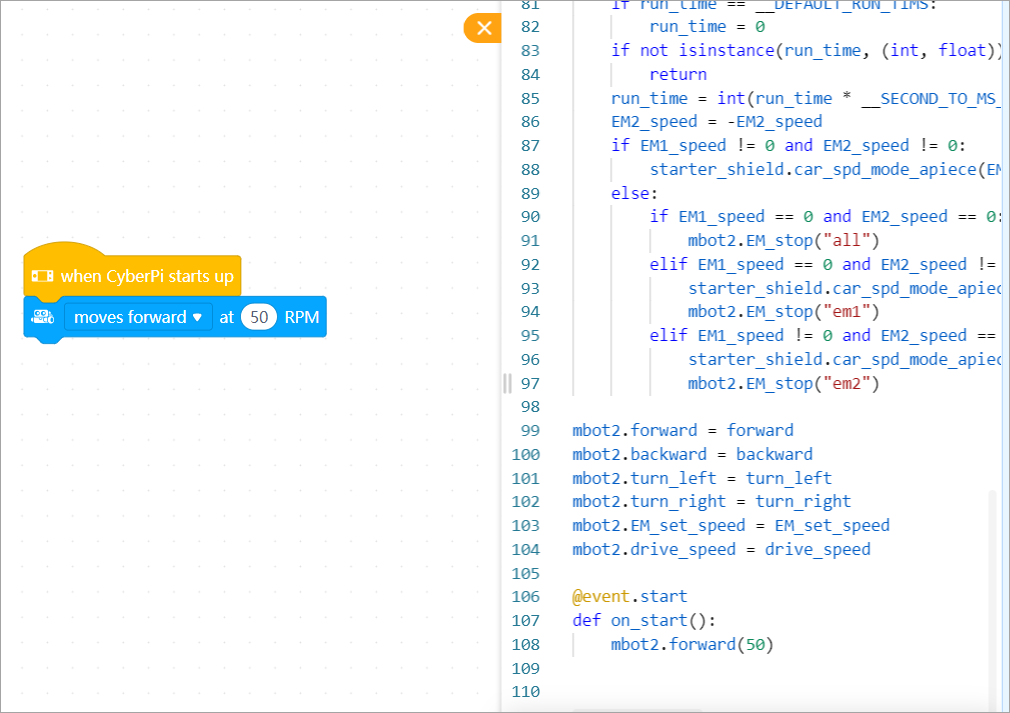
On the block-based editor of mBlock 5 (generally referred to as mBlock 5), translate blocks into Python statements.
In Upload mode, click the </> button on the right side.
The corresponding Python statements are shown.
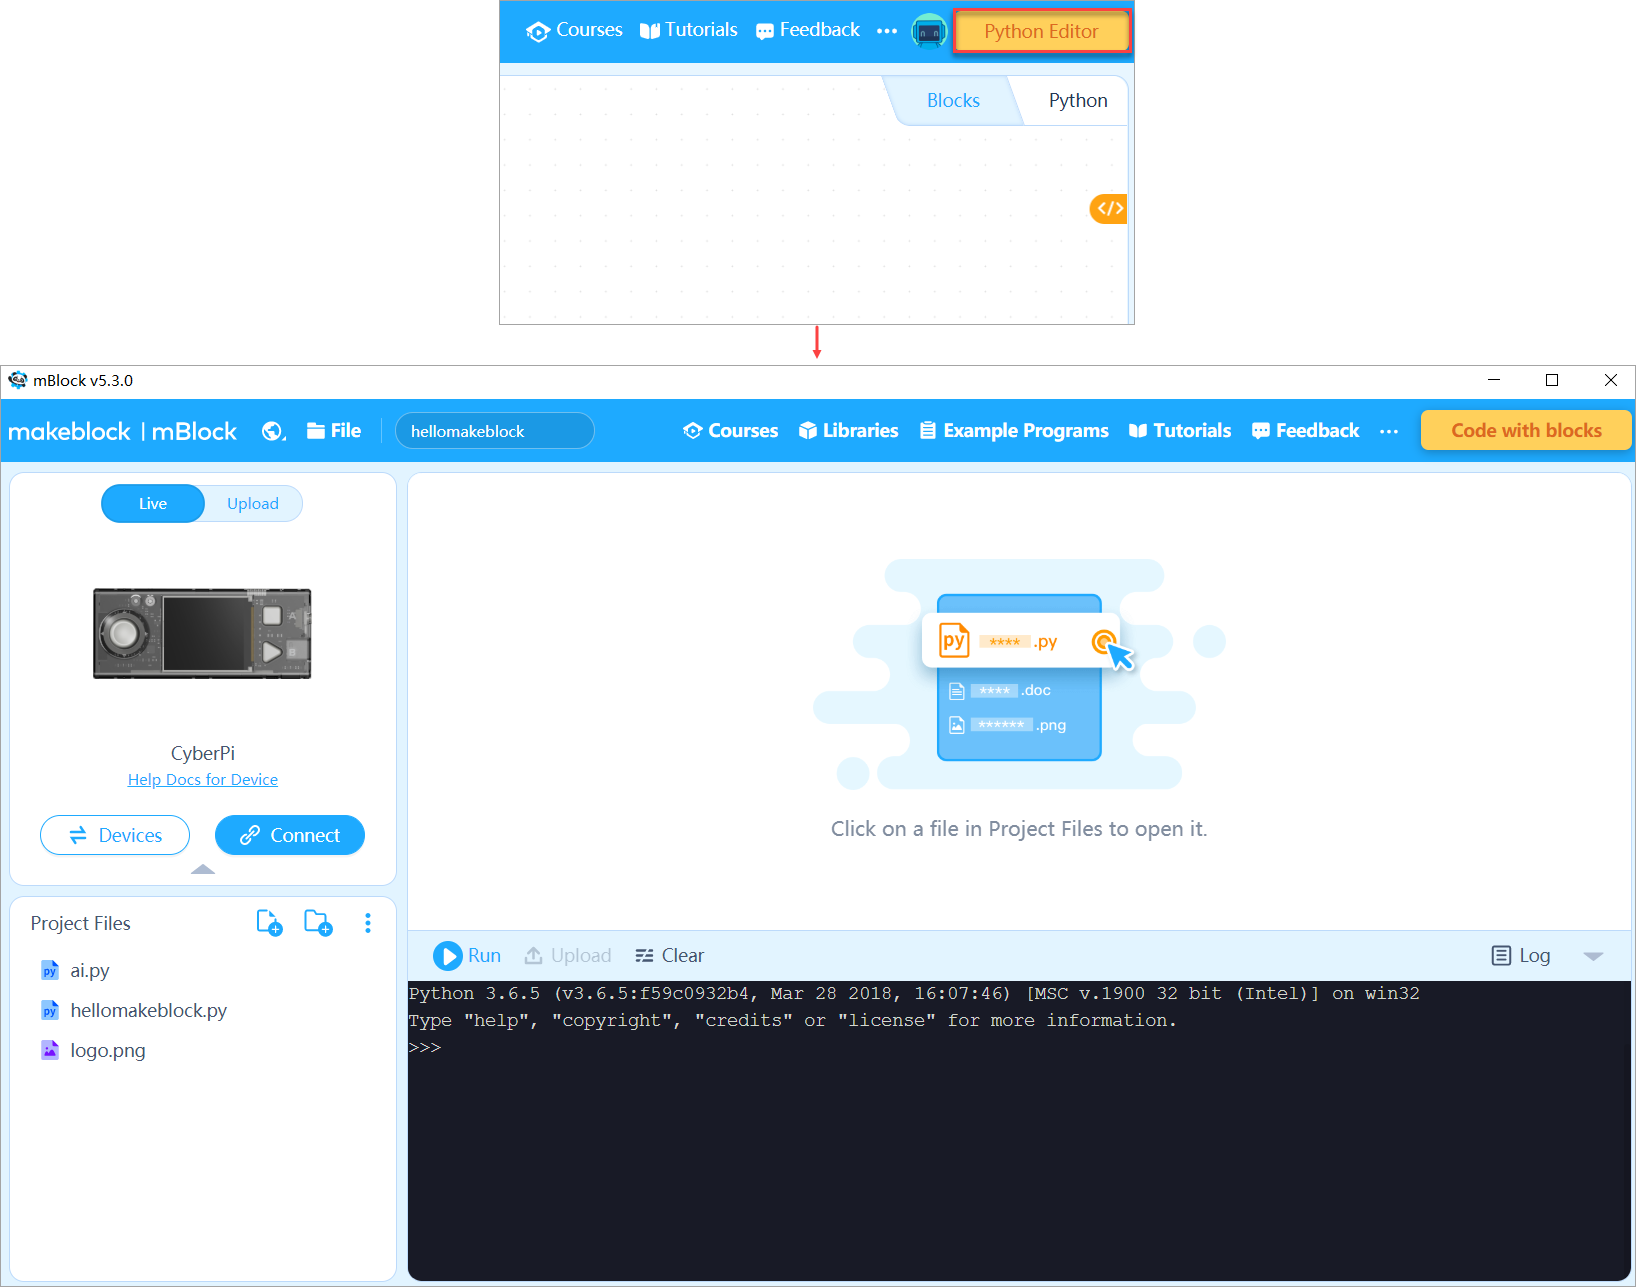
Way 2:
Use the mblock Python editor
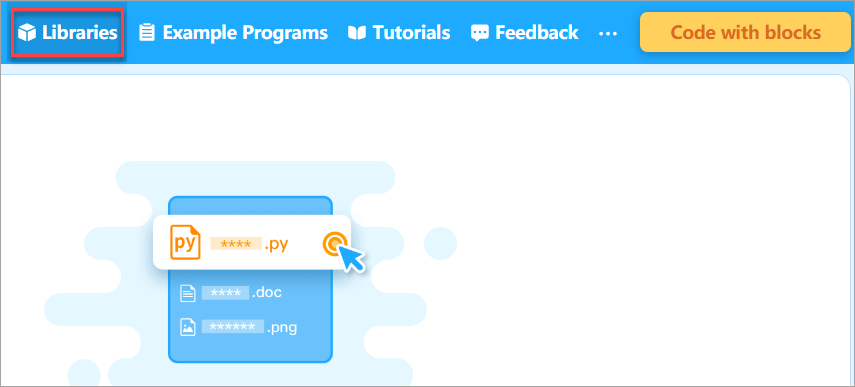
5. How do I find the libraries on the Python editor?
Choose Libraries on the toolbar.
For details about how to install or uninstall Python libraries, see Install or Uninstall Python Libraries.
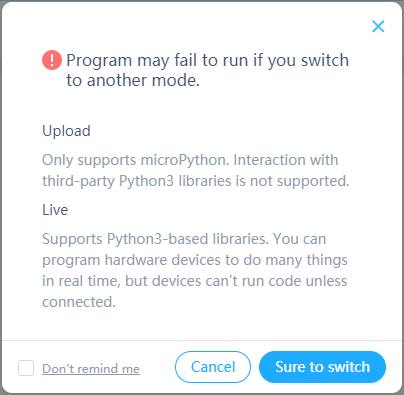
6. What are the Live and Upload modes on the Python editor?
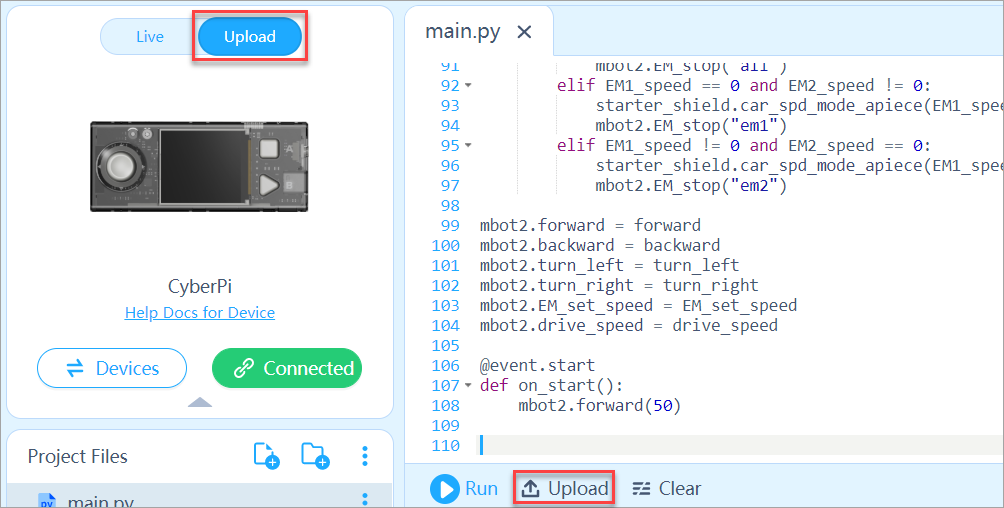
- Upload: In this mode, only MicroPython programming is supported, and Python 3 libraries can’t be used.
Advantage: After you upload a program to a robot, the robot can operate without connecting to a PC.
- Live: In this mode, Python 3 programming is supported, and therefore Python 3 libraries can be used.
Advantage: In this mode, you can execute programs online and thus check the programs immediately.
Exercise caution when you switch the programming modes.
7. Can I use the Python editor to program other Makeblock products?
No. Currently, the Python editor can be used to program only CyberPi and mBot2.
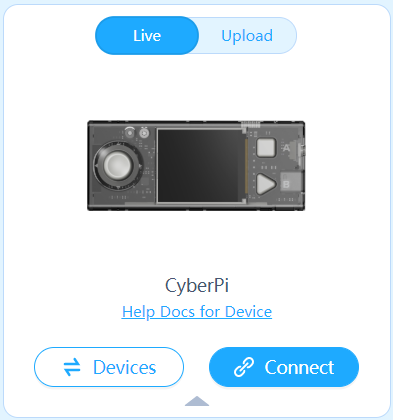
8. How do I connect mBot2 on the Python editor?
- Use a USB cable to connect mBot2 to your PC, or connect mBot2 to your PC through a Bluetootgh dongle.
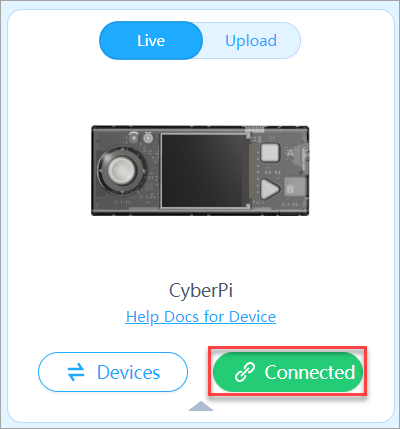
- Click Connect.
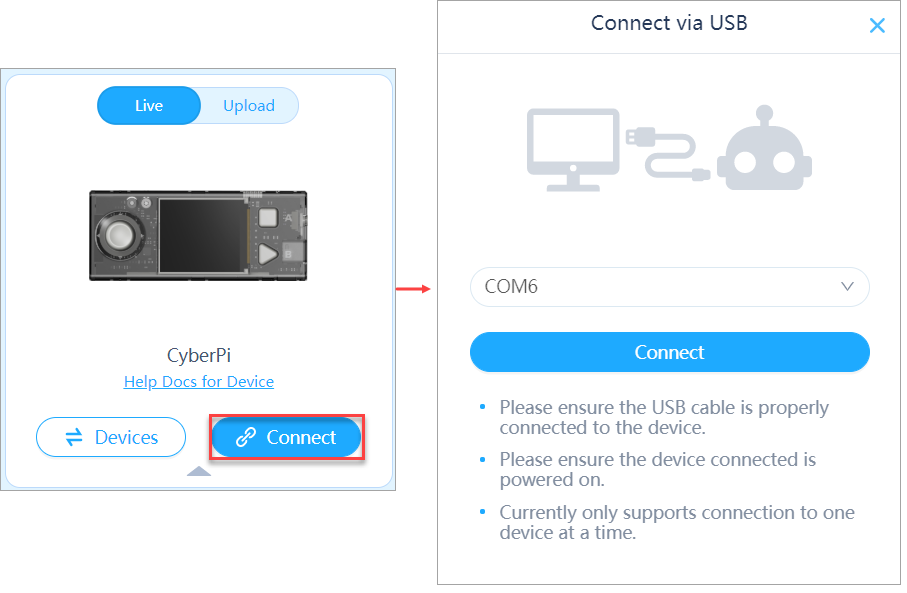
After mBot2 is connected, the button turns into green, indicating that mBot2 is connected.
9. Besides English, does the Python editor support other languages?
Currently, the Python editor supports only simplified Chinese and English. It is recommended that you use the Python editor in English, which can help you learn Python code easier.
10. When I copy the Python code obtained on the block-based editor by translating blocks to the Python editor, mBot2 can’t move any more, why?
For example, on the mBlock block-based editor:
- Check whether mBot2 is connected to the Python editor.
- Ensure that mBot2 is turned on.
- Some blocks may be available only in Live or Upload mode. Ensure that you are using the proper mode.
- Try uploading the program to mBot2.
Note: The statement with the key word event can be used only in Upload mode.
11. How do I write a program for mBot2 on the Python editor?
For details, see the mBlock-Python Editor Online Help.
12. Do I have to install mLink if I want to use mBlock on the web?
Yes, you have to.
13. What is the LAN function of mBot2, and how to use it?
A local area network (LAN) is a network of connected devices that exist within a specific location. LANs may be found in homes, offices, educational institution, or other areas. A LAN may be wired, wireless, or a combination of the two. — from https://techterms.com
For mBot2, it refers to that multiple CyberPis on the same LAN communicate with each other.
Example 1: You can use a CyberPi to control mBot2 based on its main control board (that is, another CyberPi). Example 2: Multiple CyberPis on the same LAN exchange messages with each other or interact with each other to finish a game.
14. How do I set the Wi-Fi connection?
There are three ways to set the Wi-Fi connection.
Way 1
Use the following block in the AI or IoT category to set the Wi-Fi connection.

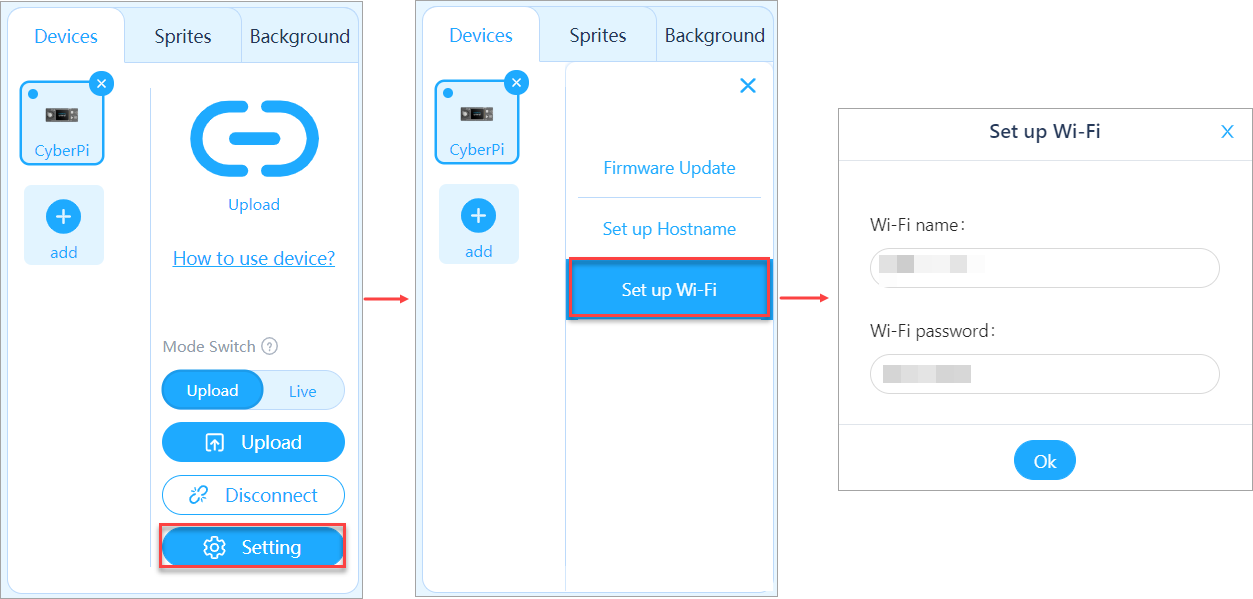
Way 2
After connecting CyberPi (mBot2) to mBlock5, click Setting, click Set up Wi-Fi, and then enter the Wi-Fi name and password.
Way 3
Set the Wi-Fi connection on the Makeblock app.
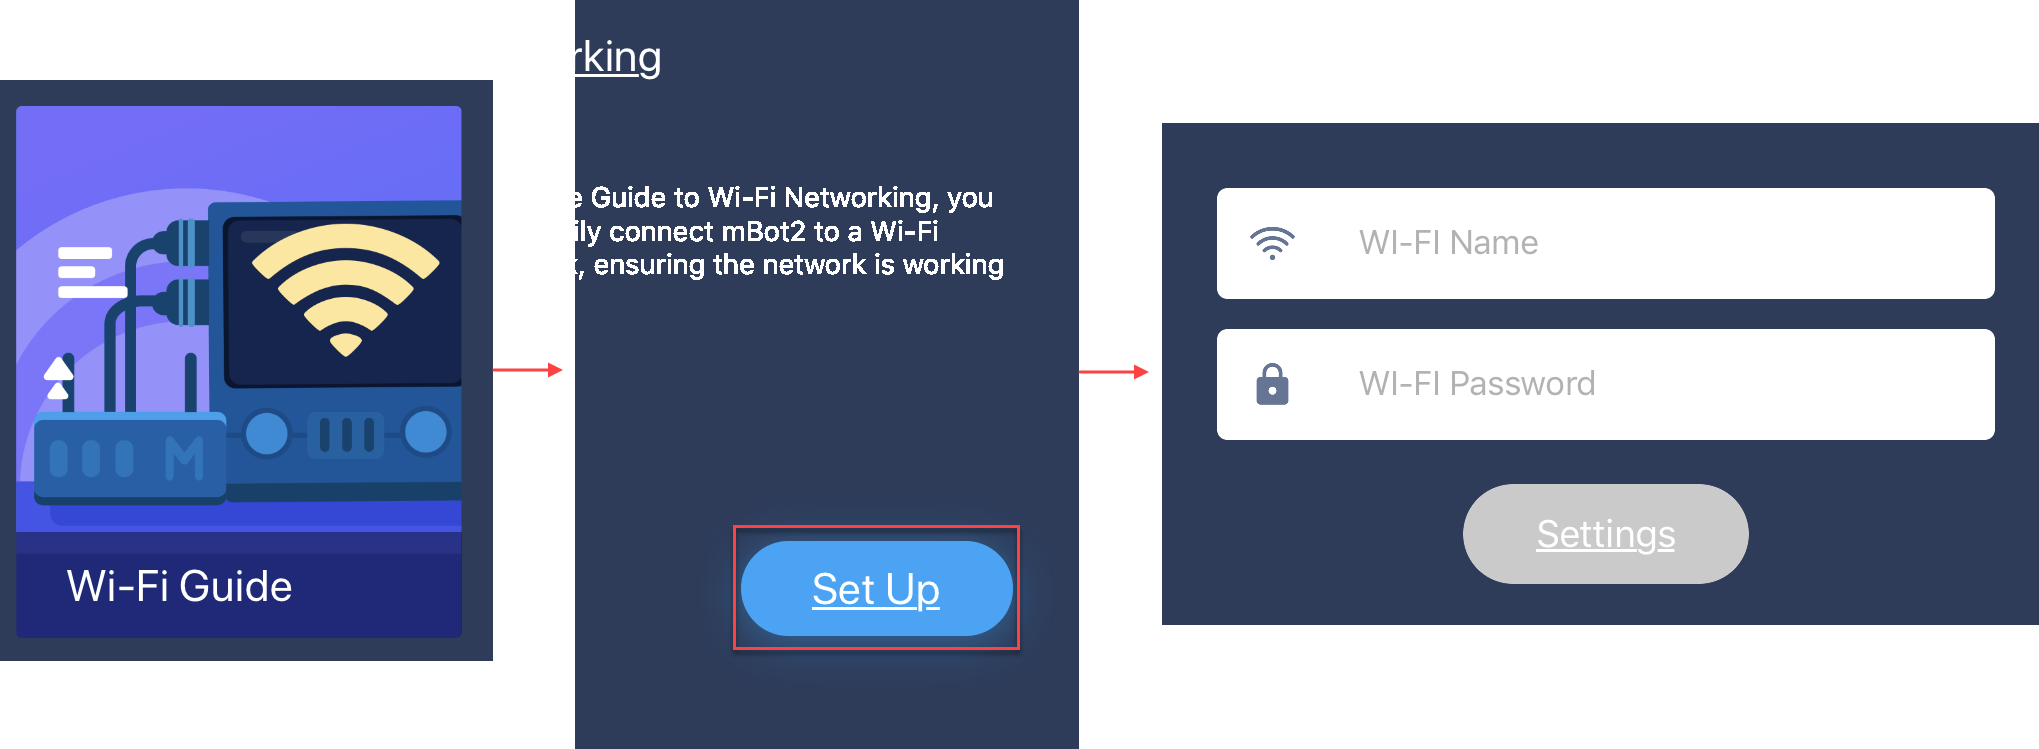
- Open the Makeblock app.
1. Choose the device mBot2.
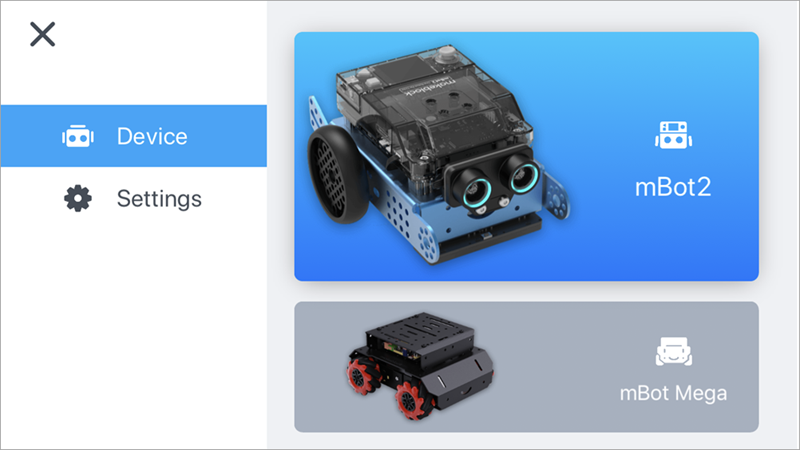
2. Click Wi-Fi Guide, click Set Up, and then enter the Wi-Fi name and password.
15. How are the line, background, and colors defined for the quad RGB sensor?
The quad RGB sensor provides two functions: line following and color recognition.
- Line following
the quad RGB sensor needs to learn the line and background first.
Line and background learning: Place the sensor on the background and double-press the button on the sensor, and then swipe the sensor horizontally over the line and background.
For more information about line following, see Quad RGB Sensor.
- Color recognition
The quad RGB sensor can recognize eight colors, namely black, red, green, cyan, blue, yellow, purple, and white.
- Line following & color recognition
The quad RGB sensor can recognize colors while identifying a line and background.
For example, when identifying the black line on a white background, the quad RGB sensor can also recognize the colors on the line.

16. How do I use the quad RGB sensor?
With the quad RGB sensor, mBot2 can recognize colors while following a line.
The following is an example program.
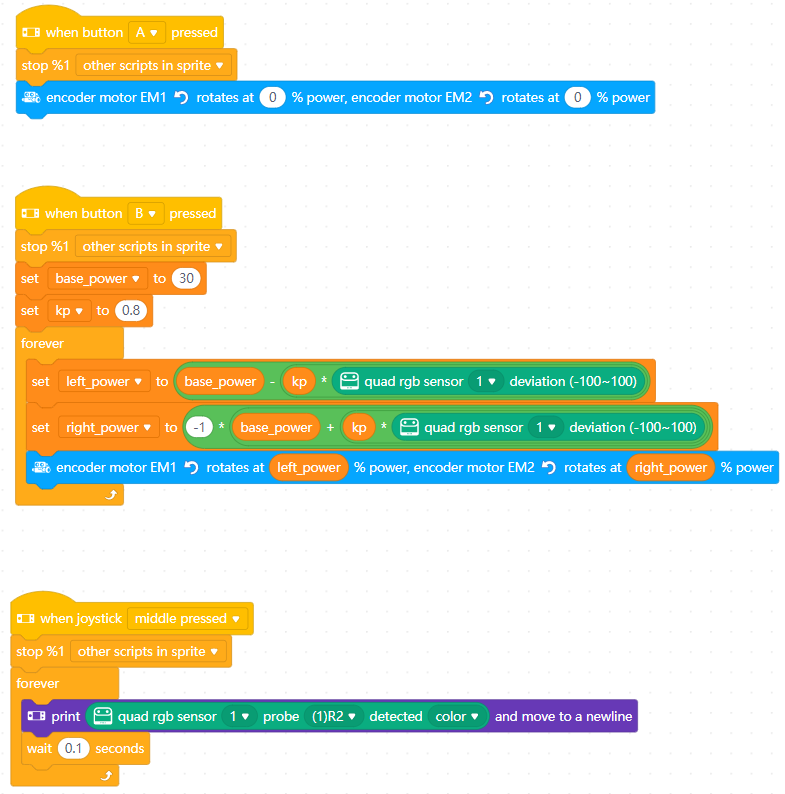
After you press button A, mBot2 stops moving.
After you press button B, mBot2 starts to follow a line.
After you press in the middle of the joystick, the name of the detected color is diplayed on the screen of CyberPi.