Laserbox Lesson 1
Laser Cutting and Laserbox
MANY YEARS
STEAM
40MINS

Learning Objectives
Students will:
- learn about the working principle and applications of laser cutting;
- learn about Laserbox;
- be able to use the Bring Sketch to Life feature to create a mysterious creature;
- improve the projects from the aspects of art, creative writing and biology.
Preparation
- Engraving materials: 3mm basswood sheets
- Markers
- Laserbox
Session 1 Laser Cutting
During this session, briefly introduce lasers, how laser cutting works and how to use LaserBox.
1) What is a laser?
Following nuclear power, semiconductors and computers, the laser is one of the most significant technological advances of the 20th century. People usually call lasers “the fastest knives”, “the most accurate rulers”, and “the brightest light”. The word “laser” actually stands for Light Amplification by Stimulated Emission of Radiation, which means light gets amplified based on the stimulated emission of radiation. The full name already addresses how to make a laser.
2)How does laser cutting work?
Light is produced when the electrons in atoms soak up energy and become stimulated. The stimulated electrons move from a lower-energy orbit to a higher-energy orbit, and when they return to the lower-energy orbit, the electrons emit photons. The laser is a highly focused and highly amplified light. Ordinary light, like that emitted by a light bulb, comprises multiple wavelengths and goes in numerous directions, while laser light contains only one wavelength and goes in one clearly defined direction. That’s why the laser light is so powerful.
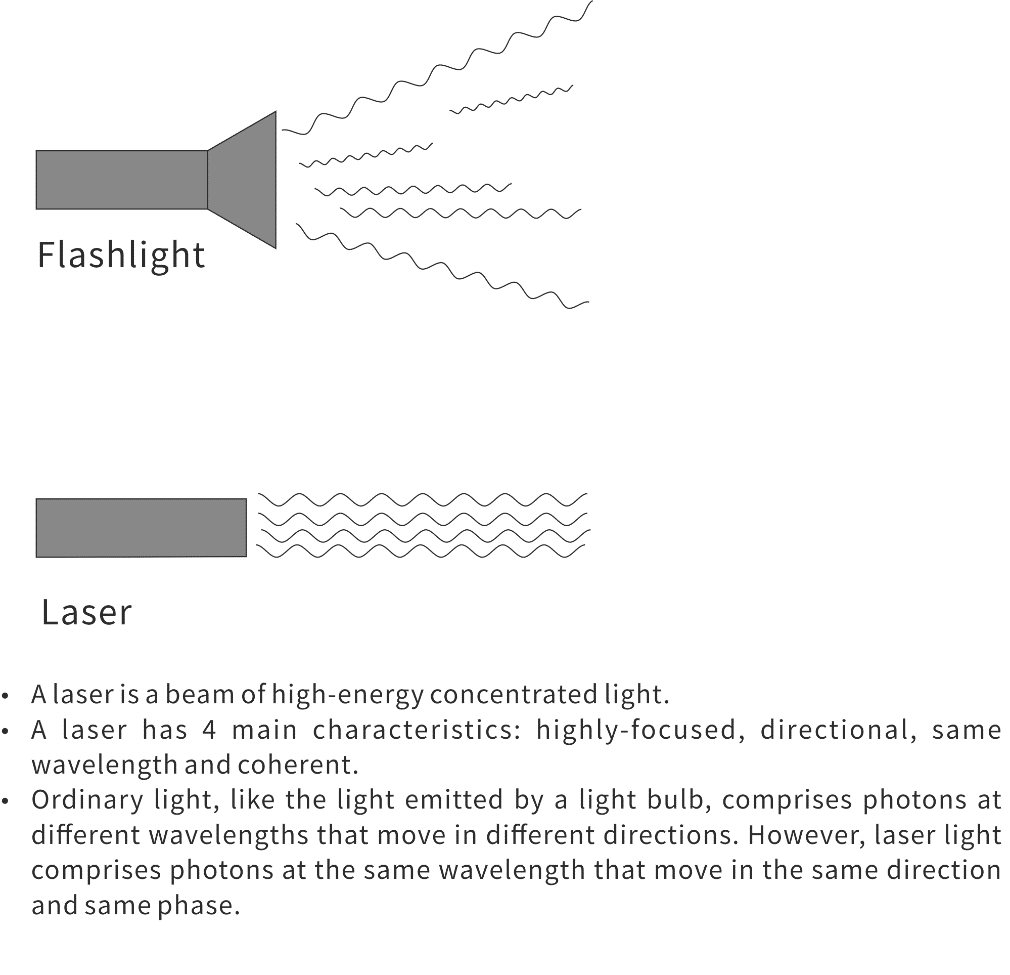
Ordinary Light & Laser Light
So, how does laser cutting work? A magnifying lens could concentrate the sunlight to ignite a leaf. Laser cutting works in a similar way. A laser tube is powered to emit a highly-parallel light beam which a beam bender bounces to a laser head. Then the focus lens on the laser head turns the laser beam into a concentrated spot which could go to such a high temperature that the object it contacts gets sublimated into gas in a flash. Then a kerf is left on the object and that’s how laser cutting works.
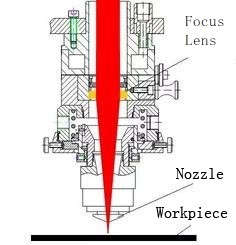
Laser Head & Focus Lens (Source: https://laser.ofweek.com/2016-09/ART-240015-11000-30039408.html)
3)What can laser cutting do?
In 1917, Albert Einstein, the known American physicist, found about the principles of laser. However, the laser was not invented until 1960 by Theodore Maiman at Hughes Research Laboratory in California. It was the first ruby laser. Since then the laser science and technology has developed in a rapid pace. Lasers are mostly used in communication, ranging, radar, cutting, weapons, records, corrective eye surgery, cosmetic surgery, scanners, and mosquito dispellers.
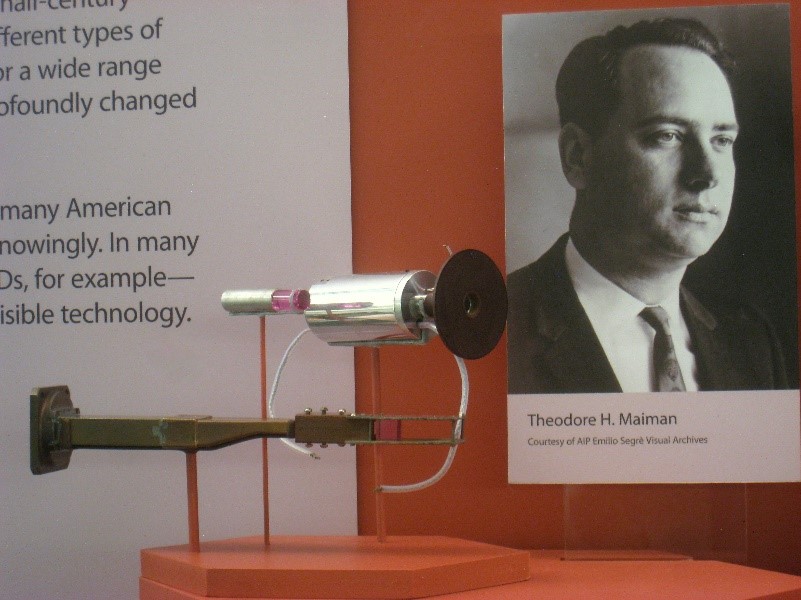
Theodore H. Mainman and Ruby Laser
A laser cutter could cut or etch almost all materials except metal, like cardboard, plywood, acrylic, leather and cloth. We can use laser cutters and these materials to make fancy handicrafts.
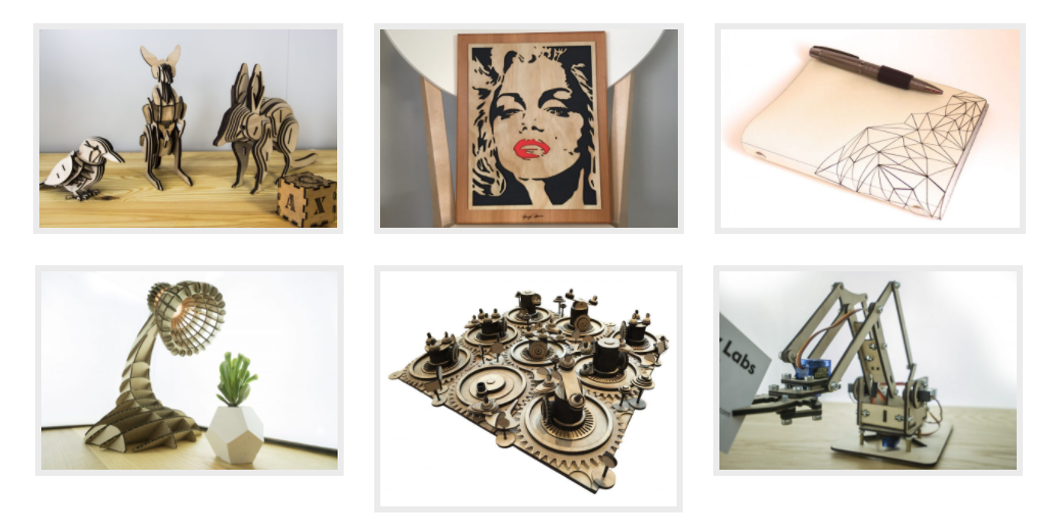
Crafty Uses for a Laser Cutter
Session 2 Laserbox
You need to give a brief introduction to Laserbox.
Hardware Features
- Shell: Black and white
- Connectivity: Connect to computers via Wi-Fi, USB, or Ethernet
- 3D engraving: Able to do 3D engraving on wood boards to produce relief engraving effect.
- In-depth engraving: Maximum thickness for wood boards is 15mm.
- Safety: The laser head stops moving and emitting lasers the moment you open the lid. This feature ensures your safety and helps prevent accidents from happening.
- Black honeycomb panel: Its surface has gone through special processing which avoids color change caused by lasers burns.
- Slide-out tray: Placed under the honeycomb panel, the slide-out tray is used to collect chippings and residues falling through the honeycomb panel interstices.
- All-in-one button: There is only one control button on the top of the machine. It can be used to start, pause and cancel tasks.
- Smoke purifier: The smart smoke purifier purifies the smoke produced during the processing cycle, and exhausts the purified outcome.
- Erasable drawing board: Each wood board is filmed with a layer of sticker paper, and you can draw on the board and use the device to laser cut what you draw. When you finish drawing on the material which is labelled with a circular barcode, put the material in the device and press the button on the device. As soon as you press the button, the device will start to work, cut along the outline, engrave the details drawn in black, and cut out the details drawn in red. In this case, you don’t need the software to run the machine.
Software Features
- Visual operation: The main interface displays what’s happening in the working platform of the laser cutter, allowing you to get a preview of your design on the material. You can insert your design with the software, position it with your mouse or finger exactly where you want, and leave the device to do the cutting and engraving.
- Material recognition: The Laserbox can recognize the types and thickness of materials via the circular barcodes labelled on the materials. The laser parameters, including focus, speed, and power, are automatically configured according to the material information gathered by the laser cutter.
- Image Extraction: You can extract designs drawn on a sheet of white paper using the machine and its companion software. The Marquee tool allows you to get your signature engraved on your DIY project and to extract the pattern on physical objects.
- Filters: The software provides three filters and is able to process bitmap images, so the machine can produce artworks in different styles.
- Time preview and real-time progress bar
- Path planning: Before starting the cutting/engraving process, you can have a preview of the cutting/engraving path via the software.
- You can manually configure based on images or patterns.
- LaserBox Learning Community: You can download images from the Laserbox Learning Community, and import the designs to the software for further creation.
- Material database: A material database has been incorporated into the software and the laser parameters in the database have been determined. You can select the material you’re currently using from the database, and the software will configure the best focus and cutting settings.
Session 3 Draw and Create Marathon
You can start the session by saying ” The Bring Sketch to Life feature of Laserbox allows us to have materials cut and engraved even when we don’t have access to the internet or use the Laserbox software. Now let’s create with Laserbox.”
In this session, students will work in groups of three. Each group is going to draw a “creature”. You need to prepare some sheets of paper and fold each into thirds beforehand. Then hand out the sheets of folded paper (each group gets one sheet), and have students follow the instructions below (Student A, B and C represent the three students from each group):
Student A: Draw the head of the creature within 1 minute, and fold the paper to cover most of the head before passing the paper to Student B. Don’t completely cover the head as Student B needs hints of where to continue the drawing.
Student B: Draw the body within 1 minute. Don’t unfold the paper or peek what has been drawn. When you finish the body part, fold the paper and pass it to Student C.
Student C: Draw the bottom within 1 minute and unfold the paper when you finish. Then it’s time to witness what creature your group creates.

Have students replicate the creatures on the basswood sheets, and outline the creature in black and draw the details in either red or black. (Remind students that the details in red will be cut and the ones in black will be engraved.)
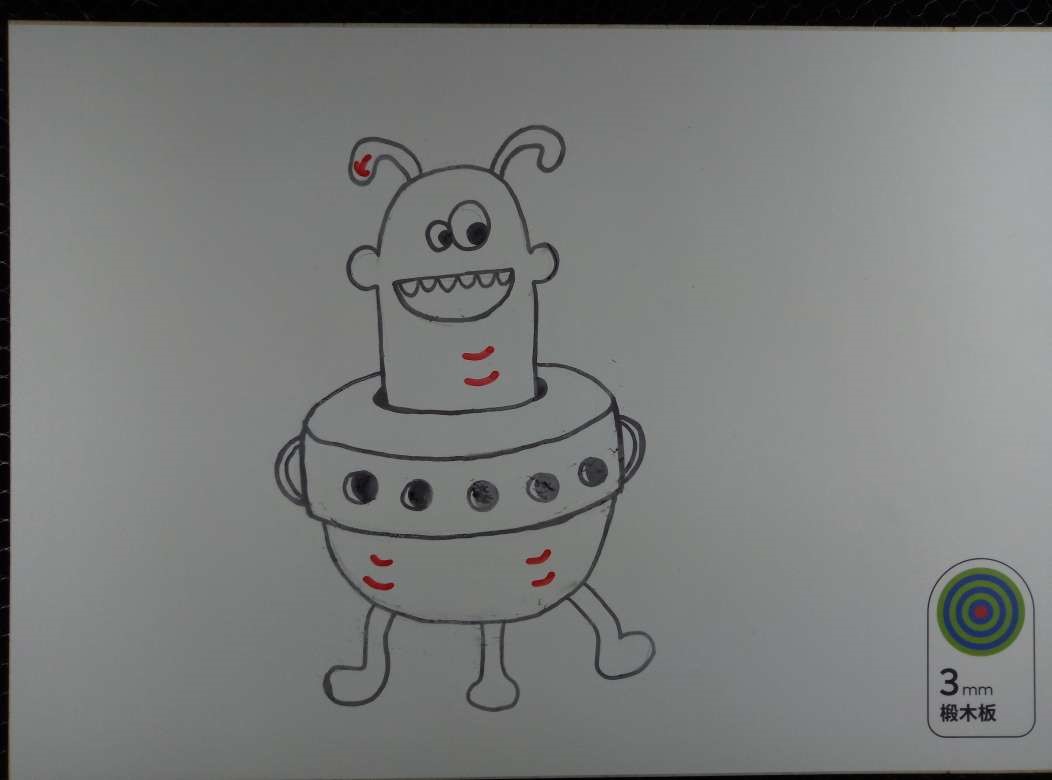
Crafty Uses for a Laser Cutter
Place the finished drawing on the working platform of Laserbox, and press the Start button, then the machine will cut the drawing.
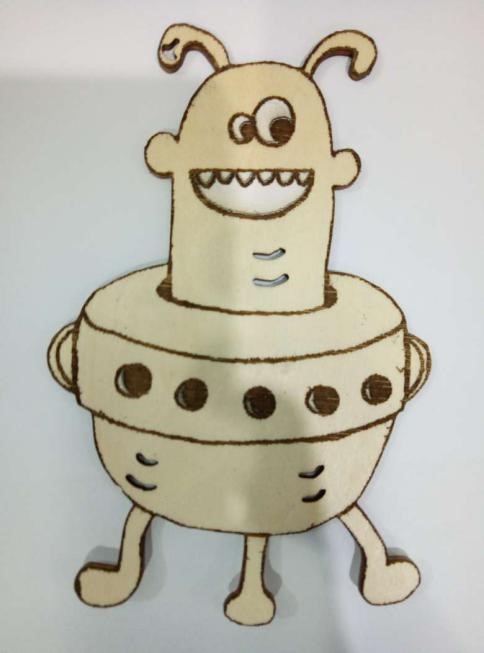
The finished work is shown below:
Session 4 Share
When students complete their projects, have each group introduce their creature. They can name their creatures and write stories based on it.
Session 5 Wrap-up
A laser tube is powered to emit a highly-parallel light beam which a beam bender bounces to a laser head. The focus lens on the laser head later focuses the laser beam into a spot which could go to such a high temperature that the object it contacts gets sublimated into gas in a flash. That’s how a kerf is left on a material and how laser cutting works.
We can use the Bring Sketch to Life feature and a specified material to cut out or engrave the pattern we draw on the material.
Session 6 Extension
When students finish the mysterious creatures, have them move on to the following extension tasks:
From the aspect of art: Color the creature or decorate it with ornaments.
From the aspect of science: Define the mysterious creature by detailing its specie, biological characteristics and living environment. Is it mammalian or amphibious? Is it herbivorous or omnivorous?
From the aspect of creative writing: Create a tale for the creature. Does it have any magic power? Is it a superhero in a comic?
