How Can We Help?
Operation Guide
Software related
how to change the default settings for the official material
Description
With the natural aging of the laser tube, the power of the laser tube will decrease, which will lead to the official material can’t be cut through or engraved with the same effect as previously with the default settings. In this case, need to adjust the settings like increase the power value or decrease the speed value. Once figured out the best settings after several tests, you can change the default settings for the official material refer to steps below:
Operation Step
Step 1: Open the laserbox software and enter a new project page, then you will see the material selecting list on the top.

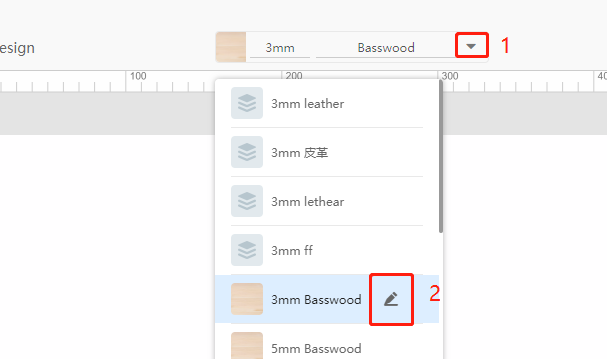
Step 2: Click on the lower triangle and click on the edit symbel for the particular material you want to modify the settings. Here I take “3mm basswood” as example:
Step 3: Set appropriate parameters (power and speed) under engraving and cutting area respectively.

Step 4: Parameter Update: connect Laserbox to your computer and go to Menu > Settings > General, and click Update after Parameter Update.
Explaination for “Parameter Update”
Laserbox boasts multiple offline features, which empower it to identify Makeblock materials and set parameters when the laser cutter is offline. Parameter Update synchronizes the material list and processing parameters in the software into Laserbox, allowing the laser cutter to apply new parameter settings when used offline.
How to fix the dimension while import the DXF drawing from AI software to laserbox software
Step 1:
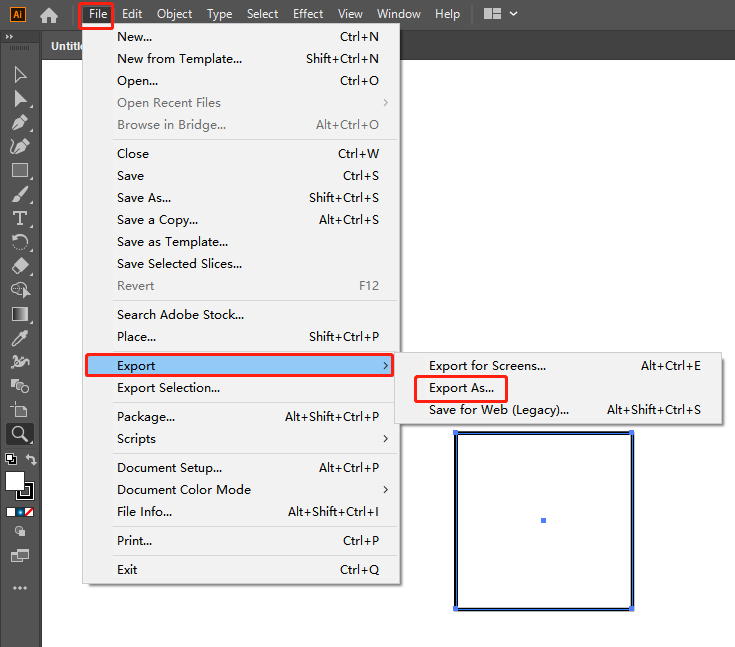
Select the file which you want to import to laserbox software,and Go to “File-Export-Export As” to set scaling size.
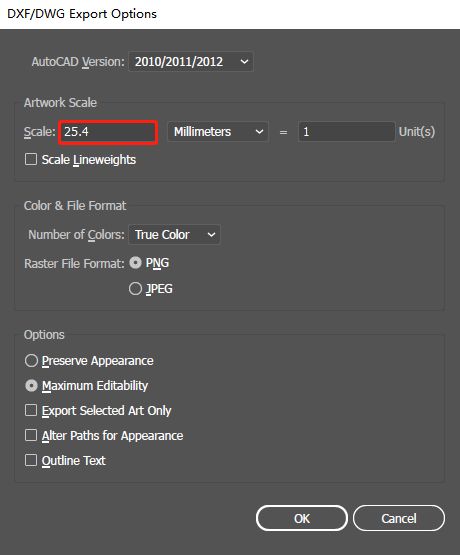
Step 2:
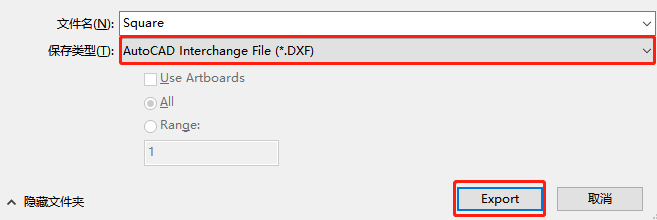
After pop-up below frame then select DXF format and click “Export” to set scaling sizej to 25.4mm for the drawing
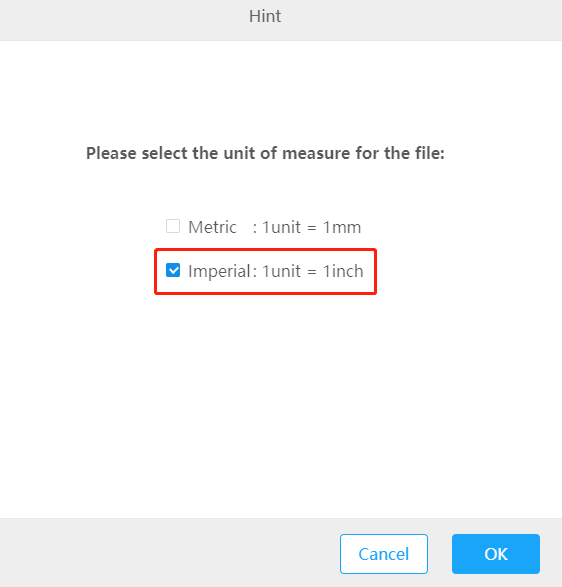
Step 3:
Select “Imperial” option while you import the file to laserbox software,then your file will be same size as your its original dimension
Hardware related
How to switch the high and low voltage of the laser power (110V/220V)?
The high and low voltage modes can be switched by adjusting the fluctuation key of the laser power, please refer to the following animation (The number 115 represents 110V voltage, 230 represents 220V voltage):
【Note: the switch must be pulled to the correct power according to the local power, otherwise, it may cause damage on laser power or mainboard. Normally, there is no need to switch it since the machine was switched to correct power before sending out to corresponding country.】
How to upgrade firmware for laserbox with SD card?
Note: Here take the firmware version 019 as example
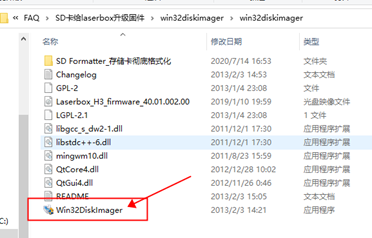
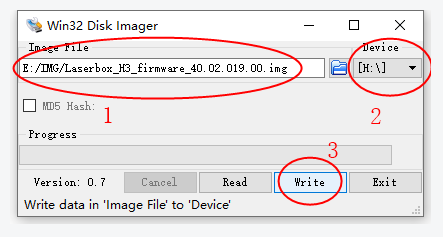
Step1: Download and save the firmware “Laserbox_H3_firmware_40.02.019.00” on the computer; Download and save the software tool “Diskmager” on the computer.
Step 2: Insert the SD card to the card reader;
Step 3: Plug the card reader to the computer;
Step 4: Open the software tool “diskimager”, then write the firmware according to the picture guides below:
After the firmware was written to the SD card successfully, please follow the steps below to upgrade the firmware:
1. Insert the SD card into the Laserbox (Here I share a video to you how and where you can insert the SD card);
2. Close the cover and power on the Laserbox machine;
3. Wait for 10 minutes, the firmware will upgrade automatically;
4. Power off the machine;
5. Take out the SD card and assemble the parts on Laserbox.