How Can We Help?
Features
Cut/Engrave
What can it do?
Laserbox can engrave or cut every single layer in the canvas, and finish processing them in one task.
How to use it?
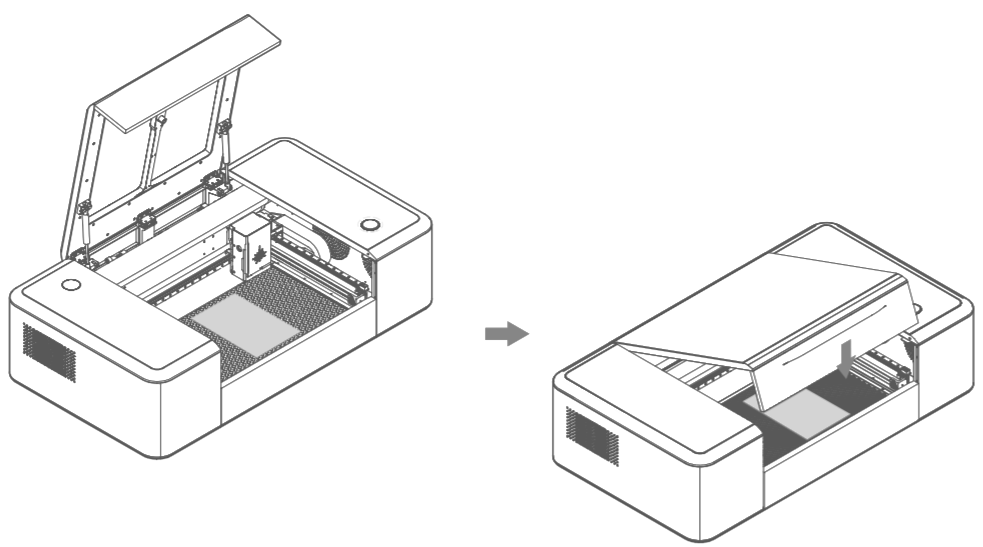
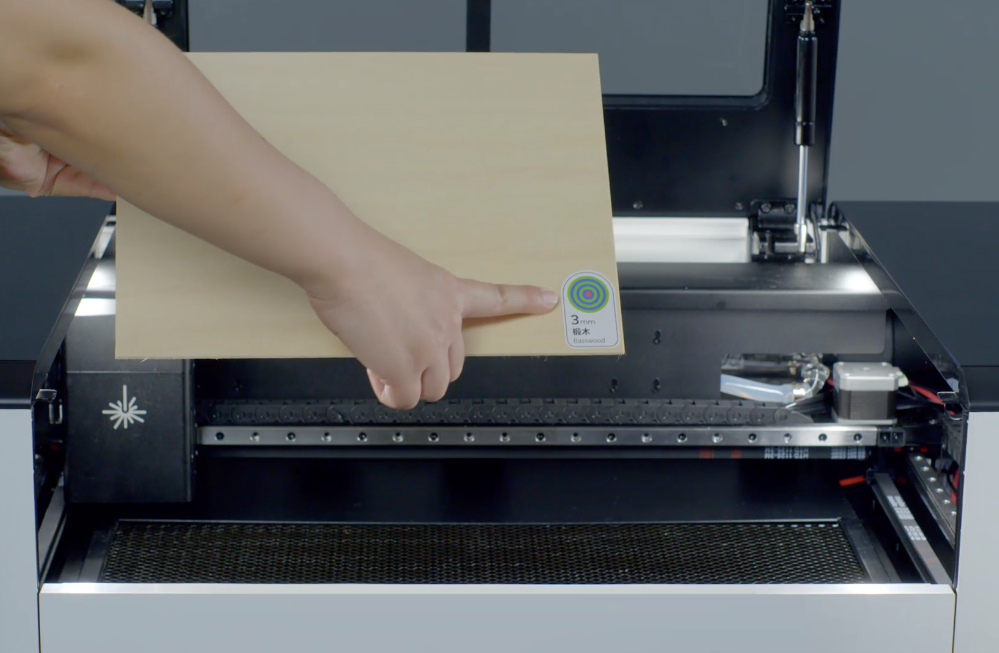
- Place materials.
Open the lid. Place a Makeblock material in the working area. Ensure the ring code side faces up.
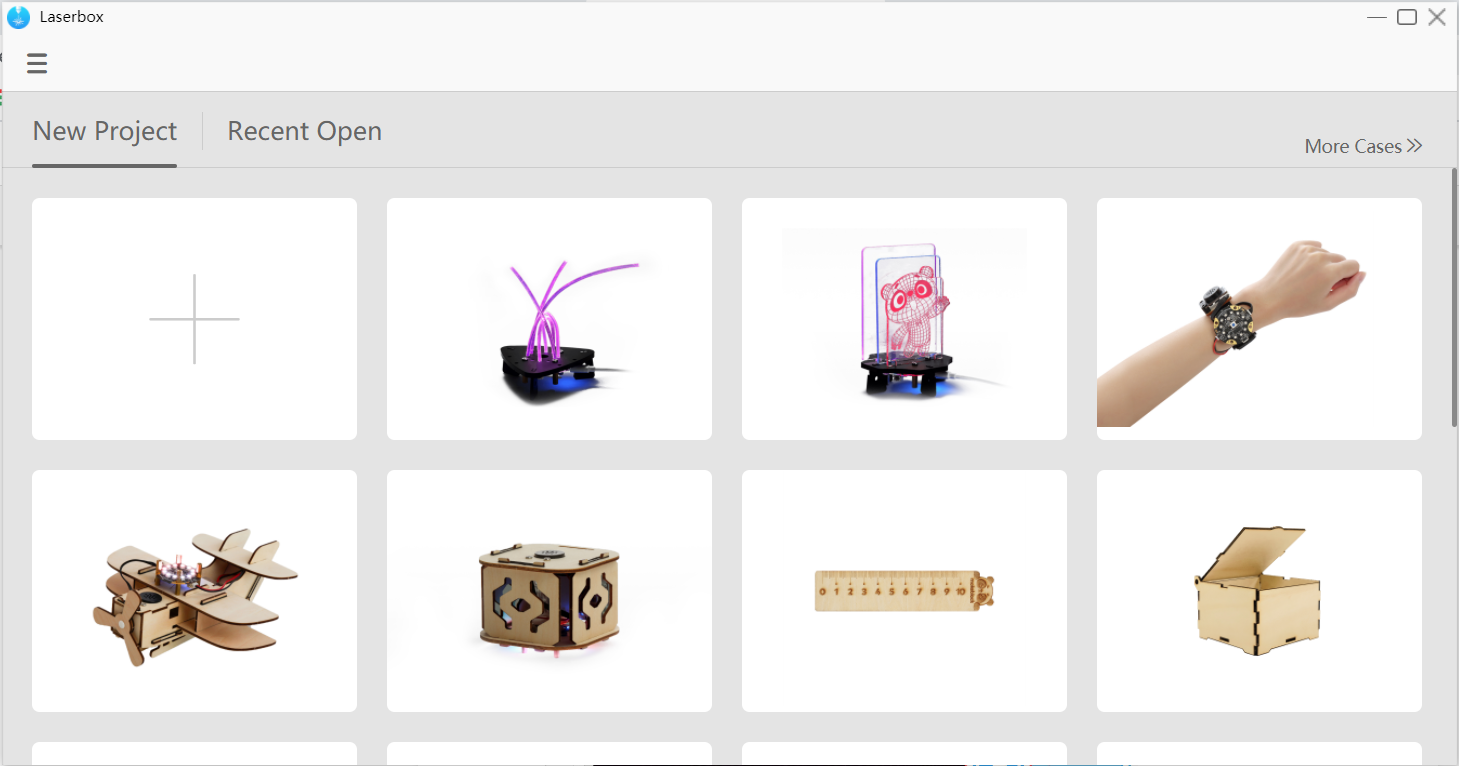
- Import the file.
Open the software Laserbox. Select a sample project, or import an image file.
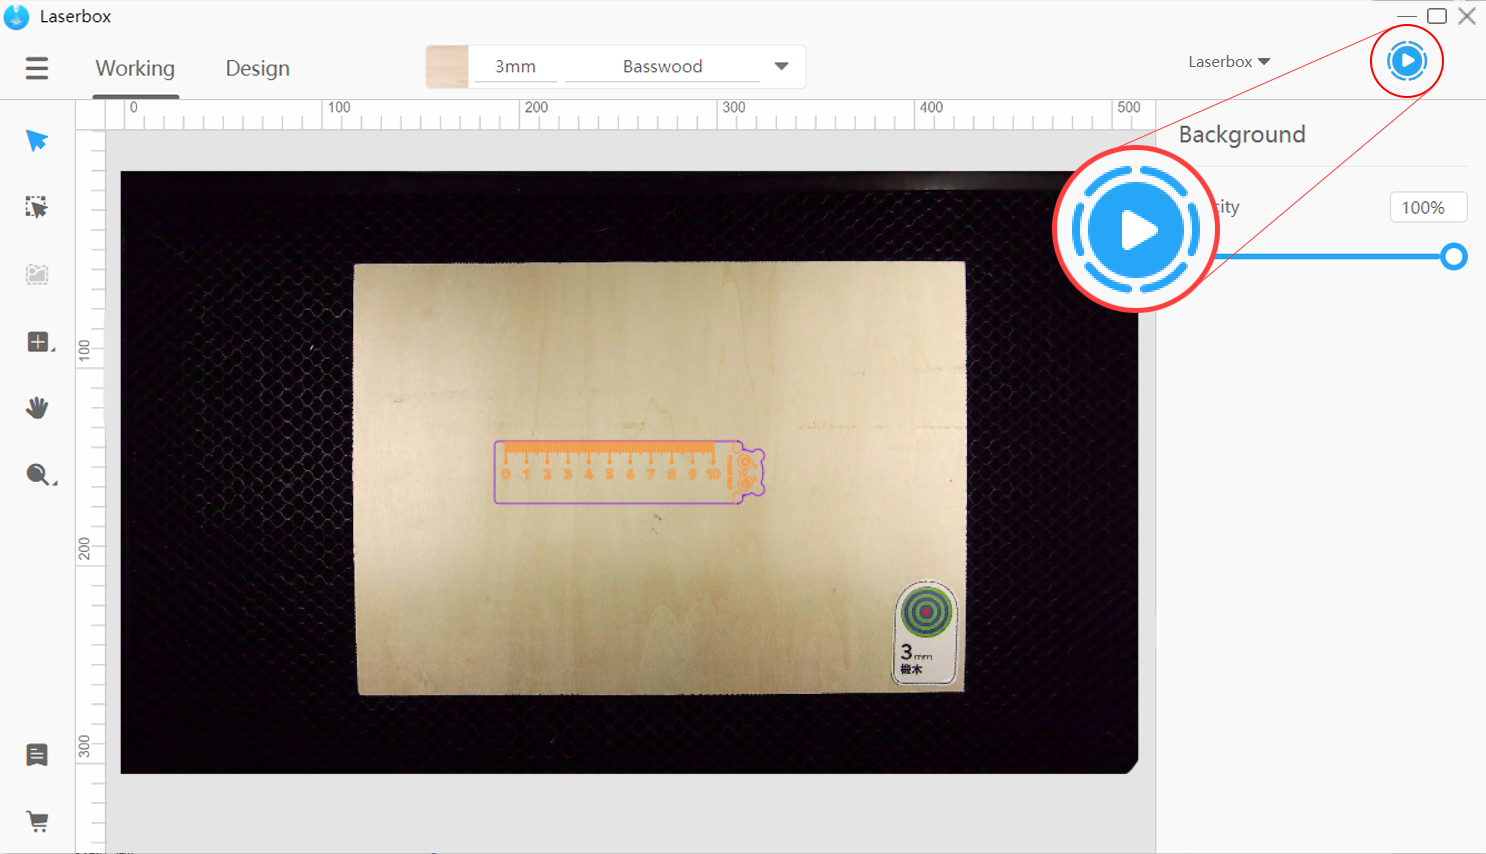
- Click the start button.
Click the start button at the upper right corner.
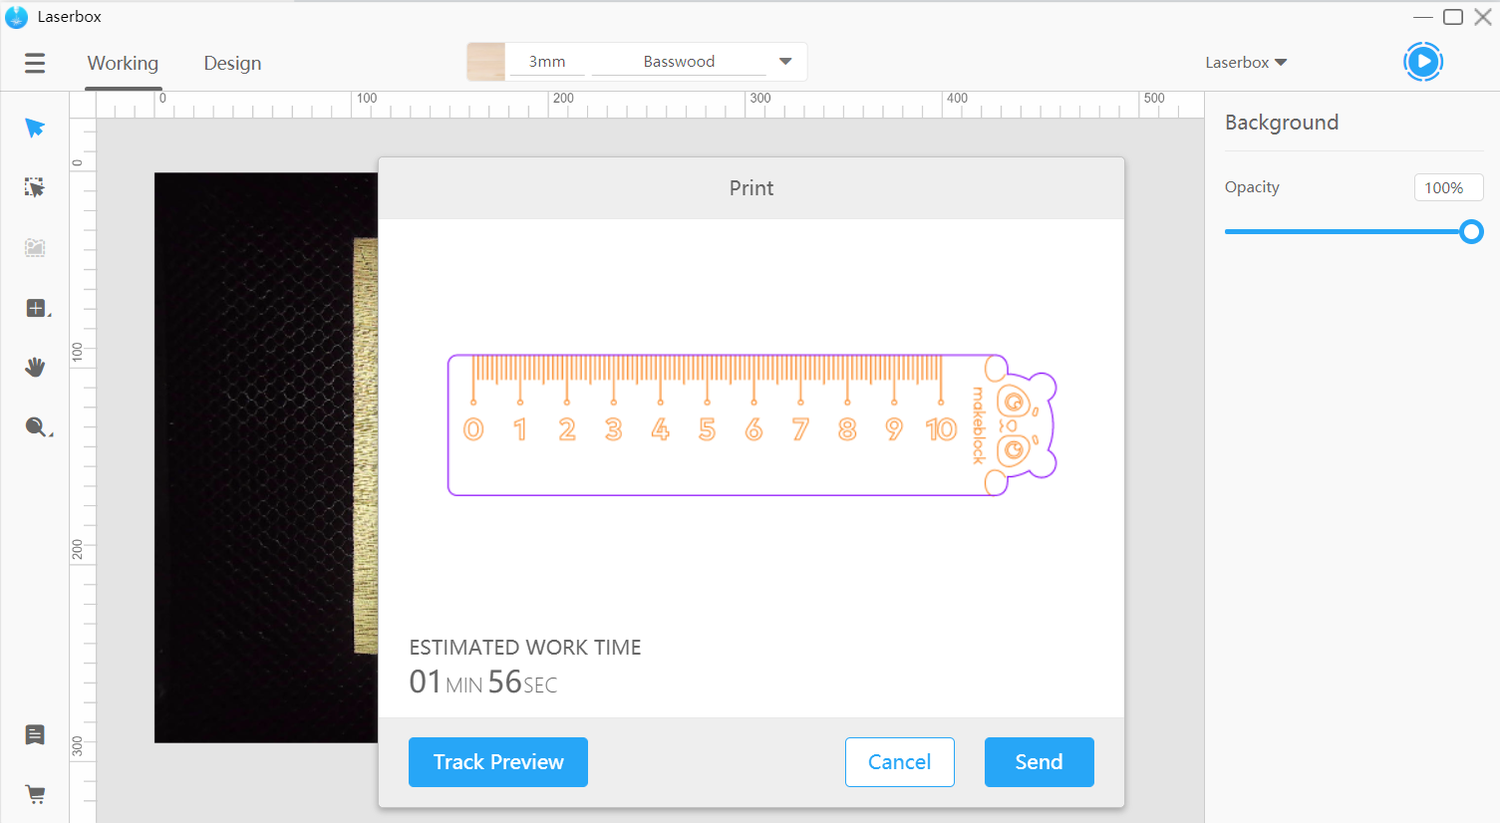
- Click the send button.
In the pop-up, click Send to send the file to the laser cutter.
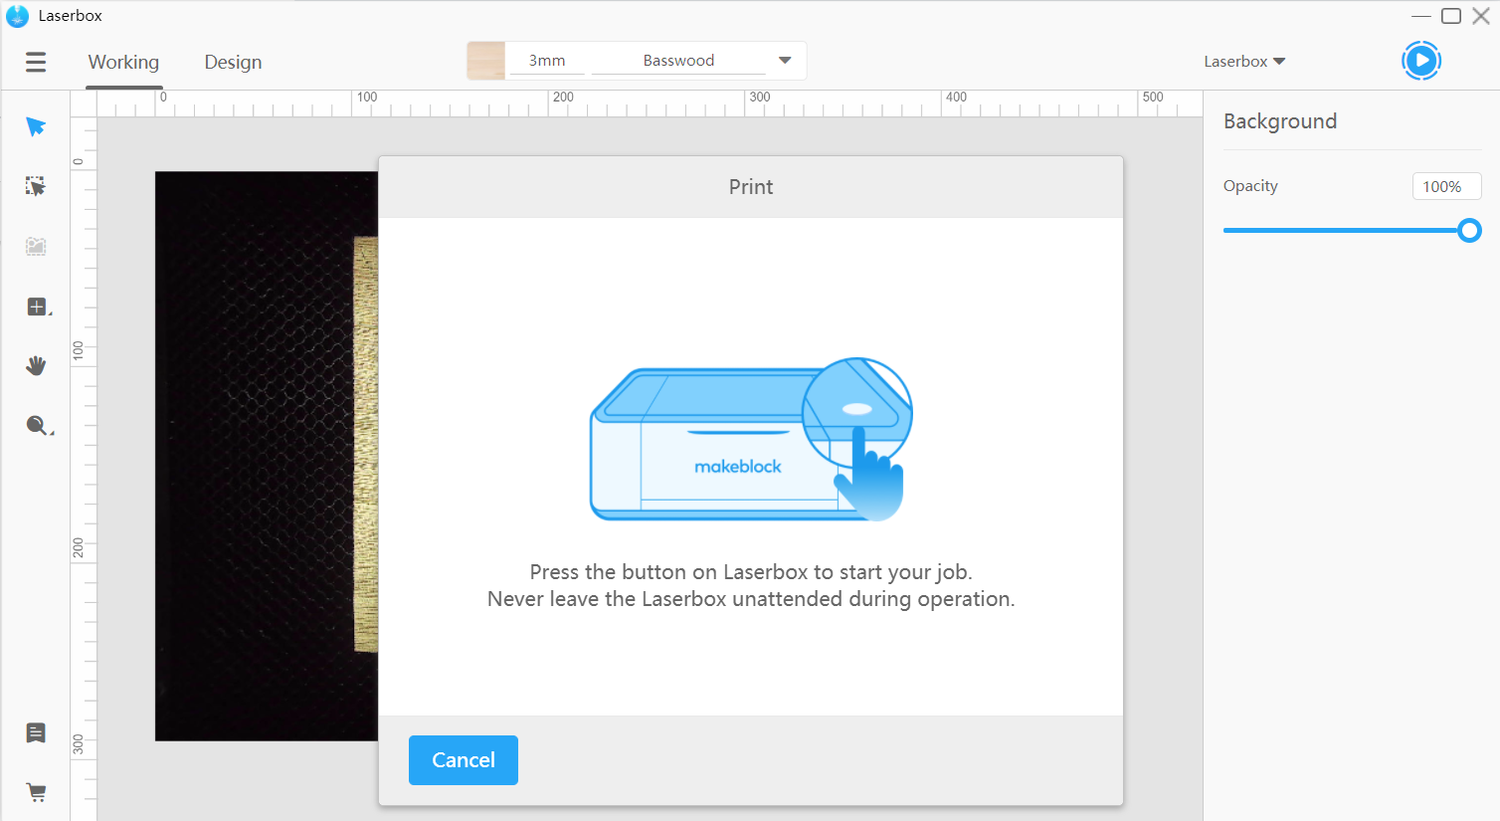
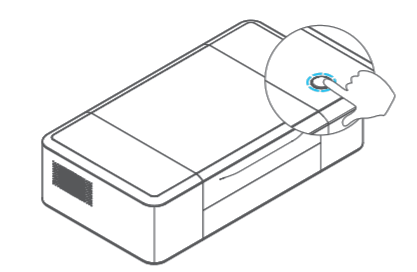
- Press the button.
After the file is sent to the laser cutter, follow the on-screen prompts to press the button on the laser cutter. The laser cutter starts working.
- Task finished.
When seeing a prompt or the annular indicator turn green, you know the task is complete. Then you can open the lid to take out the result.
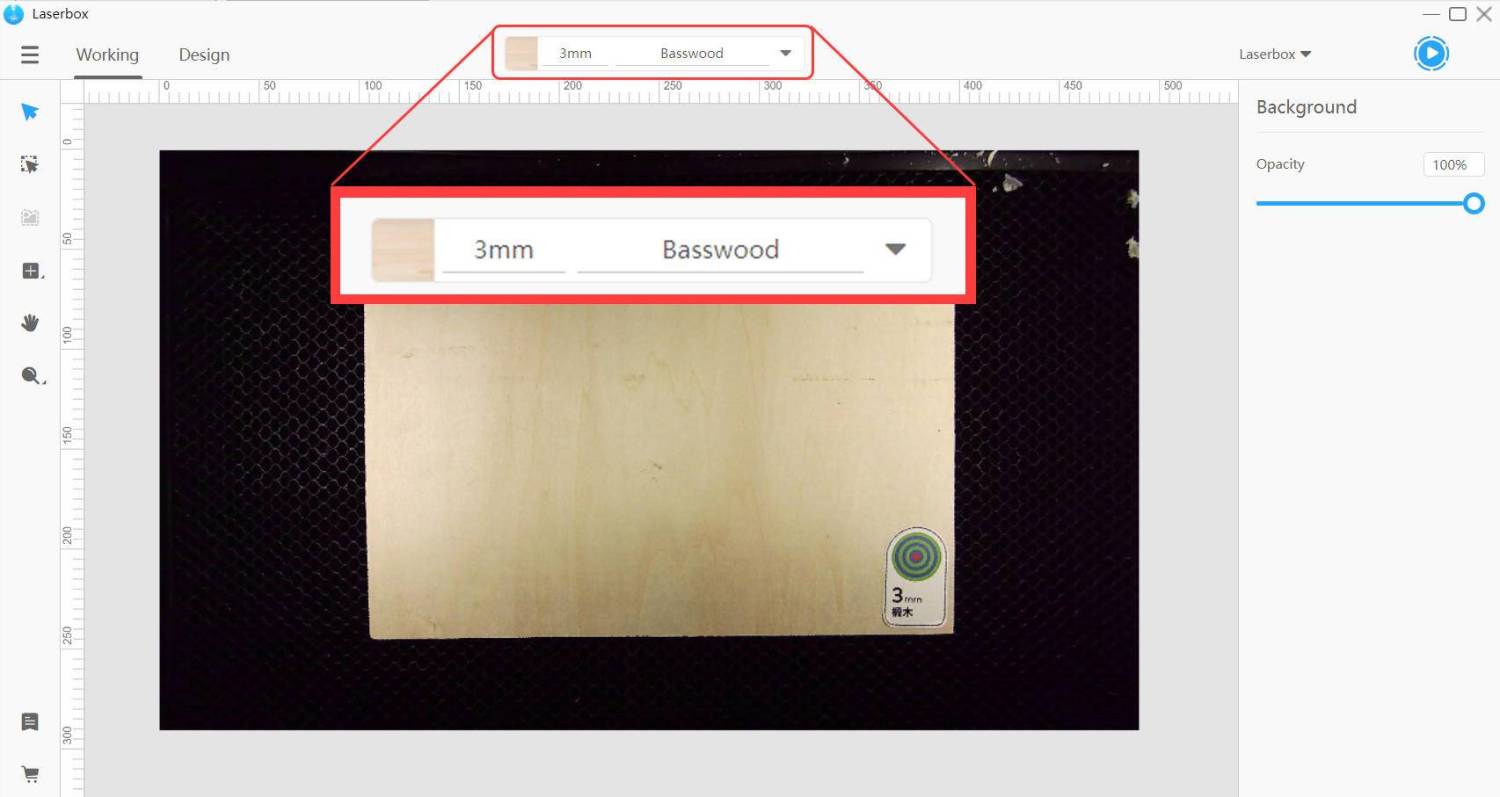
Identify materials
What can it do?
Laserbox features a high-definition camera with an ultra-wide-angle lens. It automatically recognizes Makeblock materials based on ring codes, making necessary settings adjustments, including focus, speed and power, to ensure a best cut or engraving. No more manual focus or parameters setting. No more hassle over running tests on the chosen materials.
NOTE
- DO NOT pile up several materials; otherwise, it may cause damage to the laser head.
- DO NOT stick ring codes to any of non-Makeblock materials. Laserbox relies on the ring codes to identify materials and make settings adjustments. These adjustments only apply to Makeblock materials so Laserbox could fail to give you what you expect if you’re using a non-Makeblock material.
How to use it?
- Place materials.
Open the lid. Place a Makeblock material in the working area. Ensure the ring code side faces up.
- Auto recognition
Close the lid. Laserbox automatically recognizes the material, and sets up the parameters accordingly.
Auto measure
What can it do?
Laserbox features a high-definition camera with an ultra-wide-angle lens enabling it to automatically measure the thickness of the material. Based on the measurements, Laserbox automatically adjusts the focus before it starts laser cutting or engraving. No manual measurement or manual focus is required. You can save much trouble.
NOTE
- DO NOT place materials that are over the maximum thickness. Laserbox could process up to 22mm thickness, or up to 52mm thickness if the honeycomb panel is removed. Exceeding the limit could lead to a failed focus setting and even damage the laser cutter.
- Please go to our website to check the supported materials. But we can’t recommend parameters settings for non-Makeblock materials, and can’t promise you superior cutting/engraving experience if you’re using non-Makeblock materials. Our official website: https://www.makeblock.com/maker-tools/laserbox/
How to use it?
- Place materials.
Open the lid. Place the material in the working area.
- Determine the location to measure.
Import an image or insert a shape in the software. Drag the image or shape to the location where you’d like Laserbox to process. Then, above the canvas appears an auto measurement prompt.
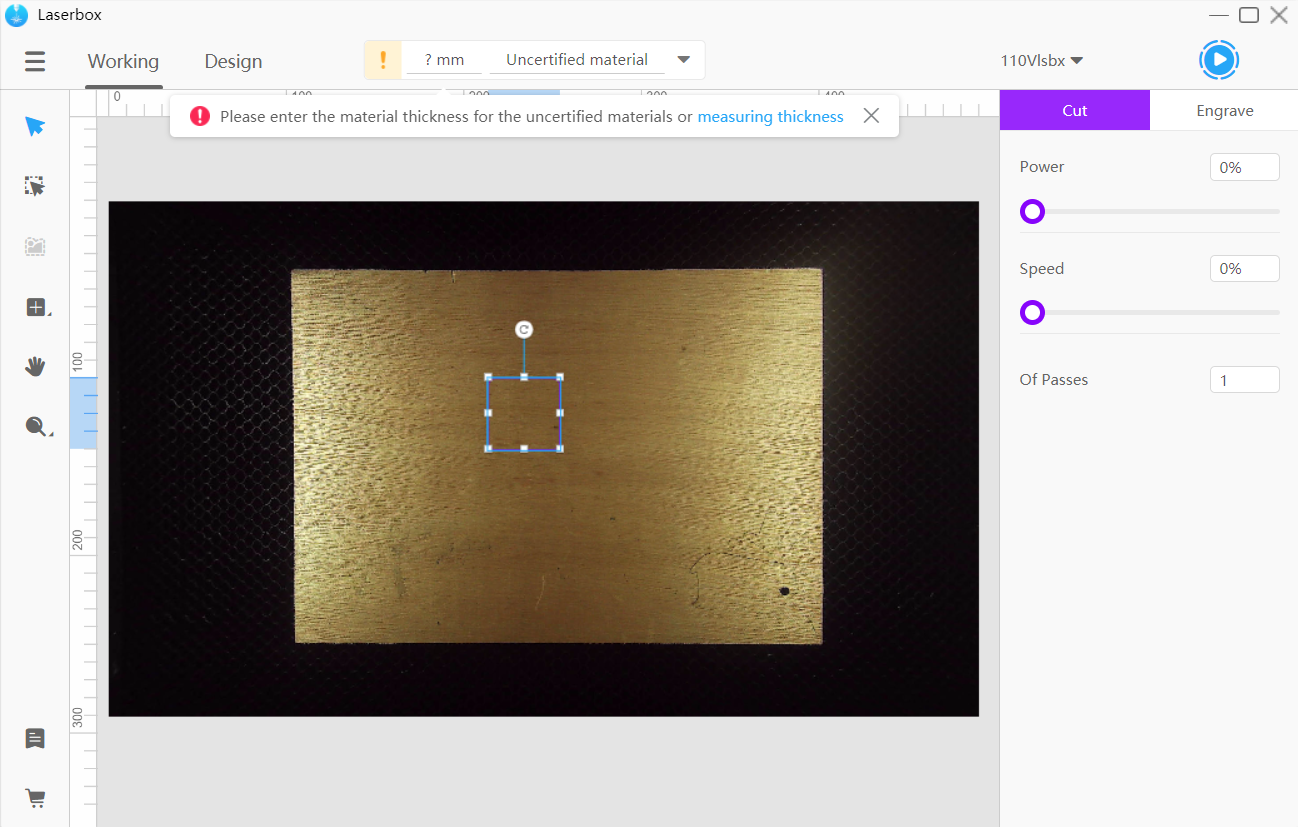
- Start measuring.
Click Measuring thickness in the prompt. The laser head will start measuring the thickness of the location where the image or shape is processed.

- Finish measuring.
A prompt pops up after measurement is complete, and the measurement result is displayed at the top of the interface.

Extract images
What can it do?
Laserbox features a high-definition camera with an ultra-wide-angle lens. It uses an image-processing algorithm which lets you extract images with a click away. You can directly use the image extracted from the surface of an item to create your own project. It could improve the efficiency a lot.
How to use it?
- Place an item.
Open the lid. Put the item you’d like to extract in the working area.
- Click Marquee.
In the Working interface, click Marquee on the left toolbar.
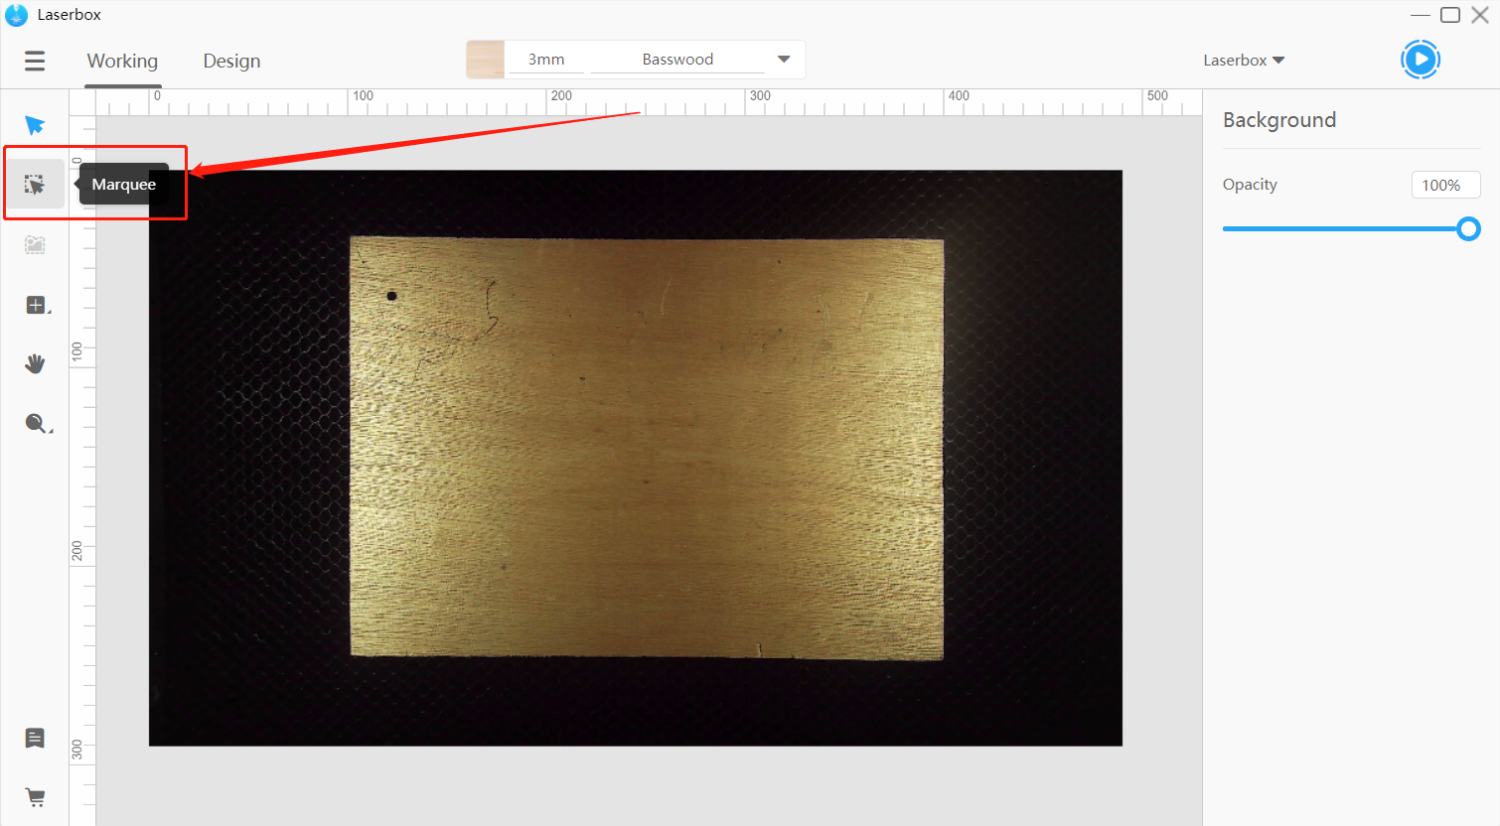
- Frame the image.
Drag your mouse to frame the image you’d like to extract. Use the eraser tool to remove what you don’t need in the frame.
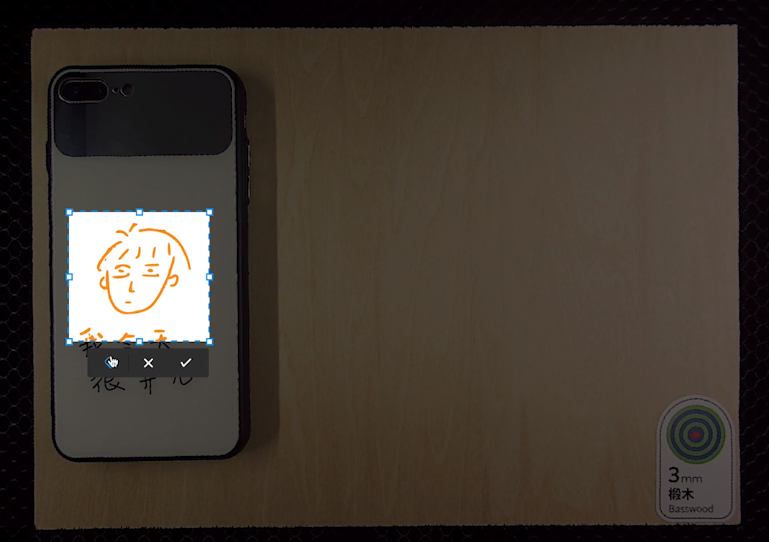
- Finish
Click √ to confirm.
Extract outlines
What can it do?
The software Laserbox is able to quickly extract an image by its outline for later cutting or engraving, ensuring much more superior results.
NOTE
- Select images with enclosed outlines. Images made of broken lines may lead to failure in outline extraction.
- Select images made with a pure-colored background. Adding images made of complex textures could lead to failure in outline extraction.
How to use it?
- Import an image.
Import an image made of enclosed outlines and pure color..
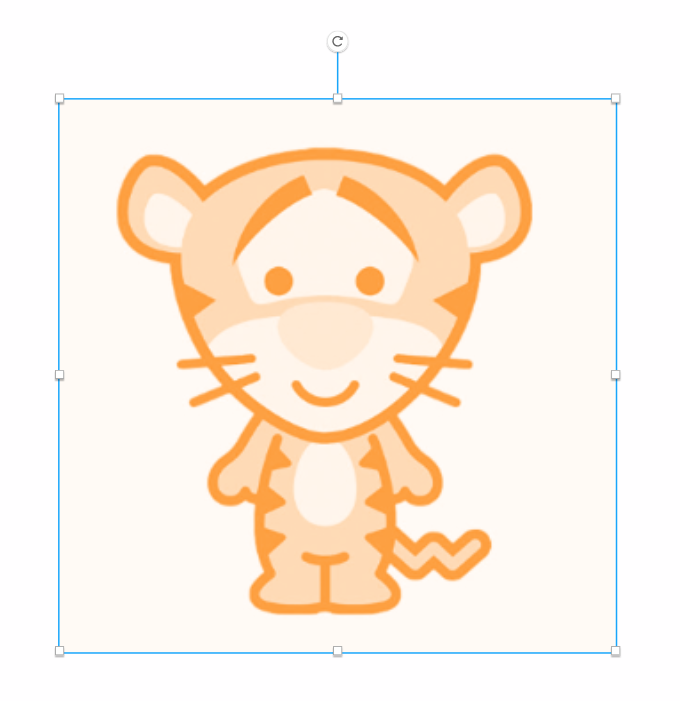
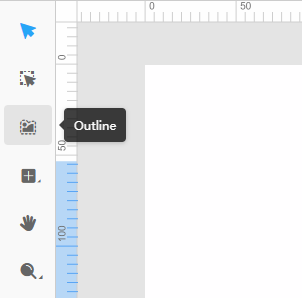
- Click Outline.
Select the image you’d like to extract. On the left toolbar, click Outline. Wait for a while, then the image is automatically extracted by its outline.

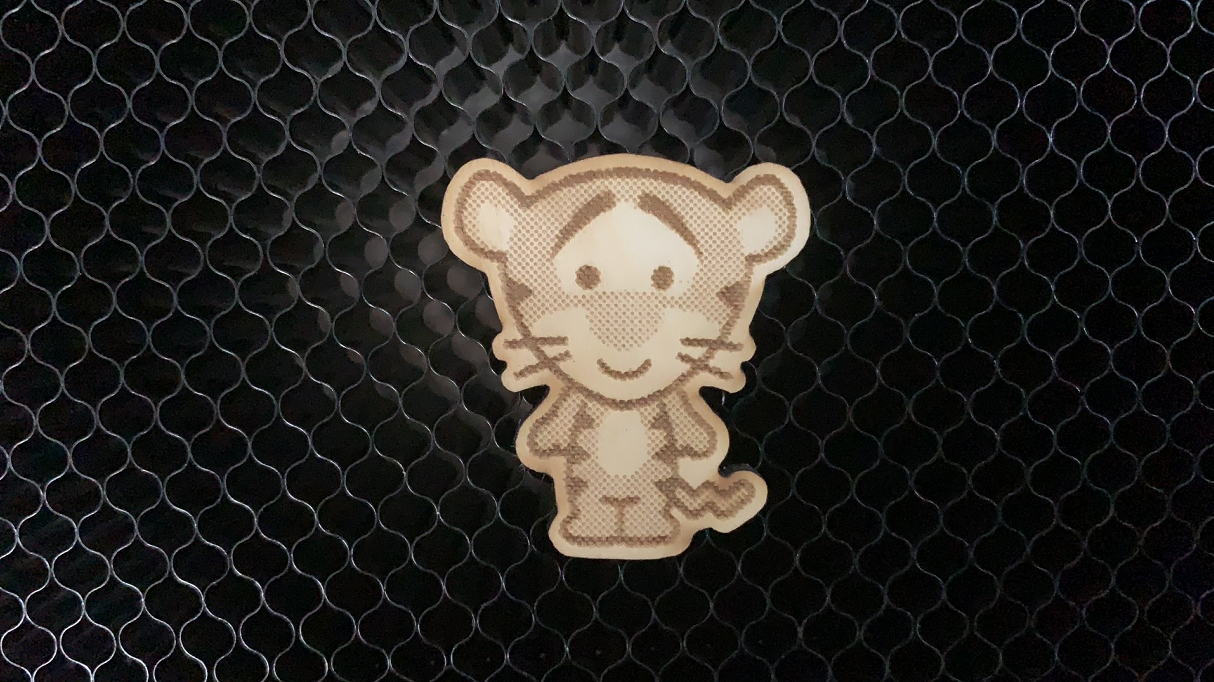
- Start processing.
Click on the start button on the upper right corner to send the image to the laser cutter. Press the start button on the laser cutter, letting Laserbox engrave the image and cut it out.
Bring sketch to life
What can it do?
Laserbox can identify images drawn on Makeblock materials and A4 copy paper. Based on its identification results, Laserbox can cut/engrave those images.
By default, Laserbox engraves lines drawn in black, and cut lines drawn in red.
Go to Settings, and select the Cut outline option. Then, the laser cutter will start engraving the outlines drawn in black.
NOTE
- Use Makeblock materials. Reflective materials or materials too dark will make it much harder for Laserbox to identify images.
- Use Makeblock-recommended markers. Images printed out or too thin(<2mm) will make it much harder for Laserbox to identify. Deli s550 marker pens are recommended.
- Avoid drawing small images. Images smaller than a size of 4mm*4mm could be regarded as distractions and thus be deleted.
- Draw images at the center of materials. Images close to the edges may lead to the failure of Laserbox to accurately position the material scope. Images near the ring code could be regarded as distractions and deleted.
- Keep black lines at a distance with red lines when drawing an image. Make sure the distance is more than 2mm.
How to use it?
- Draw images.
On a Makeblock material or a piece of white A4 paper, use a black or red marker to draw images.
- Put it into Laserbox.
Open the lid. Put the material horizontally at the center of the working area.
- Start processing.
Close the lid. Press the button on the laser cutter to let it automatically identify the image and start processing it.
Settings
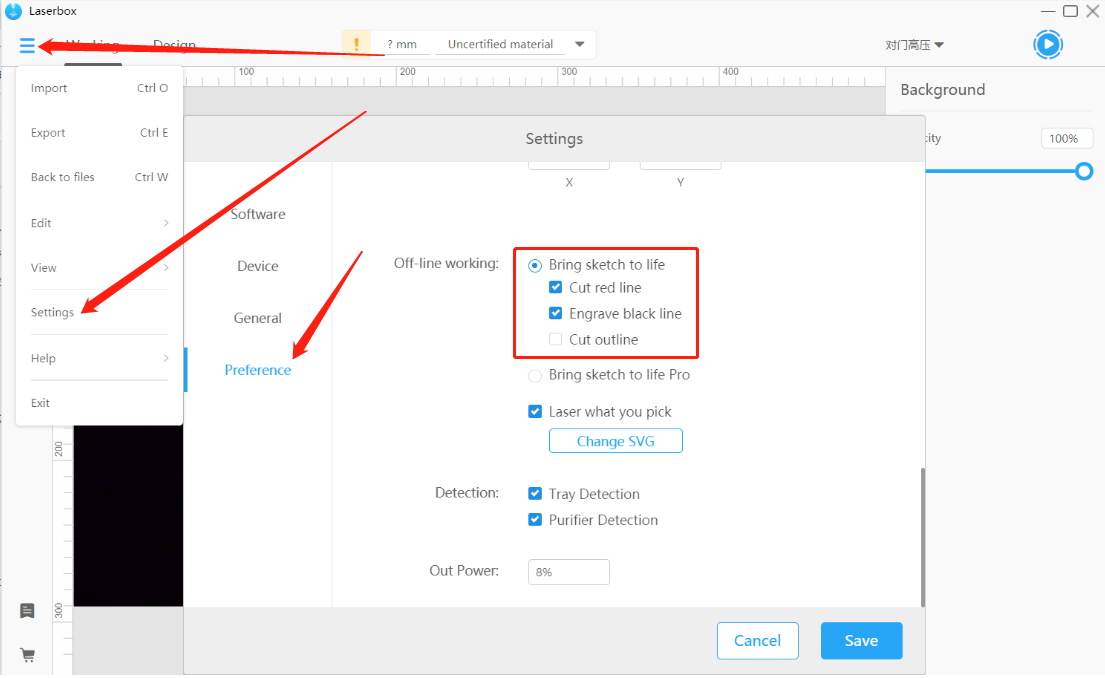
In the software, you can go to Settings to define processing methods for Bring Sketch to Life.
Go to Menu >Settings >Preference, then make sure you select the Bring sketch to life feature. You can select the options below to define how images are processed.
Bring sketch to life Pro
What can it do?
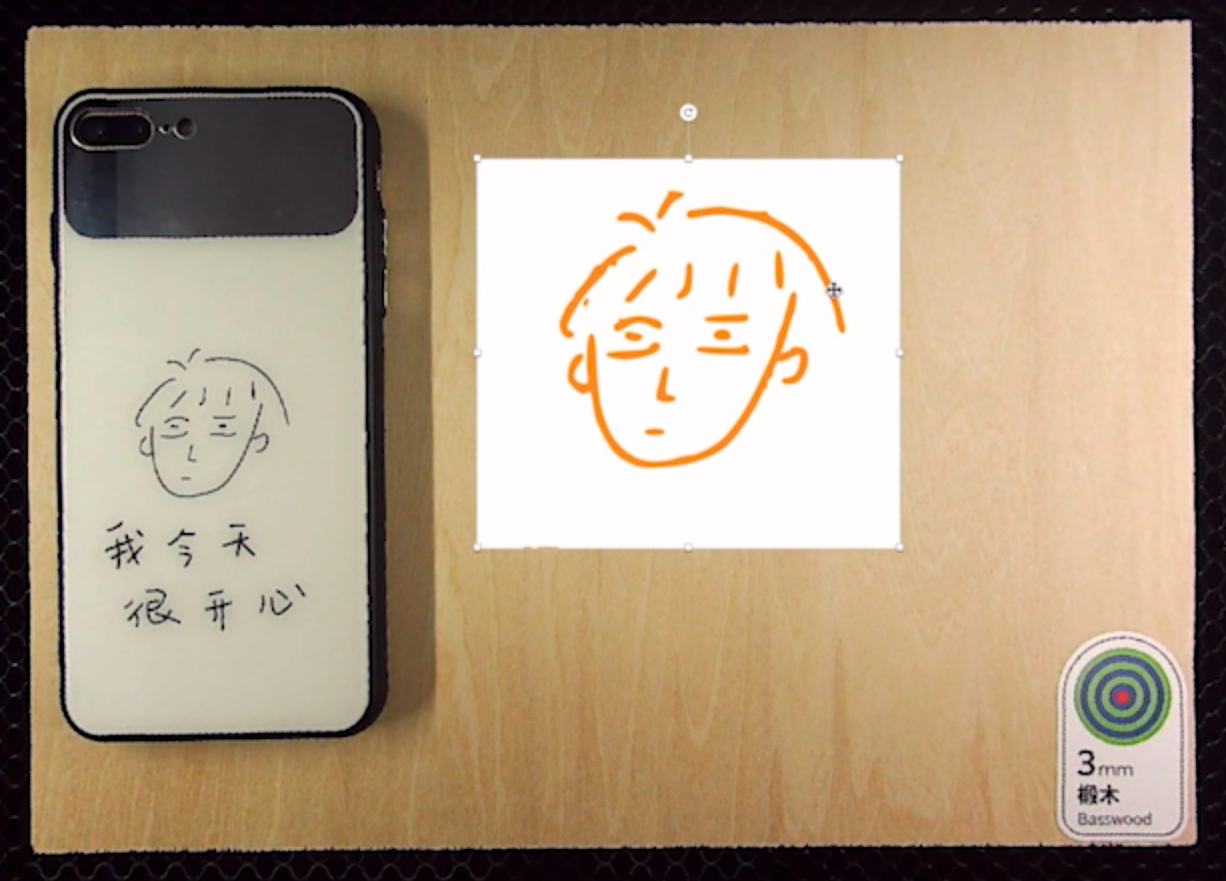
Laserbox can automatically identify images drawn on white A4 paper, and cut/engrave them. The first image will be cut or engraved on the upper left corner of Makeblock materials. The materials can be repeatedly processed using the remaining areas. Laserbox can identify which areas of the Makeblock materials have been processed and quickly decide where to process the next image.
By default, Laserbox engraves black lines and cut red lines.
In Settings, you can check the Cut outline option if you’d like Laserbox to cut black outlines.
NOTE
- Use Makeblock-recommended materials. Reflective materials or materials too dark will make it much harder for Laserbox to identify images.
- Use Makeblock-recommended markers. Images printed out or too thin(<2mm) will make it much harder for Laserbox to identify. Deli s550 marker pens are recommended.
- Avoid drawing images that are too small. Images smaller than a size of 4mm*4mm could be regarded as distractions and thus be deleted.
- Keep black lines at a distance with red lines when drawing an image. Make sure the distance is more than 2mm.
- Remove the finished engravings once they’re done. Remove the finished engravings so that Laserbox can quickly identify which areas are already processed, avoiding repetitive processing.
How to use it?
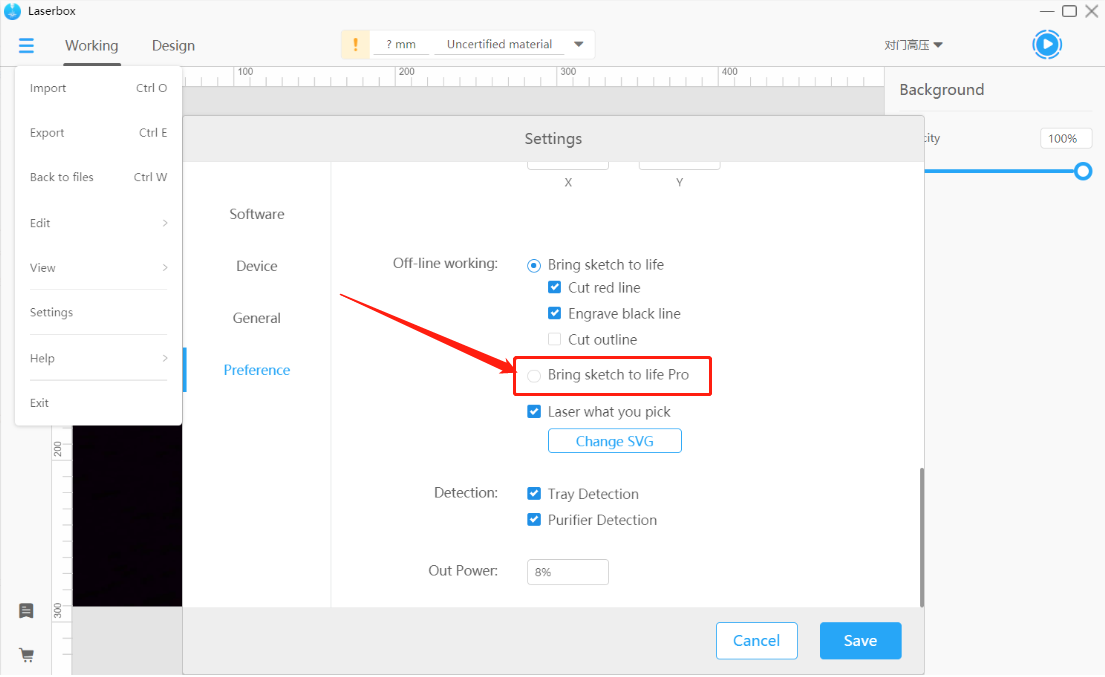
- Switch to bring sketch to life Pro .
Connect Laserbox to your computer. Go Menu > Settings > Preference, then select the Bring sketch to life Pro option.
- Draw an image.
Prepare a piece of white A4 paper. Use red or black markers to draw images.
- Put it into Laserbox.
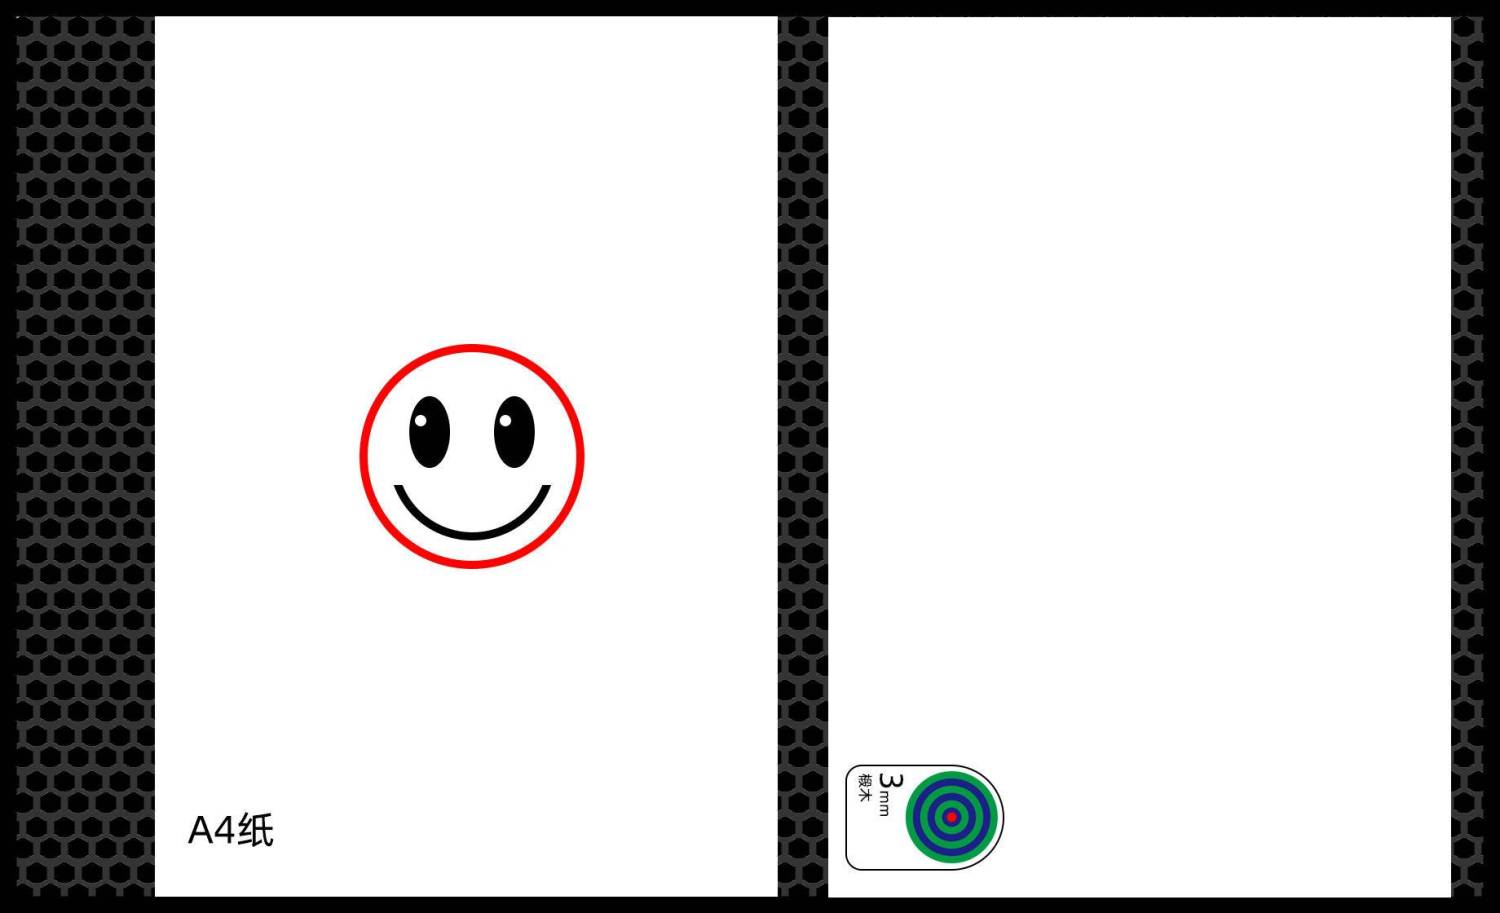
Open the lid. Put the A4 paper and Makeblock material vertically in the working area as shown. A4 paper on the left, Makeblock material on the right. Please note that the upper edges of the paper and material should align with the upper edge of the honeycomb panel. And make sure the A4 paper is about 1cm distant from the material.
- Start processing.
Close the lid. Press the button on the laser cutter to let it automatically identify the image and start processing it.
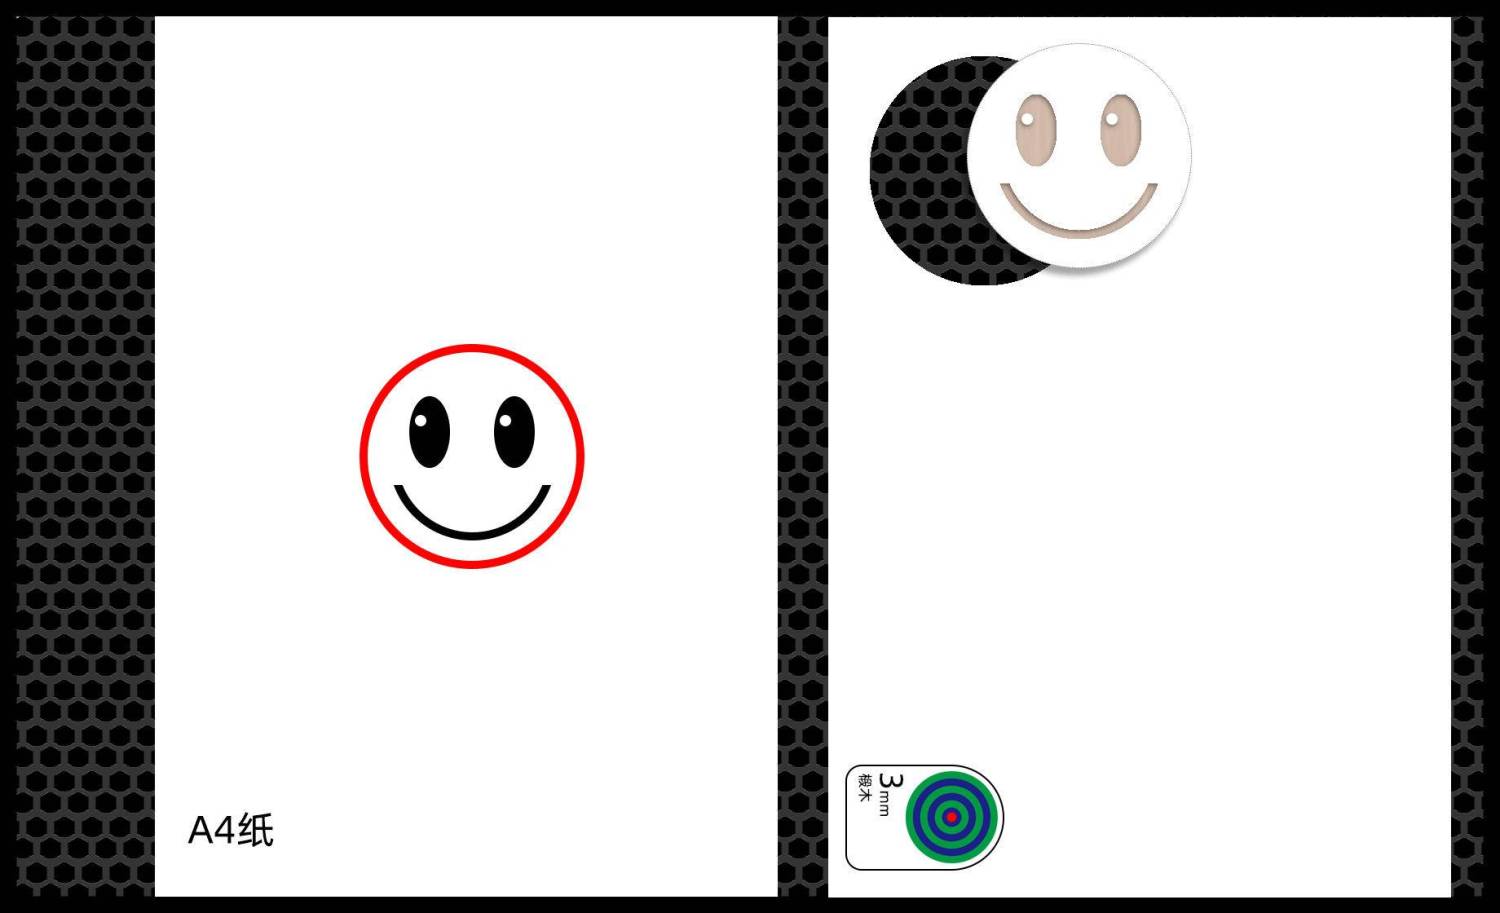
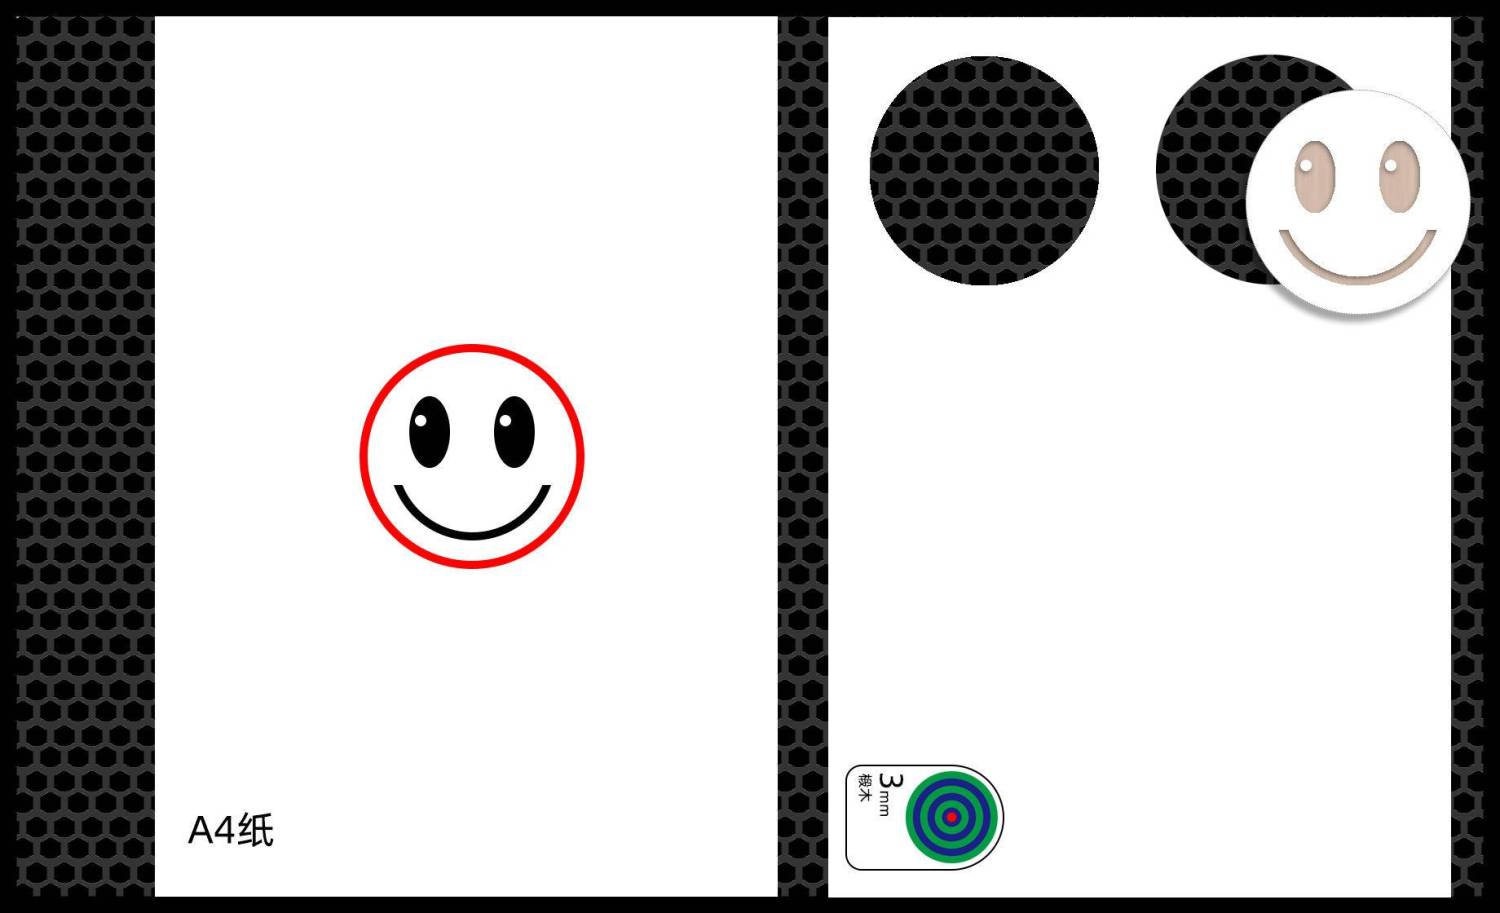
- Reuse the material.
Laserbox can automatically identify which areas are already processed, and decide where to process next. So a piece of Makeblock materials is reusable for multiple times.
Laser what you pick
What can it do?
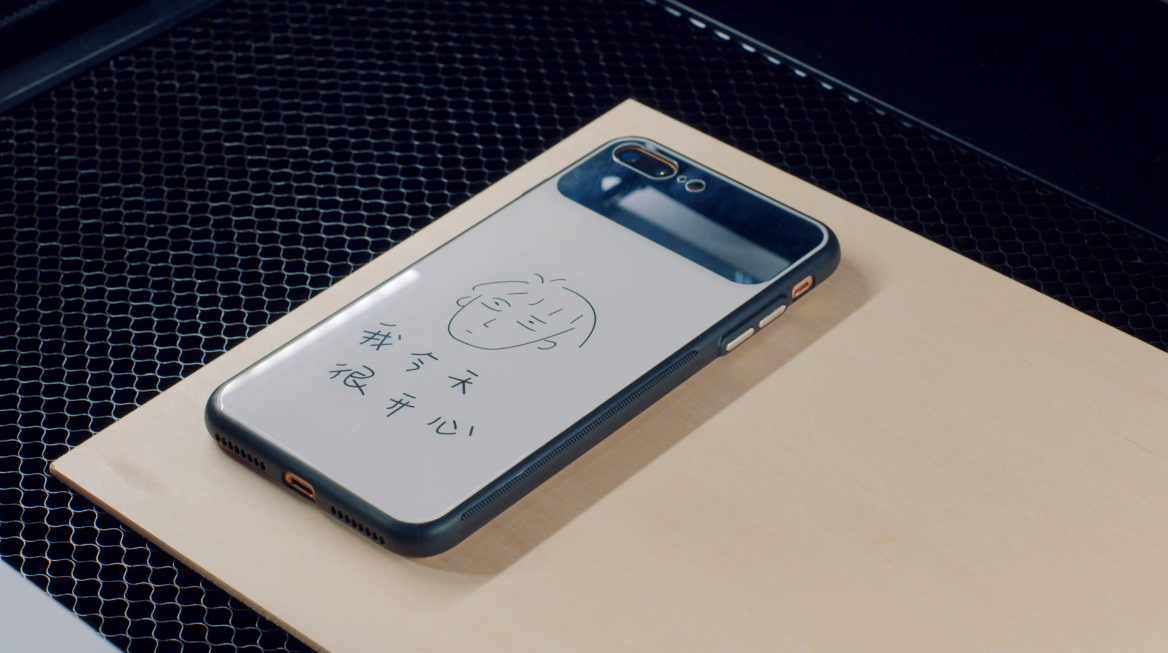
Laserbox automatically identifies the images printed on the paper, engraves the selected image on wood board, and cuts it out. You can also leave your signature or custom images on the printed sheet, having them engraved in the result as well.
How to use it?
- Print out the sheet.
Print out the sheet on a piece of A4 paper.
Download the sheet at: https://www.makeblock.com/support/ps-laserbox
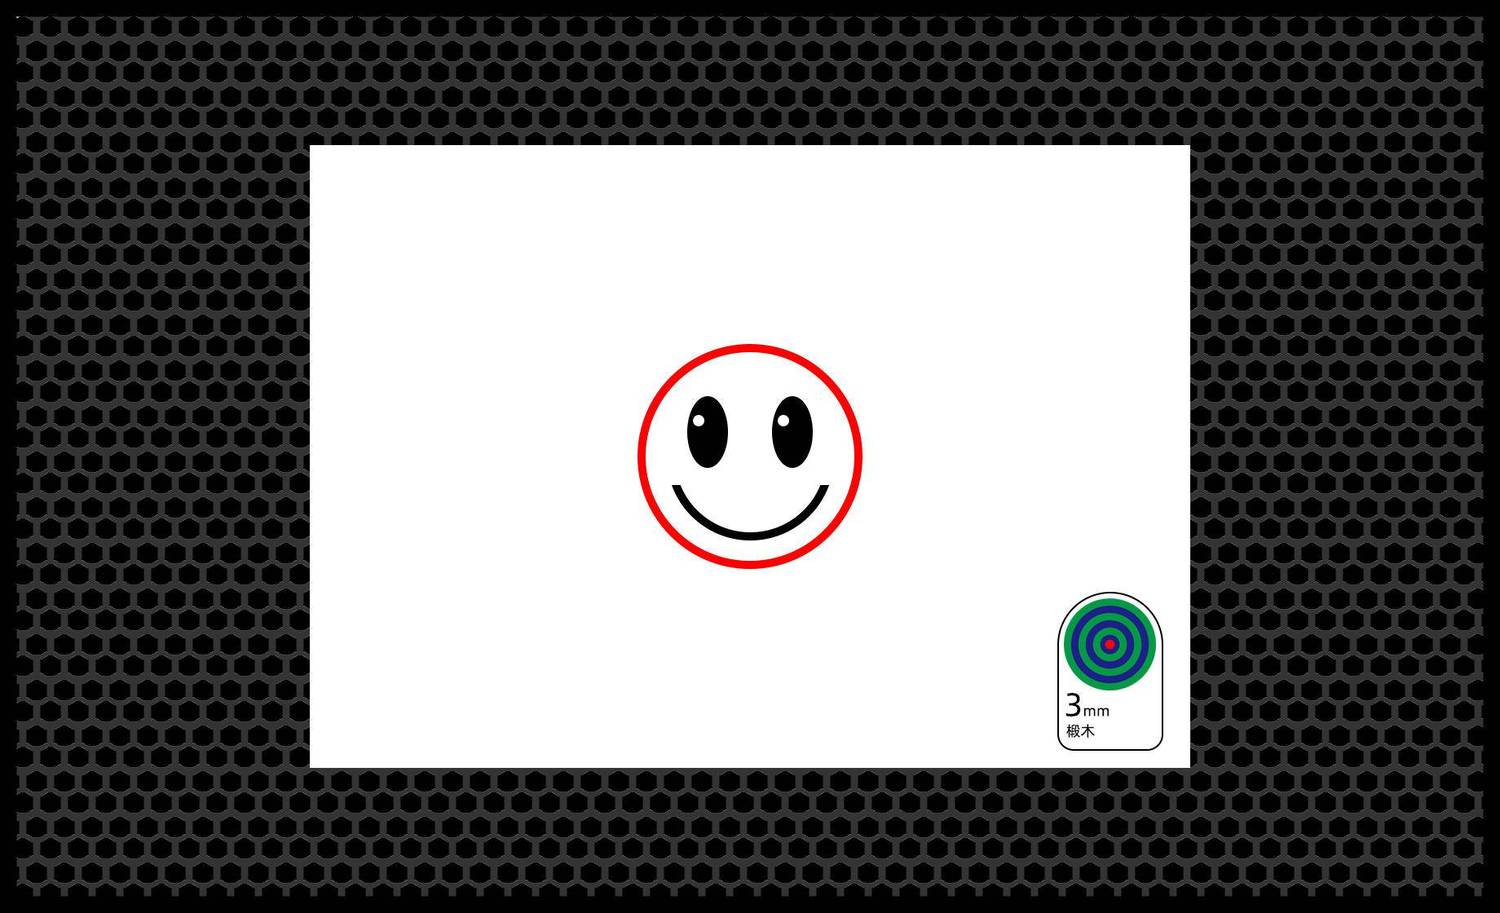
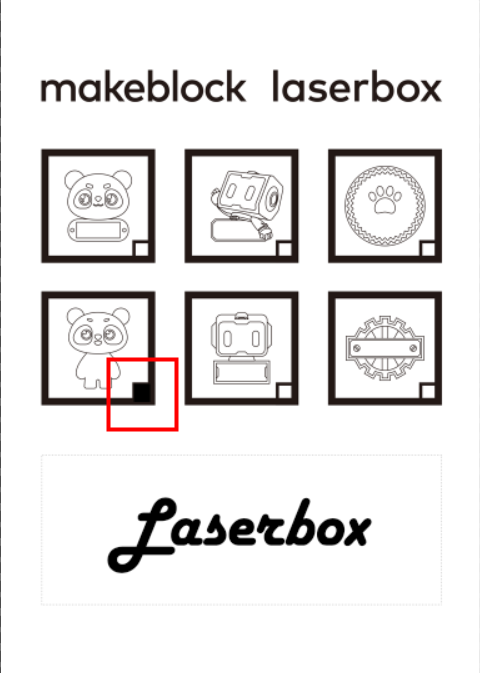
- Select an image.
Select an image you like. Use a black marker to fill the box at the bottom right corner of the image. Draw images or leave a signature in the dashed box below. Laserbox will engrave your drawings/signature into the image you just select.
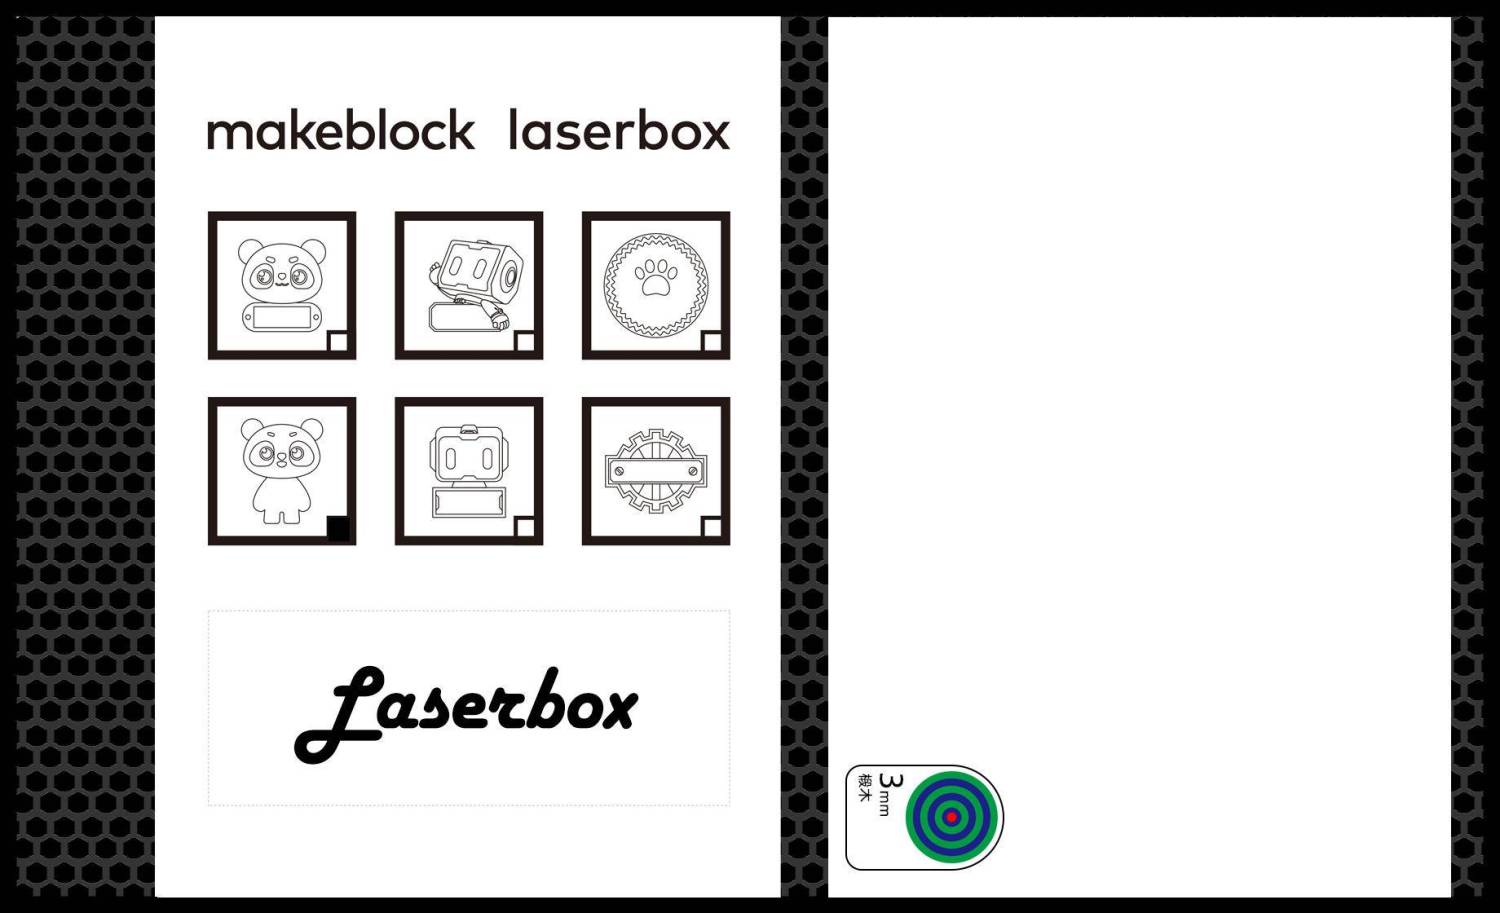
- Put it into Laserbox.
Open the lid. Put the A4 paper and 3mm basswood vertically as shown.in the working area. A4 paper on the left, 3mm basswood on the right. Please note that the upper edges of A4 paper and 3mm basswood should align with the upper edge of the honeycomb panel. And make sure the A4 paper is about 1cm distant from the basswood.
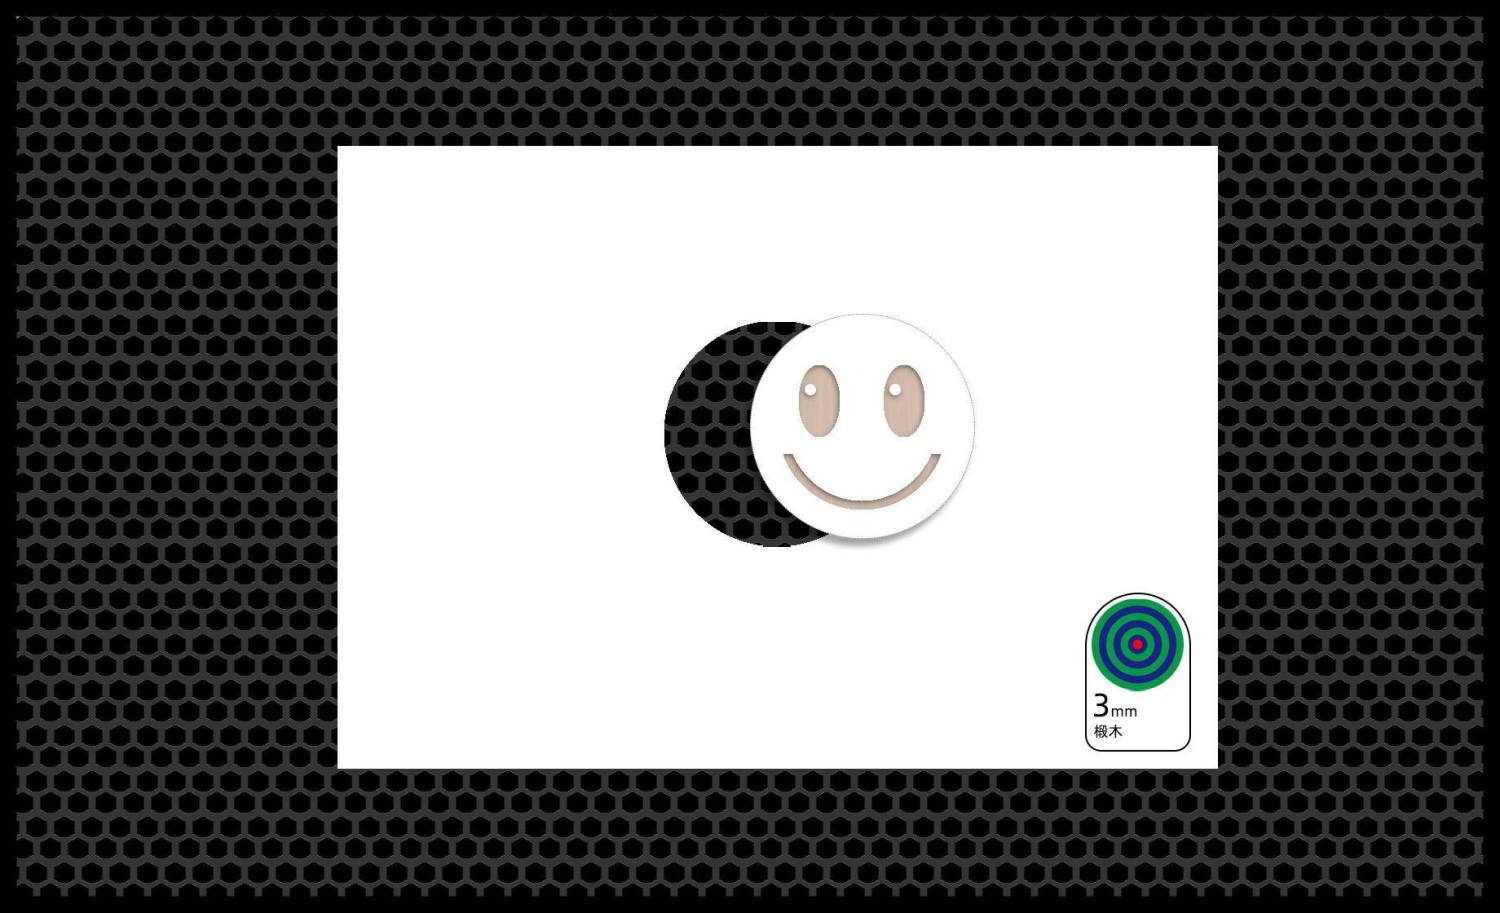
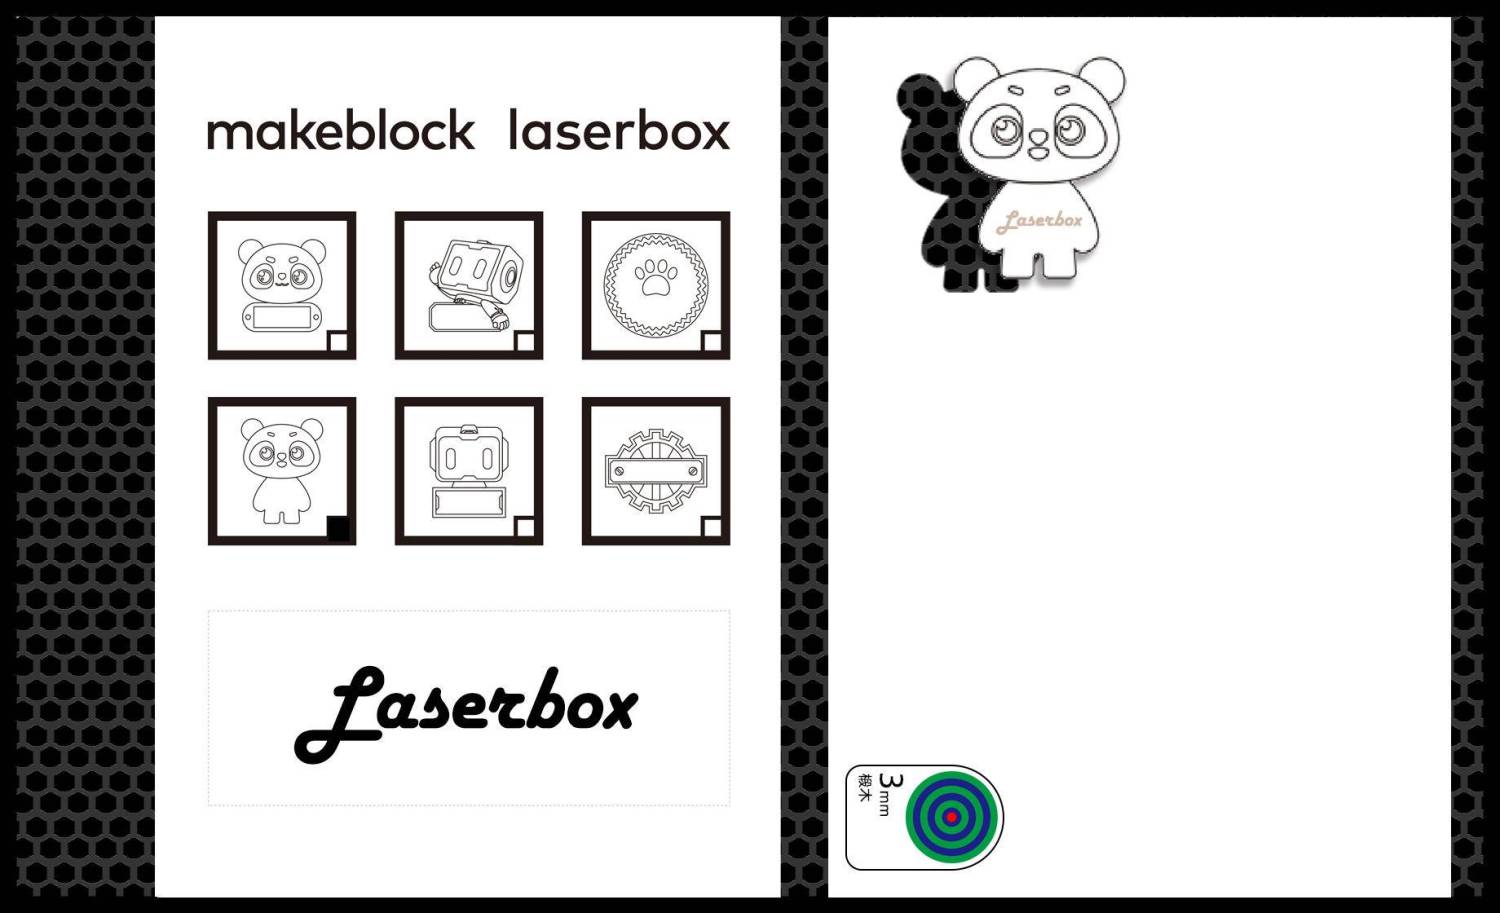
- Start processing.
Close the lid. Press the button on the laser cutter to let it automatically identify images and start processing. The image you select will be engraved on the material and cut out. The content in the dashed box will be engraved in the blank area of the image.
- Reuse the material.
Laserbox can automatically identify which areas are already processed, and decide where to process next. So a piece of 3mm basswood is reusable for multiple times.