How Can We Help?
Operation Guide of the “Display +” Extension for CyberPi
Operation Guide of the “Display +” Extension for CyberPi
Foreword
Hello, I’m Alex Yu, the product manager of CyberPi. I’m glad to introduce the Display + extension to you. It is the key feature update in iteration 003 of CyberPi.
This page describes the details about how to use the Display + extension and provides some example programs, both simple and complicated ones. The content on this page will be continuously updated and improved to help you use the Display + extension more efficiently.
Notice
- The Display + extension is available only for firmware 003 or later of CyberPi. You can update the firmware of CyberPi in OTA mode or on mBlock 5.
- Currently, CyberPi supports only mBlock 5 on the web. The PC client and mobile app will be launched around the end of September.
- The current Display + extension“ is a beta version and provides only some basic functions. Exceptions may occur when you use it, and its design still needs some improvement. Contact us if you have any suggestions or feedback on the improvement of this extension.
- Efforts will be made to ensure the compatibility of later official versions with projects created in the earlier versions, but the compatibility can’t be ensured.
- In the short term, this extension will support only the Upload mode and MicroPython programming due to the complexity of object-oriented programming.
Use the “Display +” extension
Add the Display + extension
After connecting CyberPi to mBlock 5, click + extension at the bottom of the blocks area, and then click + Add at the bottom of Display +.
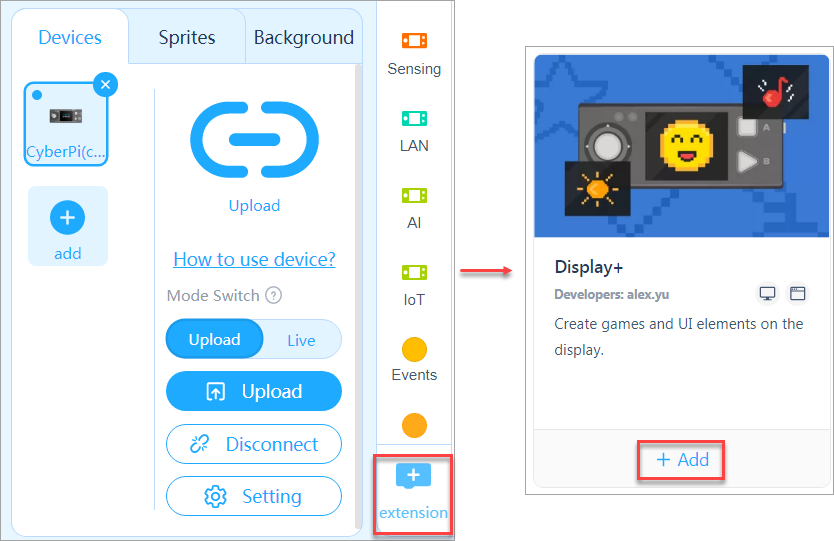
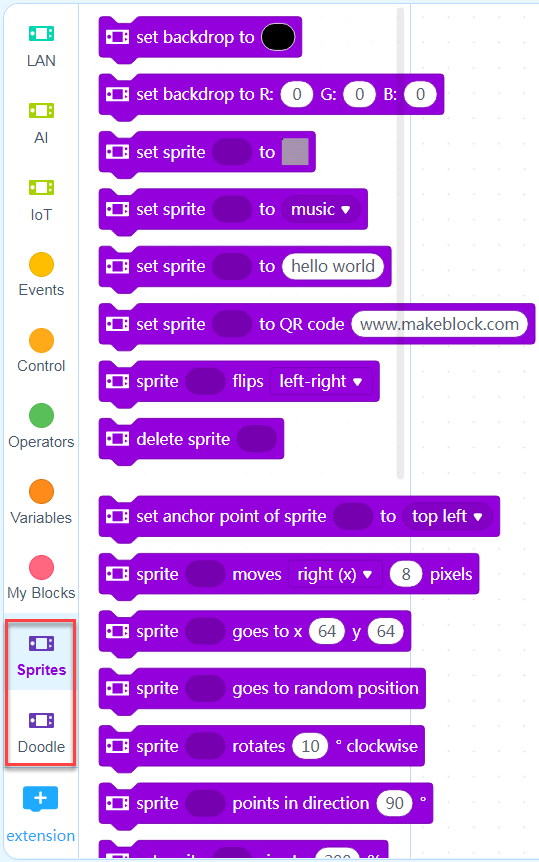
After adding the extension, you can see the Sprites and Doodle blocks.
The Display + extension extends the programmable functions of CyberPi’s screen. With this extension, you can design apps, games, and more complicated charts on CyberPi.
The Display + extension adopts the concept of object-oriented programming (OOP), and therefore, when you use this extension for programming, you need to define an object first.
The following figure describes the three basic steps for using the Display + extension for programming.
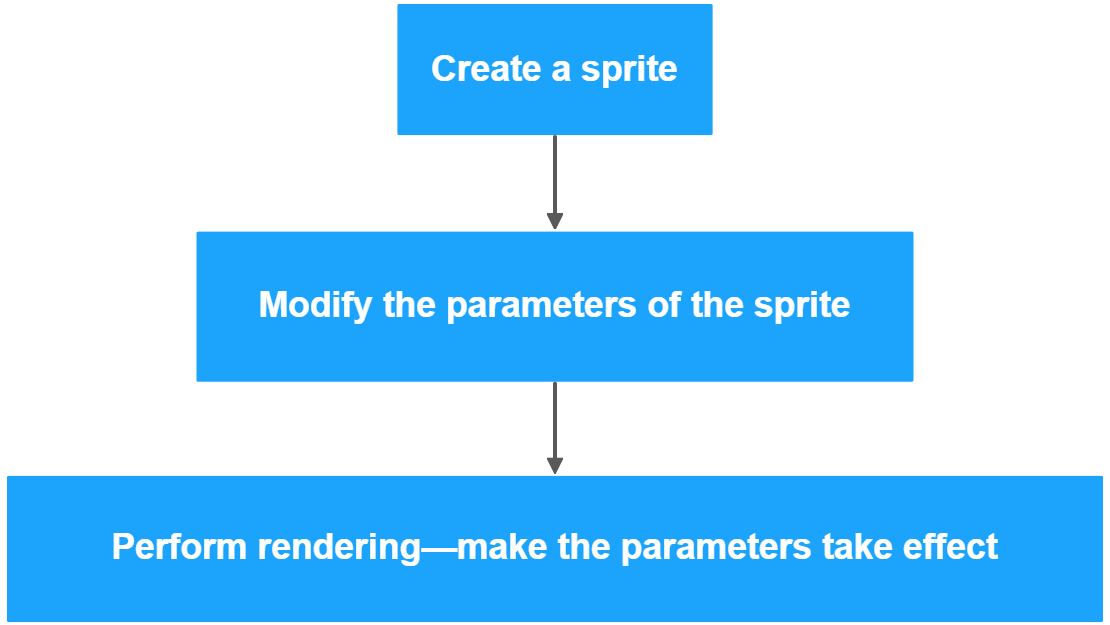
Create a sprite
Create a variable in the Variables category, and then define the variable as a sprite.
Tips: You can name a variable to be defined as a sprite in the format of s_XXX to distinguish it from an ordinary one. For example, s_text indicates a text variable to be defined as a sprite, and text indicates an ordinary text variable.
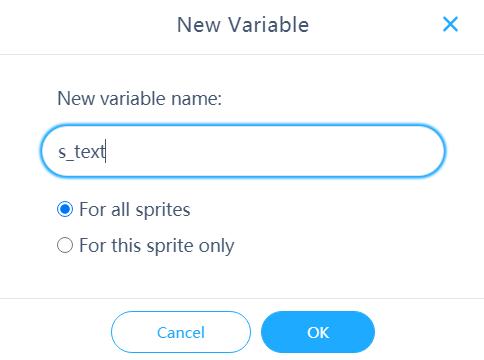
- Select the Variables category and click Make a Variable.
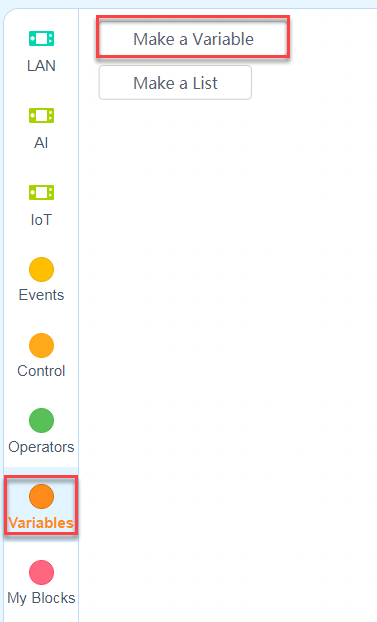
- In the New Variable dialog box that appears, enter the variable name and click OK.
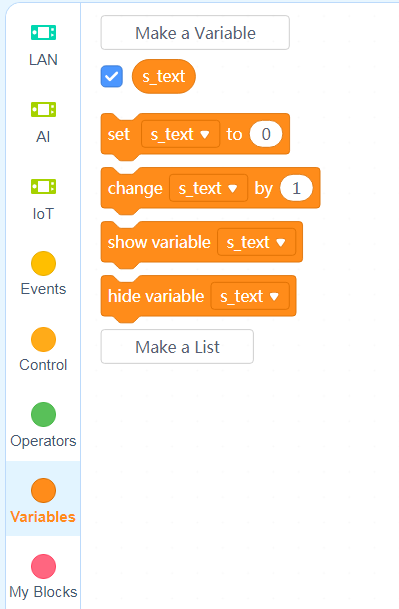
The created variable and its related blocks appear in the Variables category.
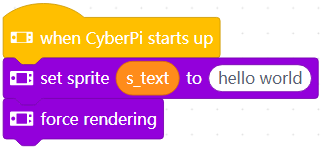
- Set the value of the created variable and define it as a sprite through blocks, as shown in the following example.
Summary:
The steps for creating a sprite are as follows:
creating a variable -> assigning a value and defining it as a sprite -> performing redering to display the sprite
Note that the sprite can be displayed only when you use the force rendering block.
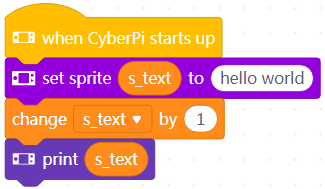
If a variable is defined as a sprite, you can no longer perform arithmetic operations on it because data of the sprite type does not support arithmetic operations. Errors may be reported if you do.
For example, an error is reported when you execute the following program.
Types of sprites
We have defined multiple types of sprites to facilitate your creation of projects. Generally, you can use the following blocks to define sprites.
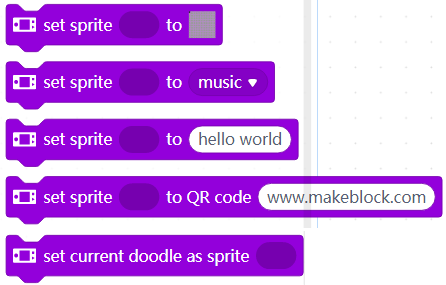
The following table describes the currently available types of sprites.
| Type | Block | Description |
| Matrix | 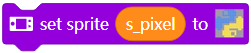 |
Defines a matrix pattern as a sprite
Tips: We have restricted the aspect ratio of matrix patterns for MicroPython programming, allowing you to create larger images, for example, a 128 × 128 (pixel) image. |
| Text |  |
Defines a text as a sprite |
| Icon |  |
Defines a preset icon as a sprite |
| QR code |  |
Defines a QR code as a sprite |
| Doodle |  |
Defines a sketch as a sprite
Tips: The Doodle blocks simulate the structures of Turtles drawing, which work best when you use them to draw geometric figures. |
Modify parameters for sprites
You can modify the parameters for a sprite through blocks or APIs. The following figure shows the currently available parameters for sprites.
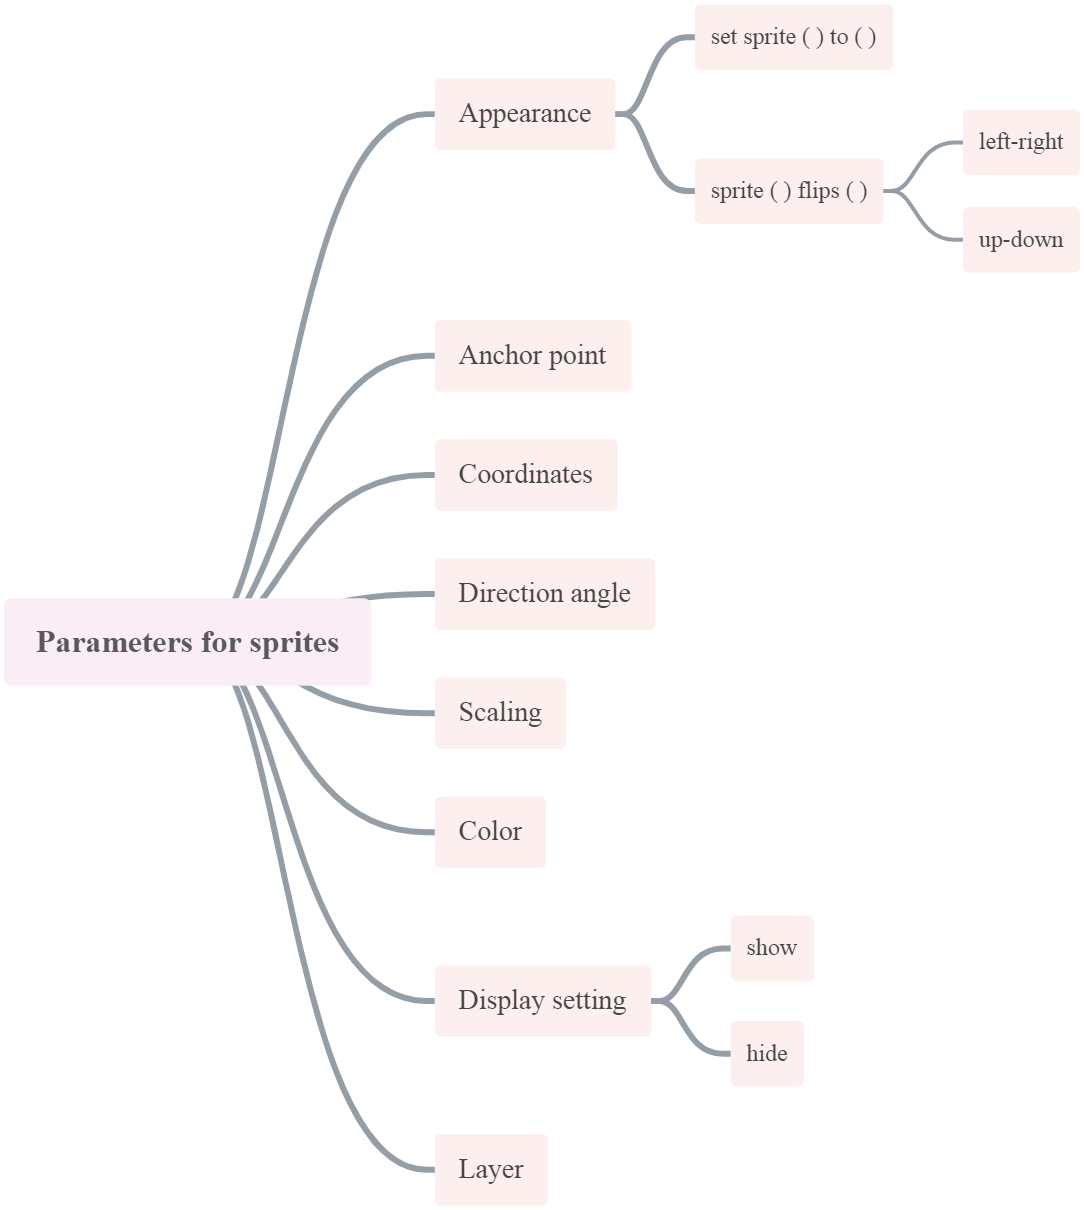
| Parameter | Block | Description |
| Appearance | 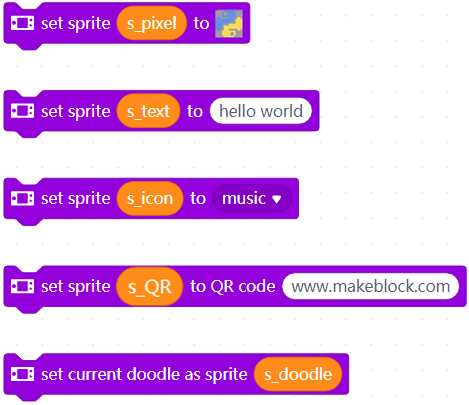 |
The appearance of the sprite depends on the blocks set sprite ( ) to ( ) and sprite ( ) flips ( ). |
| Anchor point | 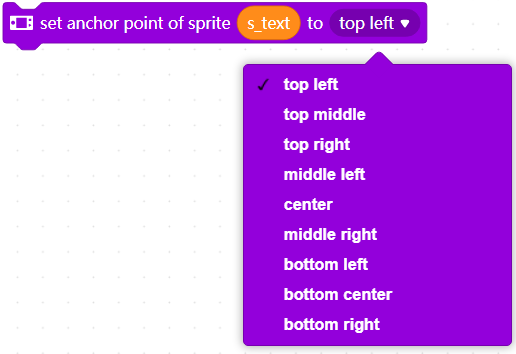 |
The anchor point determines the origin of the sprite and its center of rotation. |
| Coordinates | 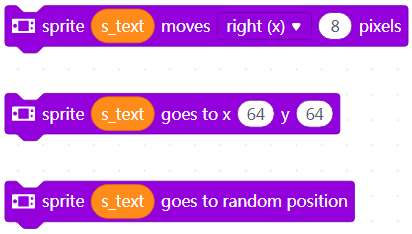 |
The coordinates determine the position of the sprite. You can move a sprite by changing its coordinates. |
| Direction angle | 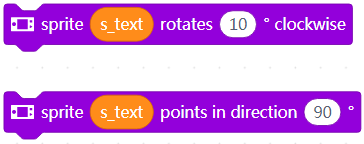 |
The direction angle determines the direction the sprite faces. You can rotate a sprite by changing its direction angle. |
| Scaling |  |
This block determines the ratio of the to-be-displayed sprite to the original size of the sprite. |
| Color | 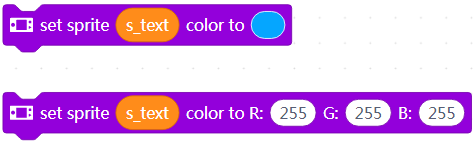 |
You can put a color layer over a sprite. For example, you can change the color of a text sprite from white to red. |
| Display setting | 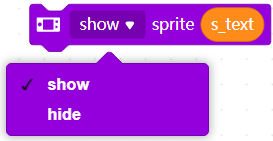 |
This block can be used to show or hide a sprite. |
| Layer | 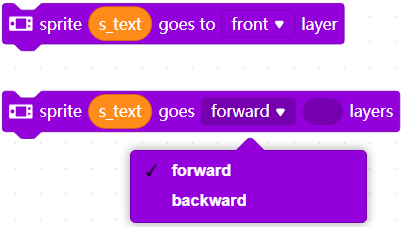 |
These blocks can be used to place a sprite on the specified layer. |
Tips: After a sprite is created, its parameters are set to the default values. When it is changed by using the block set sprite ( ) to ( ), all the other properties remain, except the reflecting effect. The reflecting effect is part of the appearance of the sprite.
Rendering
After modifying the properties of a sprite, you need to perform rendering on it to make the new properties take effect, that is, use the block force rendering.
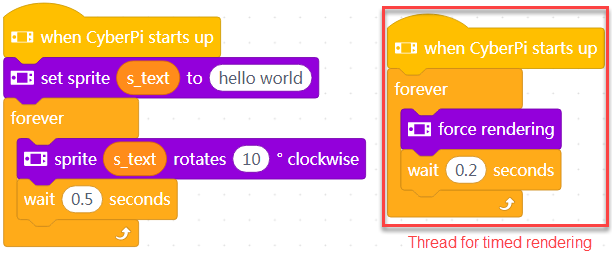
Each time of rendering is similar to generate a frame in animation. Using the force rendering function properly can make better use of the hardware performance.
CyberPi can execute multiple threads simultaneously, and therefore, you can write a thread to implement timed rendering.
The following shows an example.
The implementation of the rendering mechanism may be different from other graphical programming logic. We have also tried to design an automatic rendering mechanism but haven’t released it due to its stability.
Others
Detection
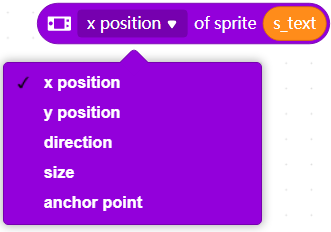
Some blocks are designed for users to obtain the status information of sprites. The following describes some of these blocks.
To obtain status information of a sprite, use:
To determine whether a sprite touches another one or the edge of the screen, use:
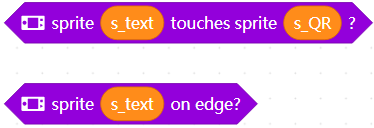
To determine the background color of the screen, use:
![]()
Background color setting
To set the color of the background, use:
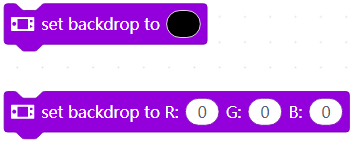
Note: After setting the color, you need to use the block force rendering to make the setting take effect.
Example programs
Aircraft War
In this example, detection of touching and self-defined matrix patterns are used.
Fun with Arithmetic
In this example, the function for defining sprites is used to implement the alternation of questions and answers.