How Can We Help?
[Arduino Device] Add an Arduino Device
- Click Add device.
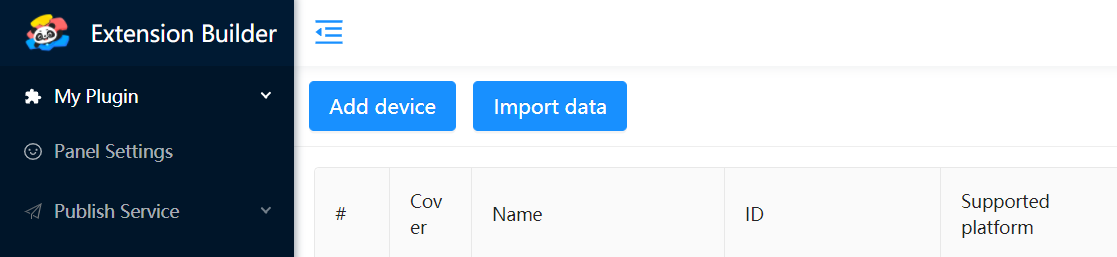
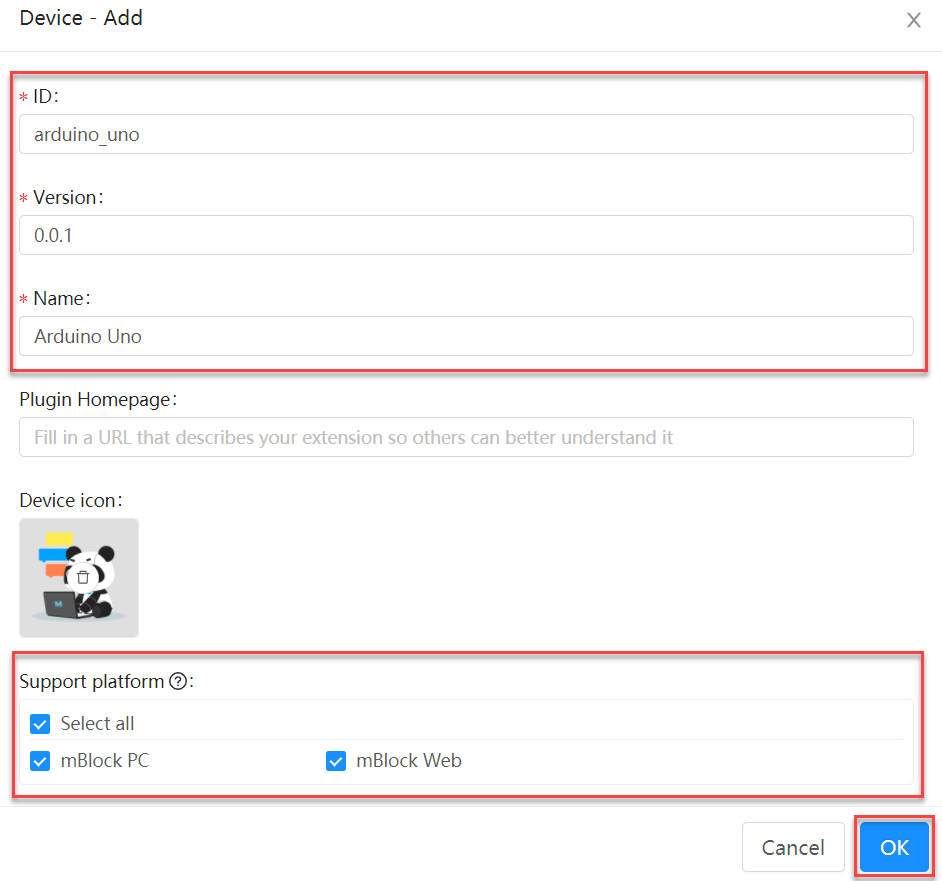
- Set ID, Version, Name, and Support platform for the device, and click OK.
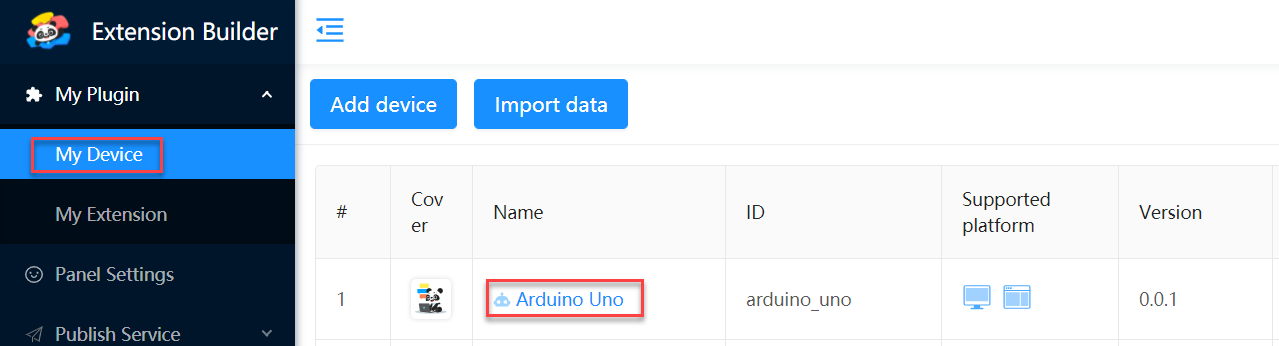
- Click the device name in the My Device list to enter the editing page.
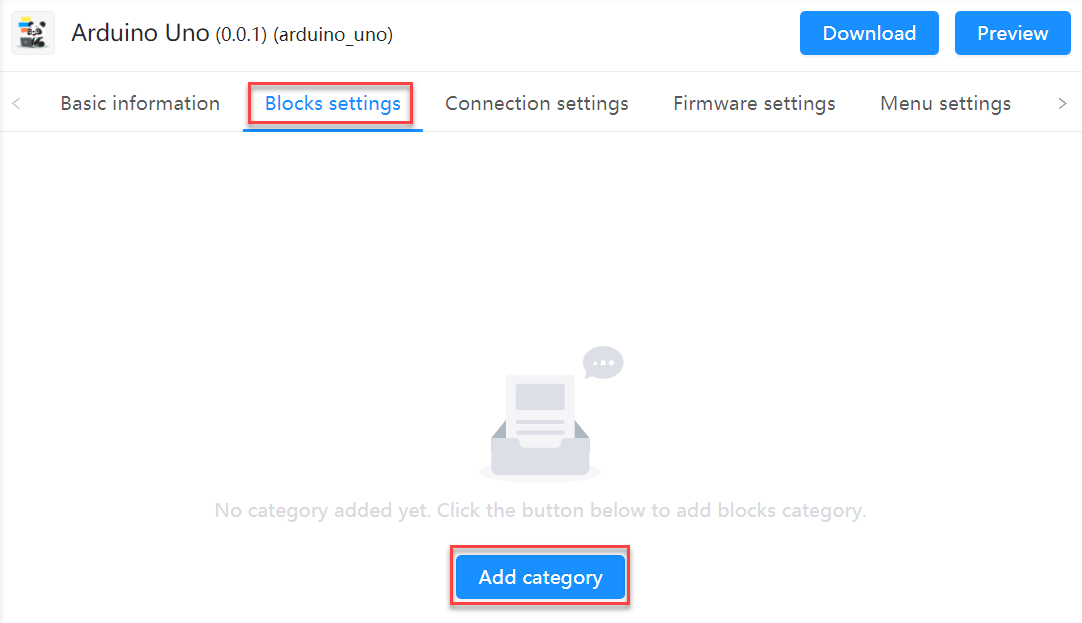
- Click Add category on the Blocks settings tab.
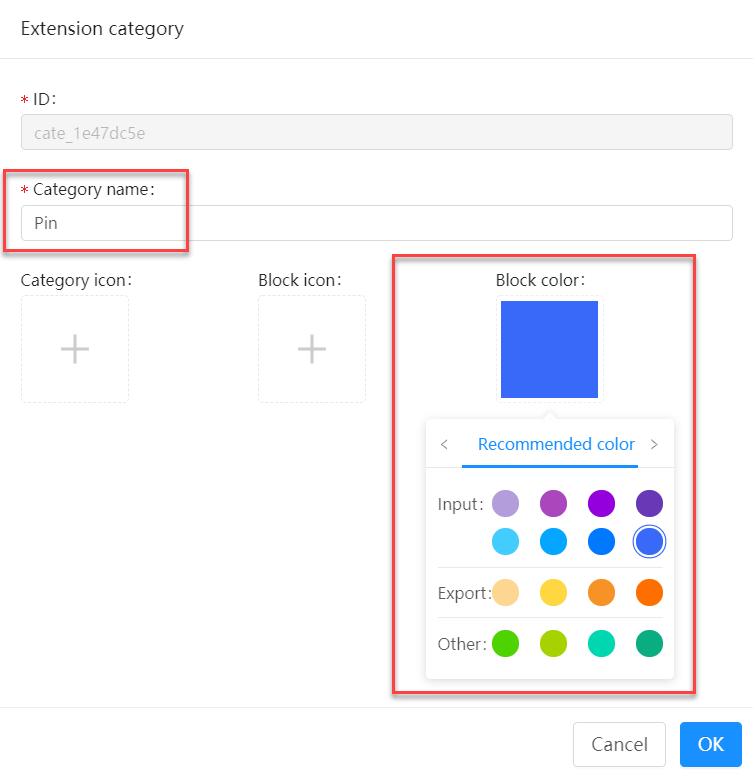
- Set Category name and click OK.
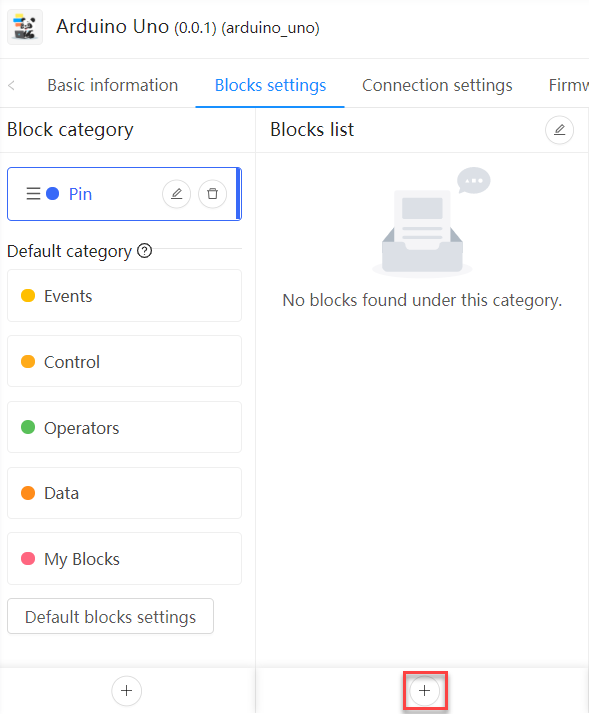
- Click + in the Blocks list area to add a block.
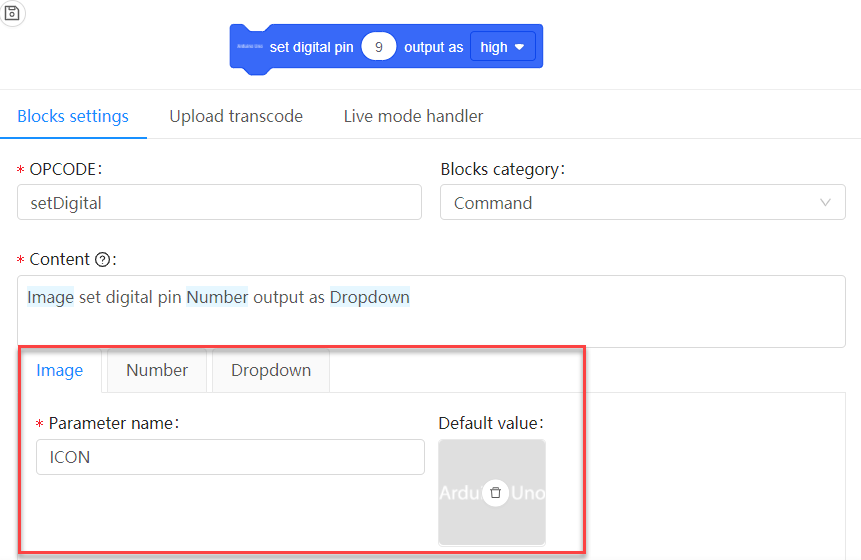
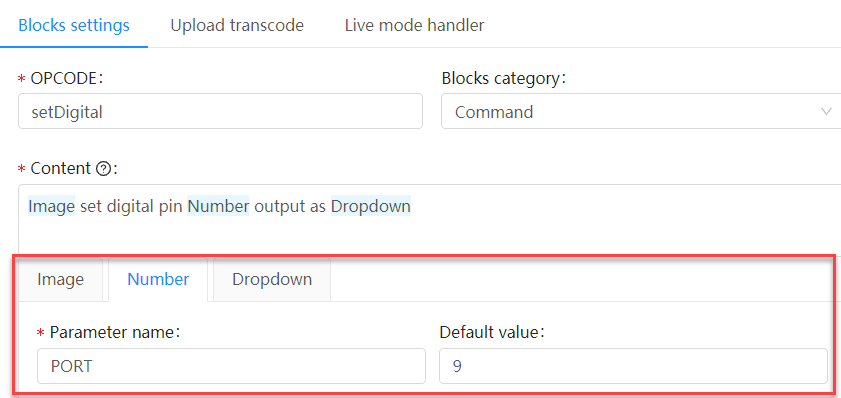
- Set OPCODE and Content for the block.
 Tips: When setting Content, you can press “space+@” to add a parameter.
(1) Set an icon.
(2) Set the name and default value for the number parameter.
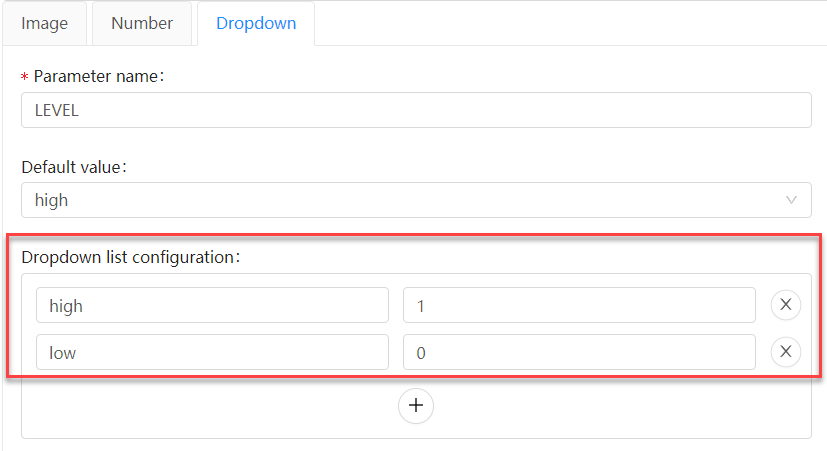
(3) Set the value options for the dropdown parameter.
8. Select the support platforms, and click Save.
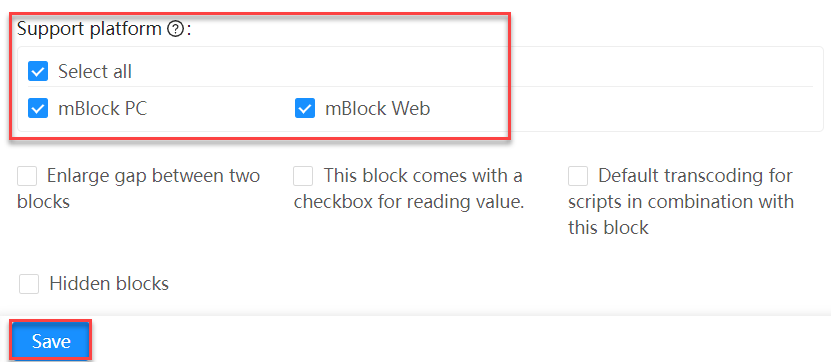
When you select all the platforms, the block can be used on both the mBlock 5 PC client and web version.
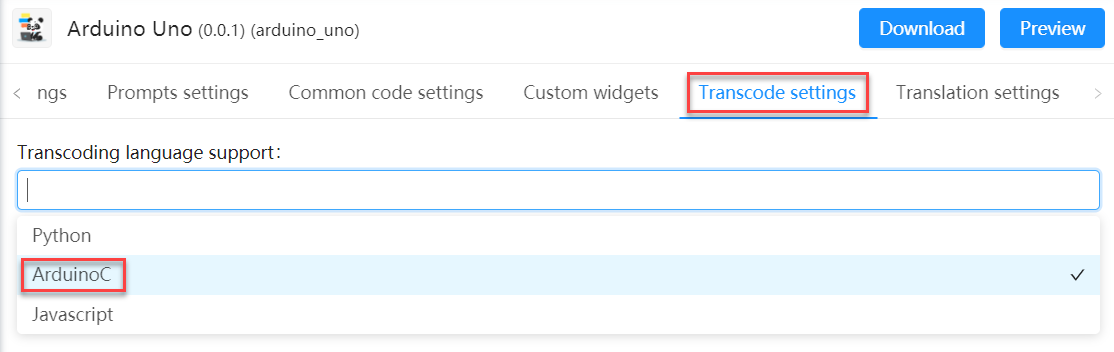
9. Click the Transcode settings tab, set Transcoding language support to Arduino C, and click Save.
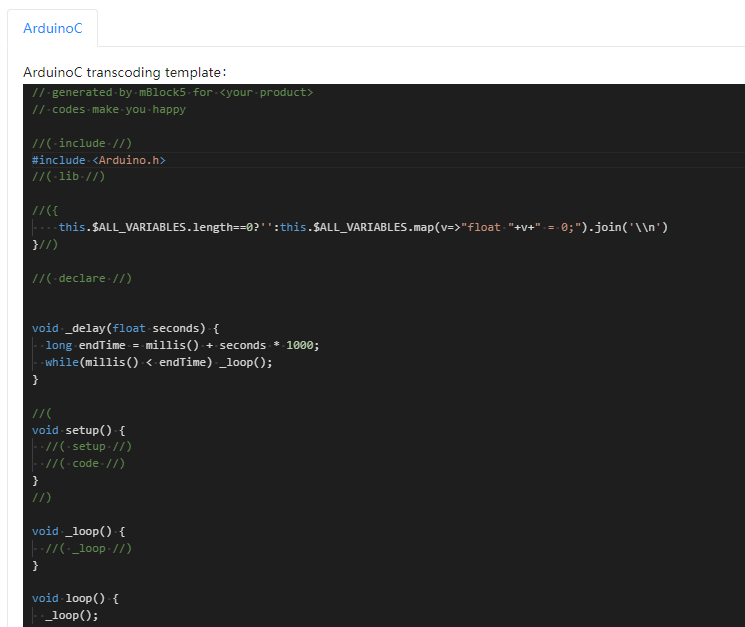
The following code is included in the Arduino C transcoding template, which can be used to set a delay or define _loop.
Code:
1 // generated by mBlock5 for <your product>
2 // codes make you happy
3
4 //( include //)
5 #include <Arduino.h>
6 //( lib //)
7
8 //({
9 this.$ALL_VARIABLES.length==0?”:this.$ALL_VARIABLES.map(v=>”float “+v+” = 0;”).join(‘\\n’)
10 }//)
11
12 //( declare //)
13
14
15 void _delay(float seconds) {
16 long endTime = millis() + seconds * 1000;
17 while(millis() < endTime) _loop();
18 }
19
20 //(
21 void setup() {
22 //( setup //)
23 //( code //)
24 }
25 //)
26
27 void _loop() {
28 //( _loop //)
29 }
30
31 void loop() {
32 _loop();
33 }
10. Click the Connection settings tab and set vendor ID to 0x2A03.
(This parameter is used for serial port filtering. The vendor ID for Uno is 0x2A03.)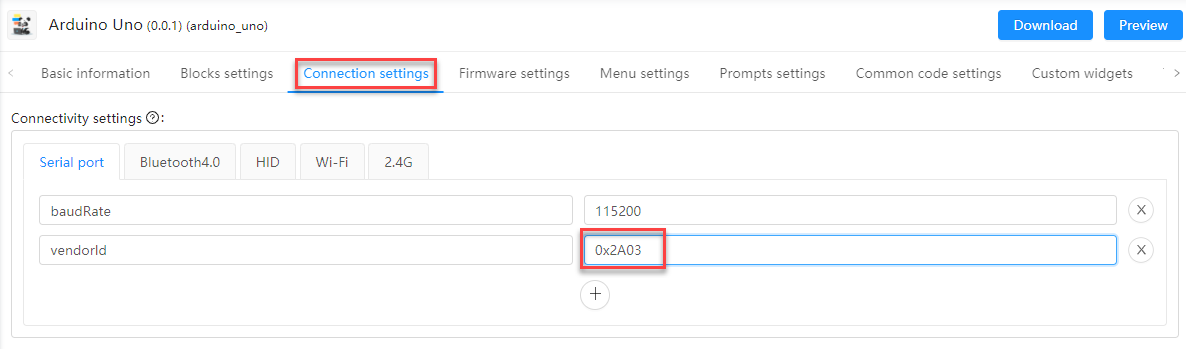
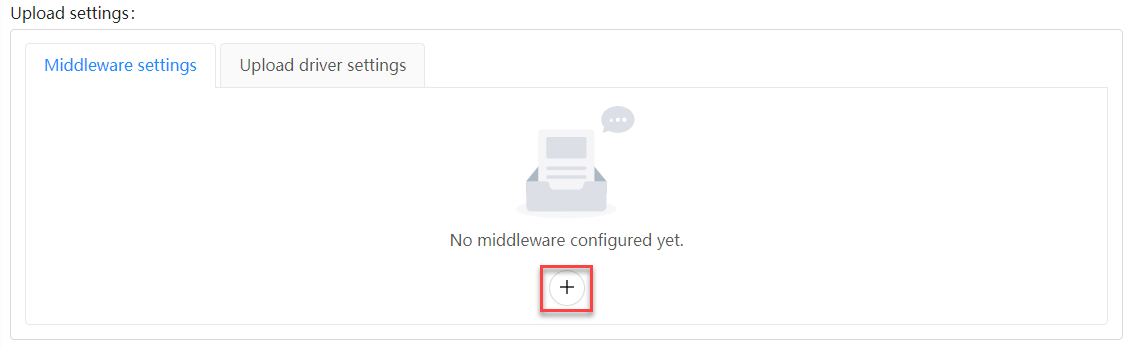
11. Configure middleware.
(1) Click + to add middleware.
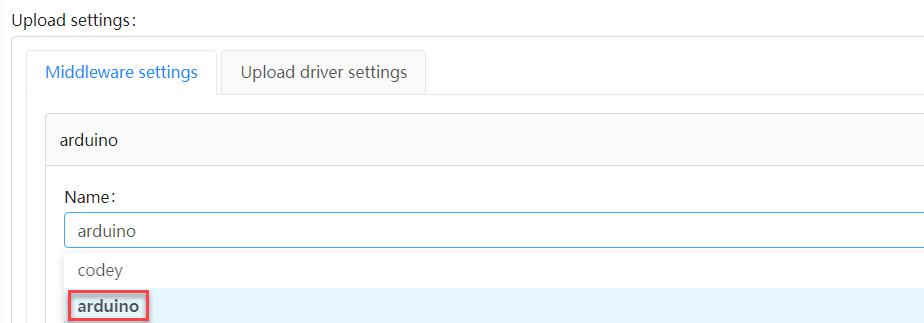
(2) Set Name to arduino.
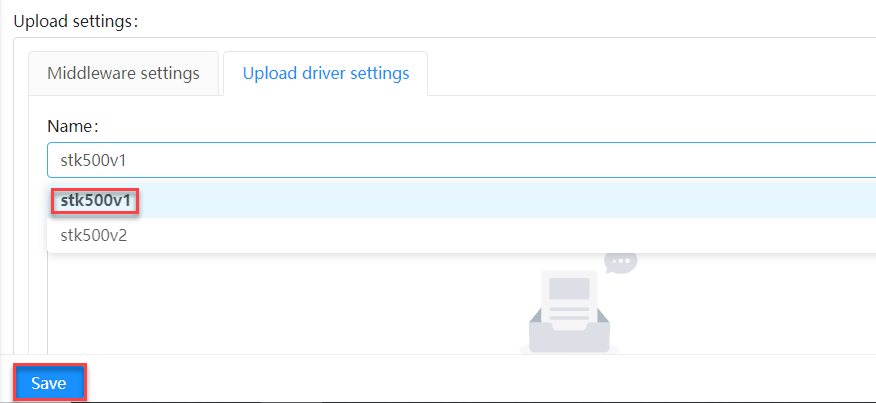
(3) Click the Upload driver settings tab, set Name to stk500v1, and click Save.
12. Click the Blocks settings tab, and click Upload transcode.
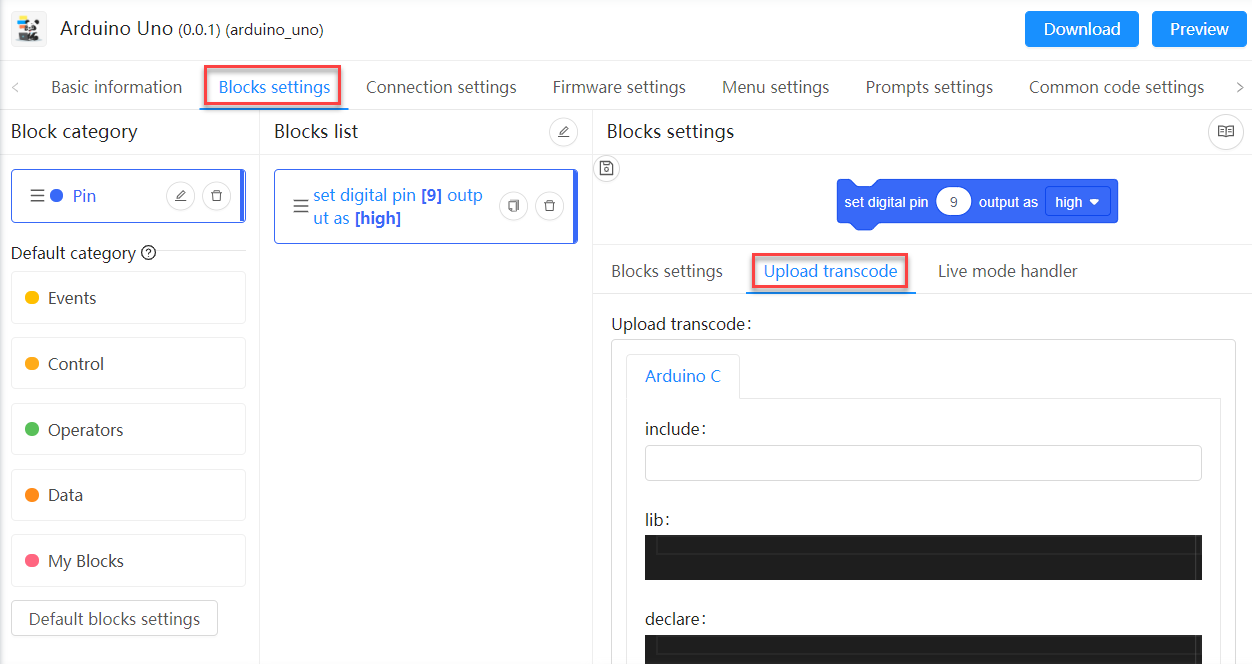
13. Set code, and click Save.
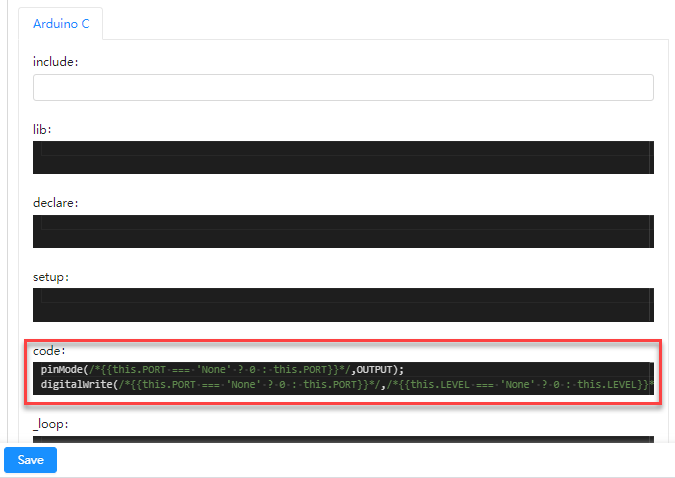
1 code:
2 pinMode(/*{{this.PORT === ‘None’ ? 0 : this.PORT}}*/,OUTPUT);
3 digitalWrite(/*{{this.PORT === ‘None’ ? 0 : this.PORT}}*/,/*{{this.LEVEL === ‘None’ ? 0 : this.LEVEL}}*/);
14. Click the Events category, and click +.
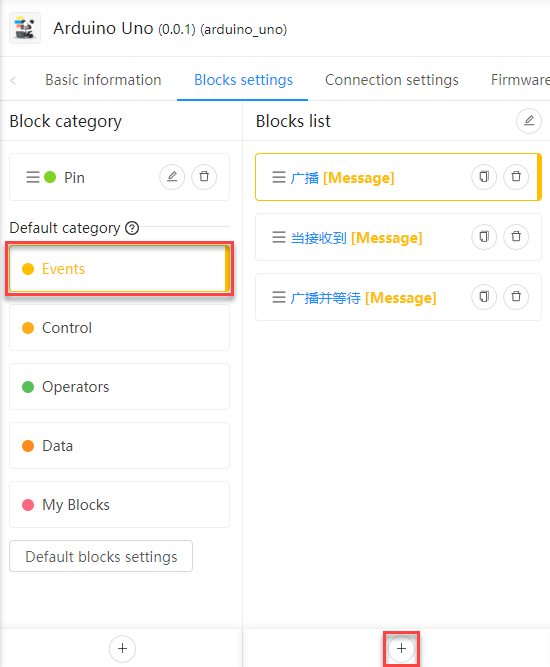
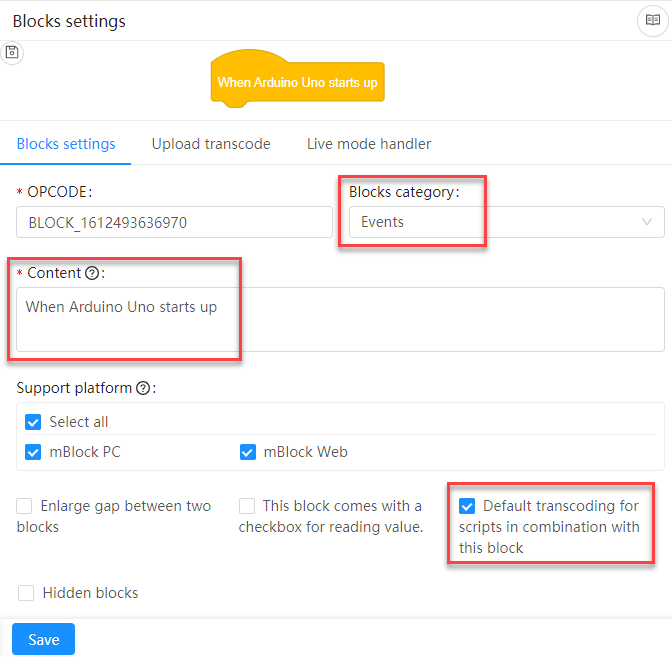
15. Set the content and support platform for the block, and click Save.
Note: Ensure that Blocks category is set to Events.
16. Set Upload transcode for the block, and click Save.
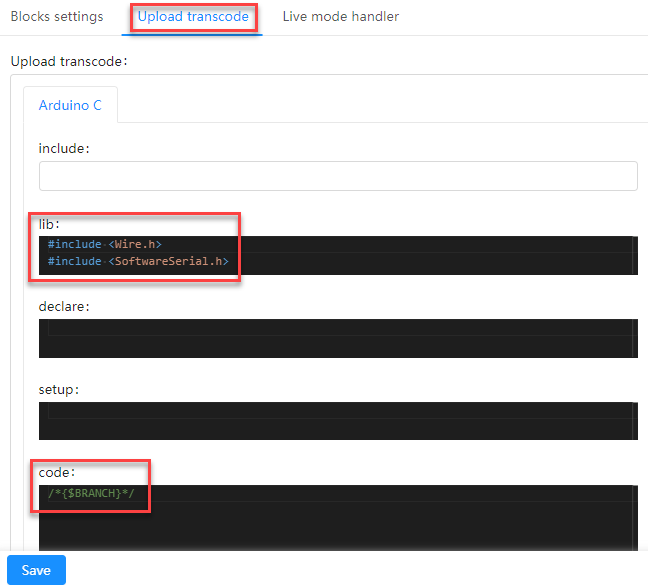
Code:
1 lib:
2 #include <Wire.h>
3 #include <SoftwareSerial.h>
4 code:
5 /*{$BRANCH}*/ // Here, $BRANCH refers to the corresponding code of the block that is put under this Events block.
17. Click Download to download the device extension.

The extension builder automatically packages the extension, and you can click Download now to download it.
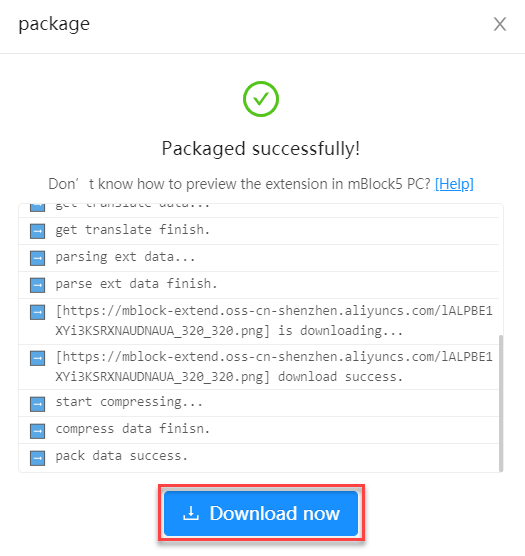
The extension is downloaded as a .mext file.
![]()
18. Drag the .mext file to your mBlock 5 PC client.
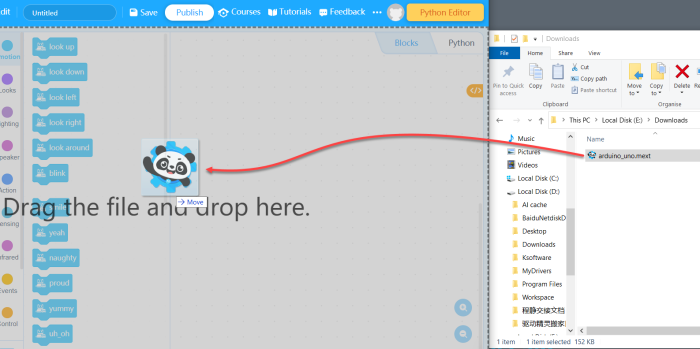
You can see the device and the block you have configured.
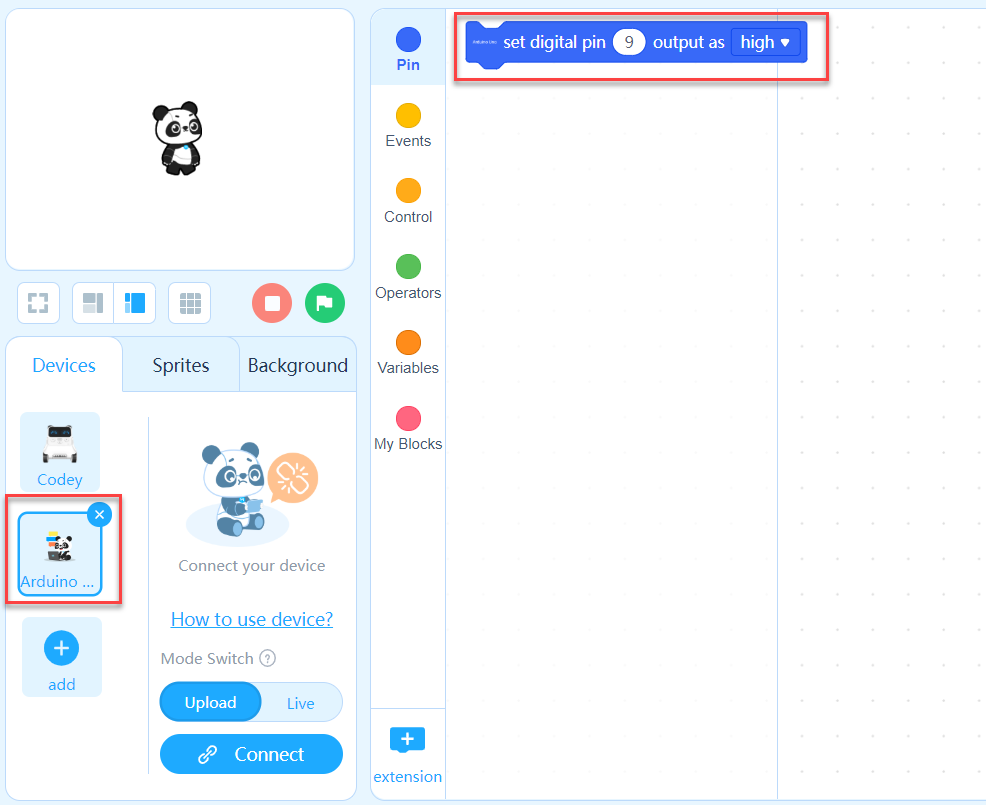
19. Connect your Arduino Uno to your PC and click Connect on mBlock 5.

20. Drag blocks to the scripts area and upload the program to the device.
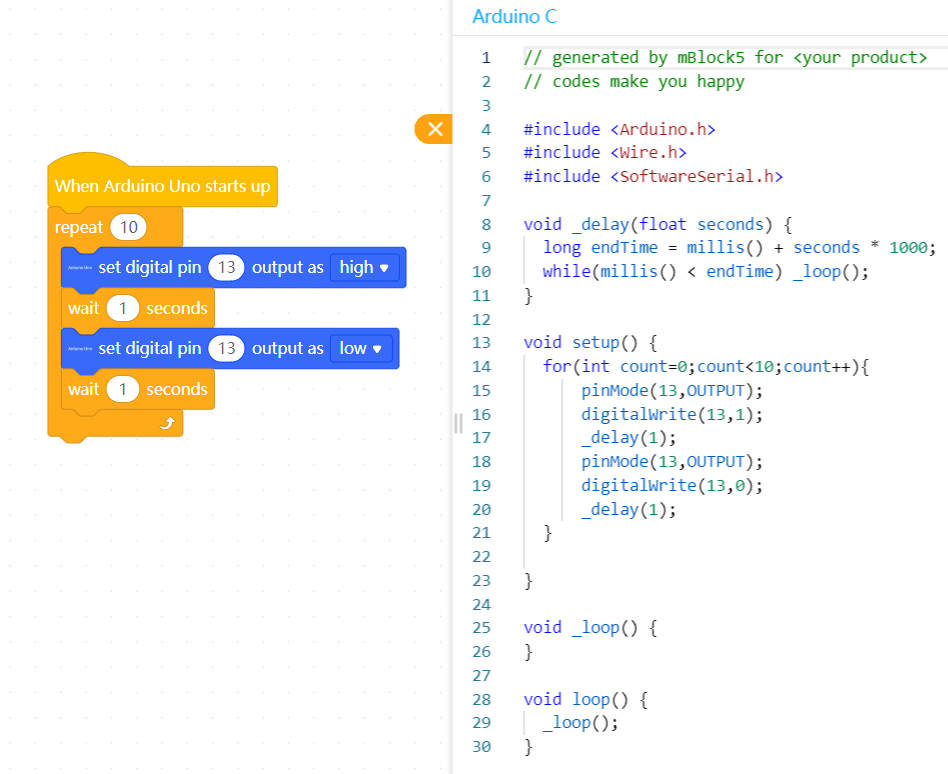
Start Arduino Uno.
If the yellow LED on it blinks ten times, your device extension has been successfully developed.