How Can We Help?
[Arduino] Create an LED Extension (Using the Universal Template)
Tips:
On this page, the extension is created using the universal template.
For creating an LED control block for Arduino Uno, you can also refer to the example that uses the default Arduino template in the ” [Arduino] Create an LED Extension (Using the Default Arduino Template).” Comparing these two examples, you will understand the advantages of the default Arduino template in creating Arduino extensions.
This page describes how to create an LED block to control an LED connected to Arduino Uno, using an LED module of the Seeed Studio Grove Starter Kit as an example. You can also use an LED module of another electronic kit.
Step 1: Sign in to Extension Builder and create an extension
- Visit ext.mblock.cc ext and sign in to your mBlock 5 account.
Note: If you haven’t got an account, sign up one.
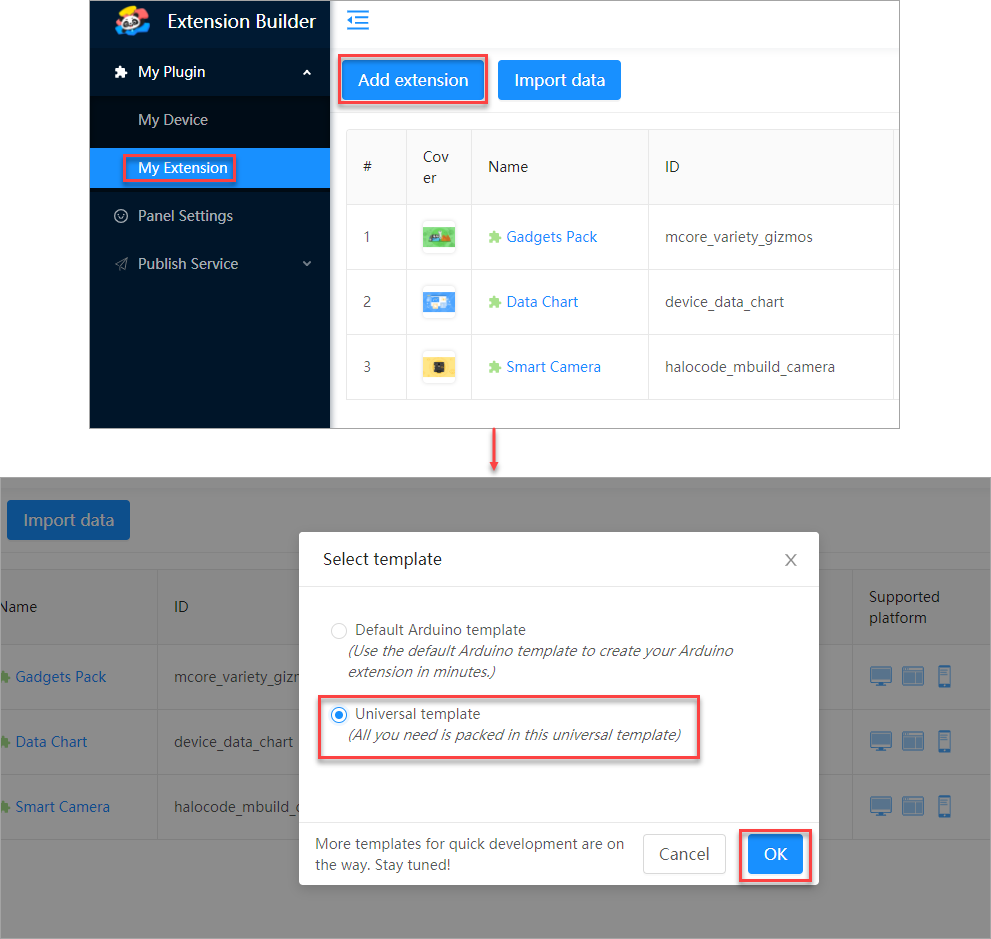
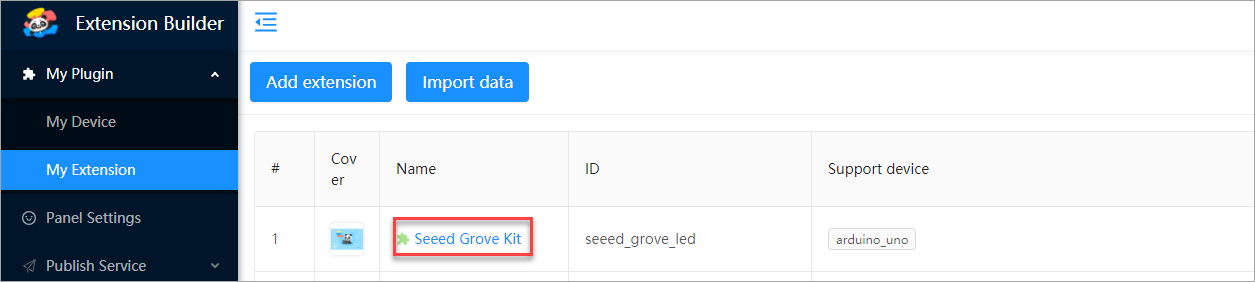
2. Choose My Plugin > My Extension, click Add extension, select the default Arduino template in the dialog box that appears, and click OK.
3. Set the ID, version number, supported platform(s), and supported device or sprite for the extension, and click OK.
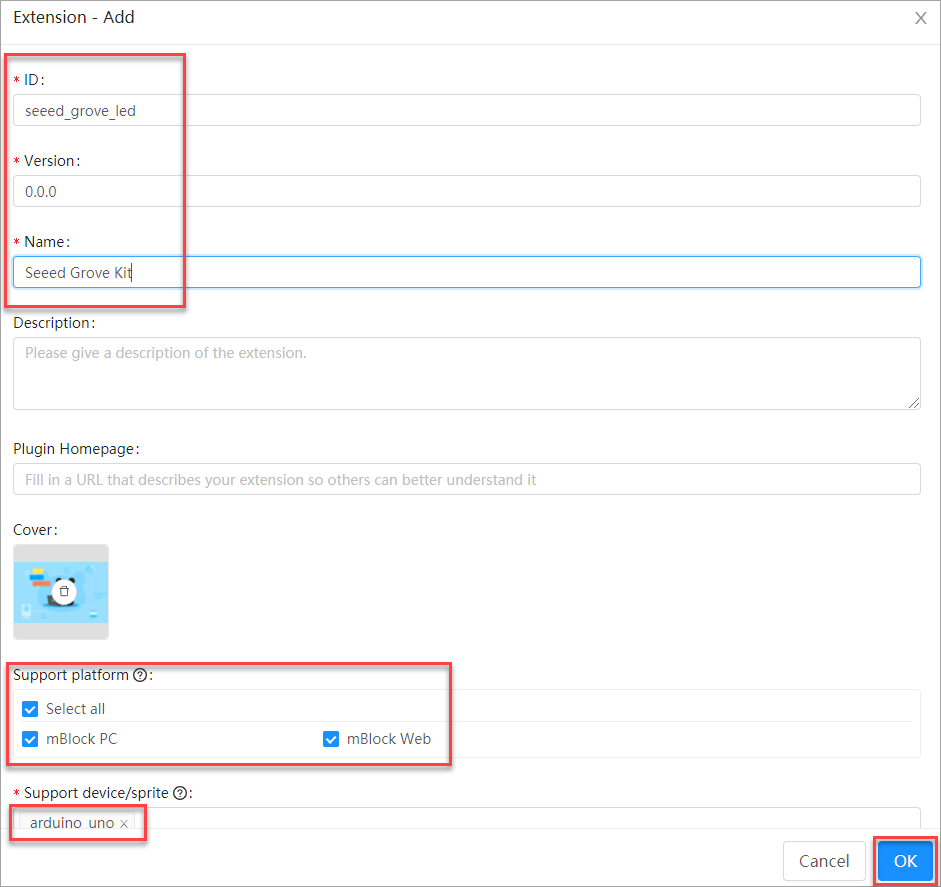
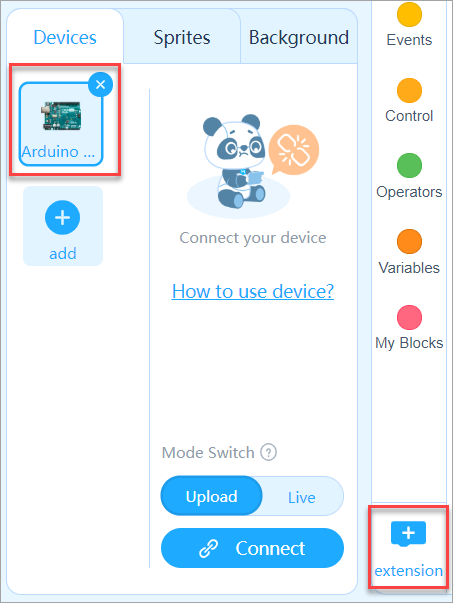
If you set Support device/sprite to arduino_uno when creating an extension. After the extension is published, you can click + extension to add the extension for the Arduino Uno device on mBlock 5.
Step 2: Add a block
- Click the name of the extension in the extension list to open the editing page.
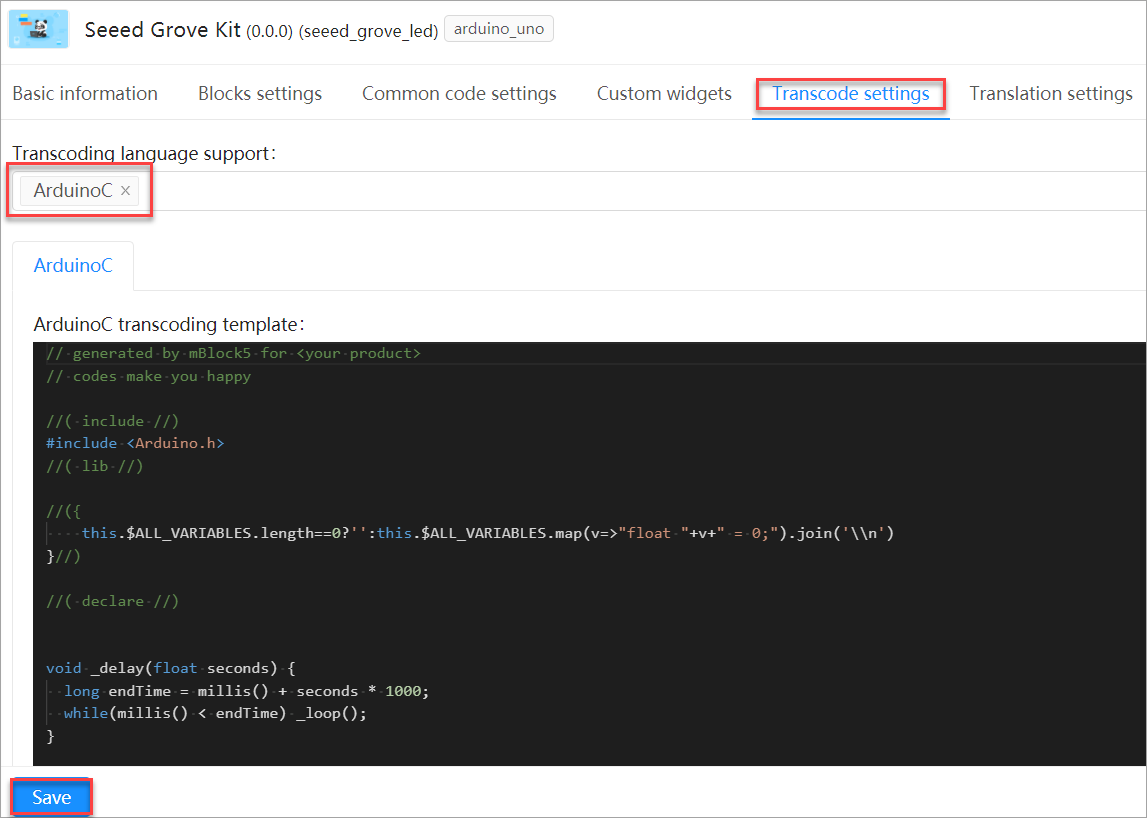
2. Set the transcoding language before you add a block.
Click Transcode settings, set Transcoding language support to ArduinoC, and click OK.
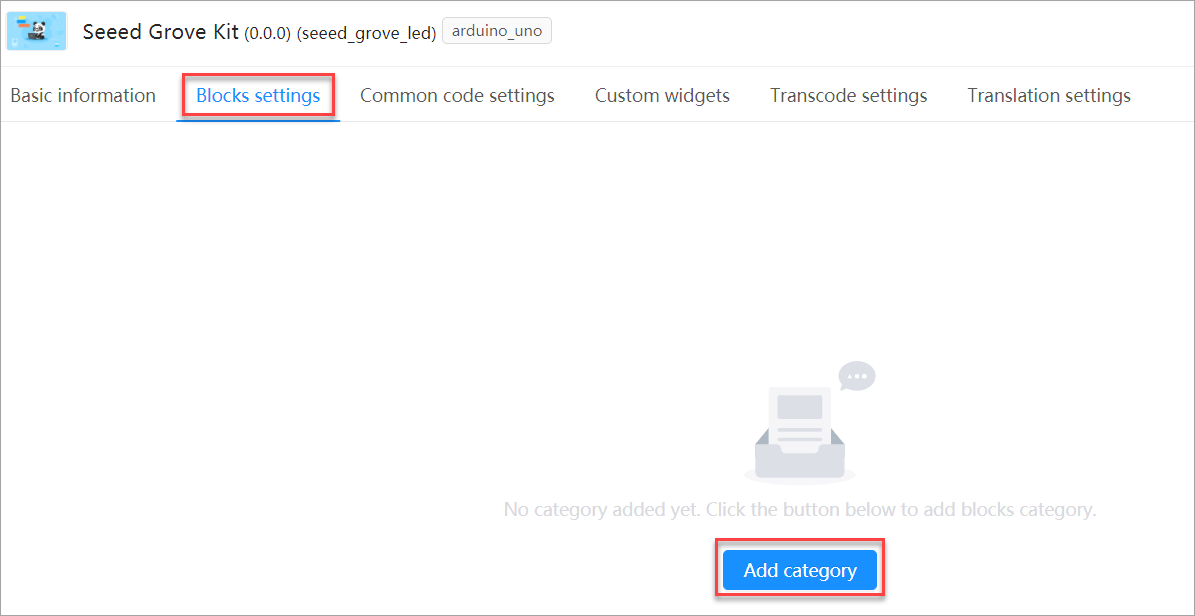
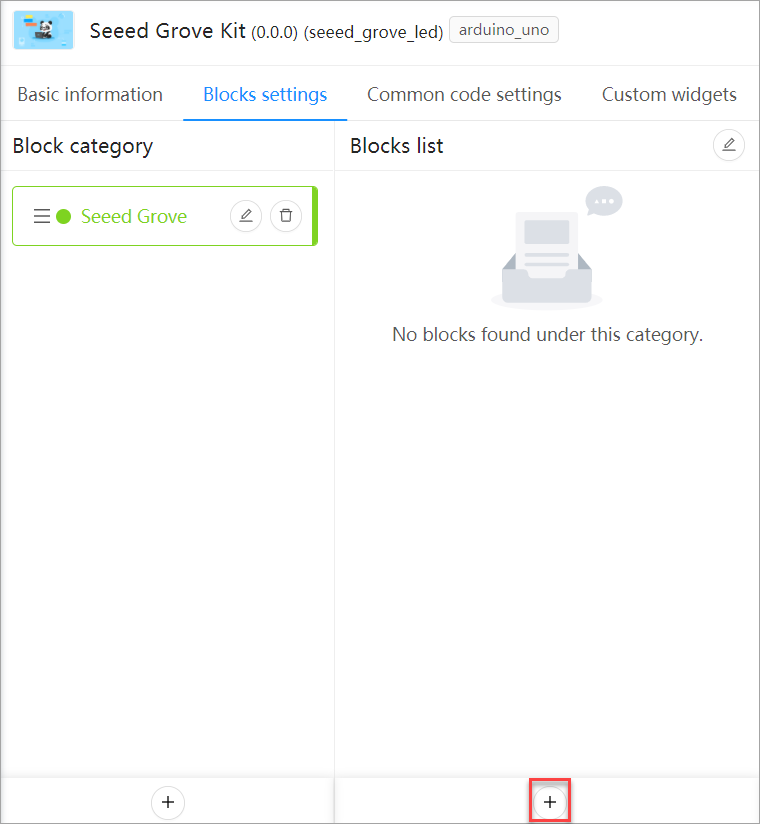
3. Click Block settings, and click Add category.
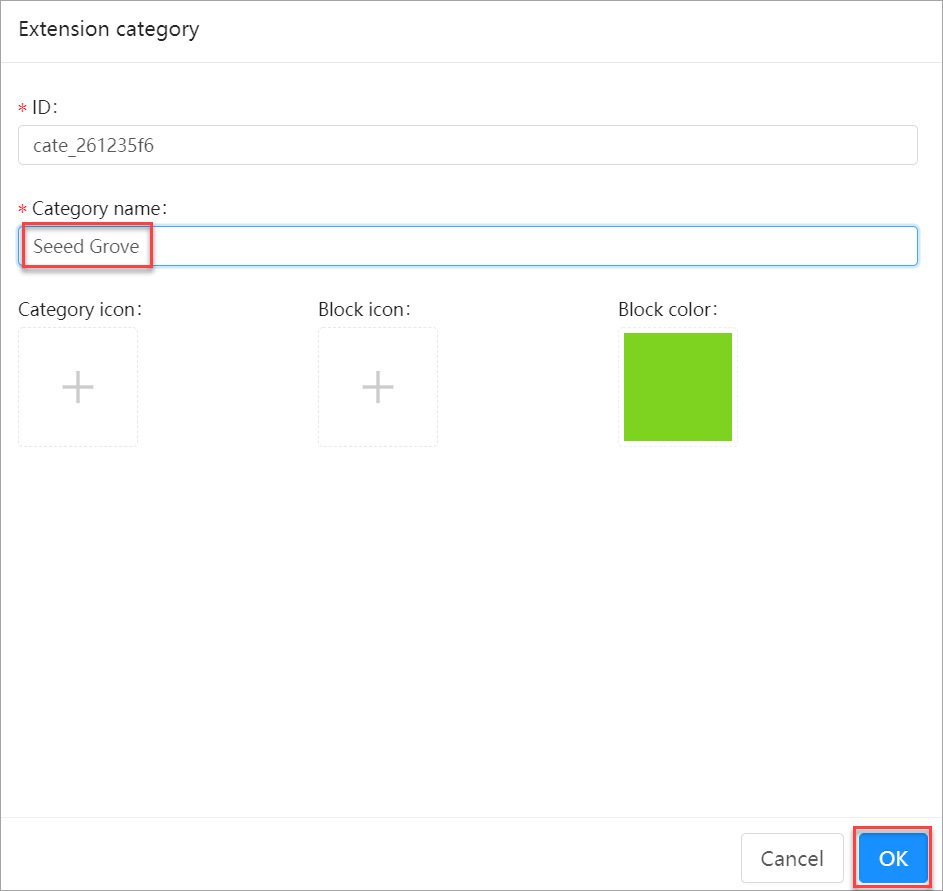
4. Name the block category Seeed Grove.
Note: You can set the name and block color for the category.
5. Click + at the bottom of the Blocks list area.
6. Create a block for this extension: LED (D2) lights (up).
7. Set the content. Set the port and status as parameters of the drop-down list type. Enter “space + @” to configure a parameter.
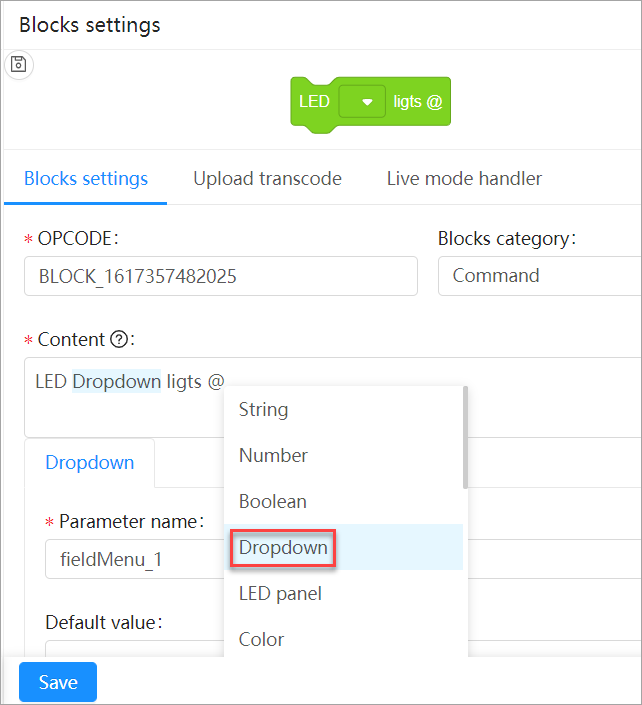
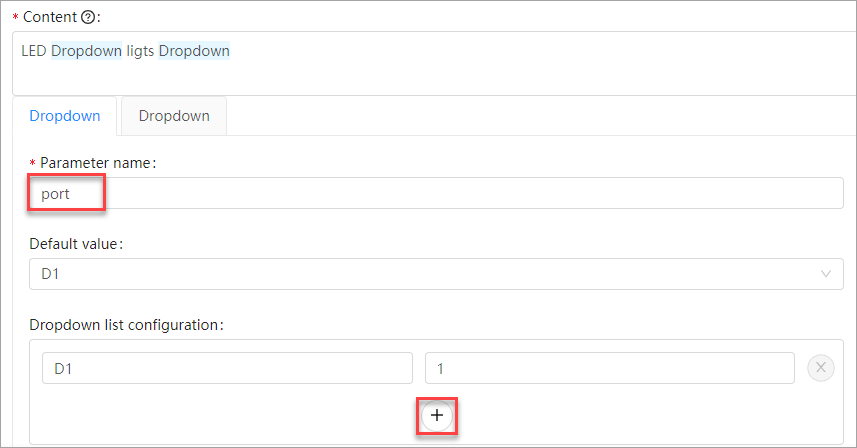
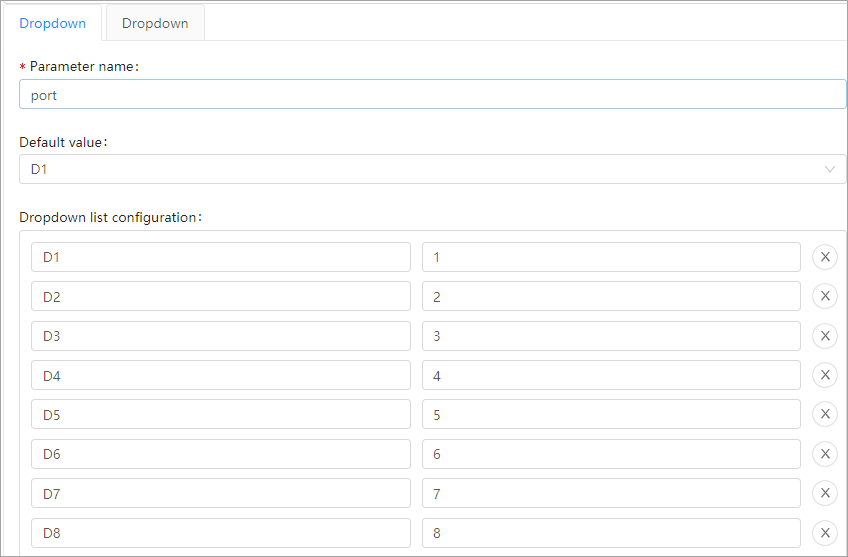
8. Configure the first parameter: port.
Set the parameter name, default value, and value list.
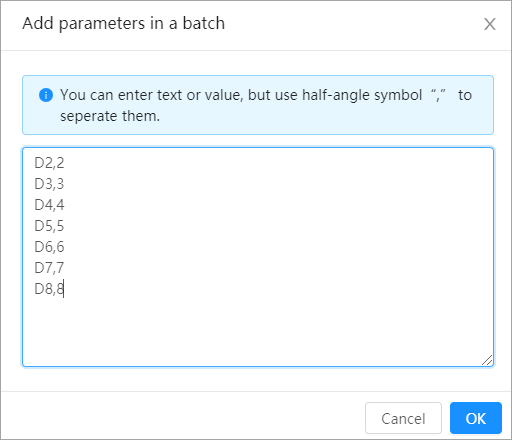
The LEDs of the Seeed Grove kit can be connected to port D1 to D8 of the Arduino Uno board.
Note: You can click + to add parameter values in batches.
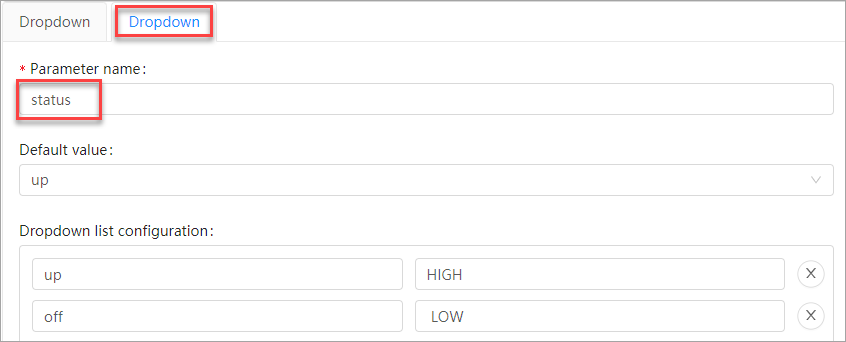
9. Configure the second parameter: status.
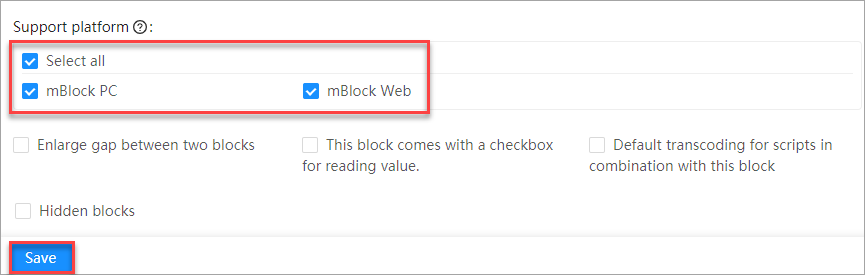
10. Select the supported platform(s), and click Save.
Step 3: Set the transcoding
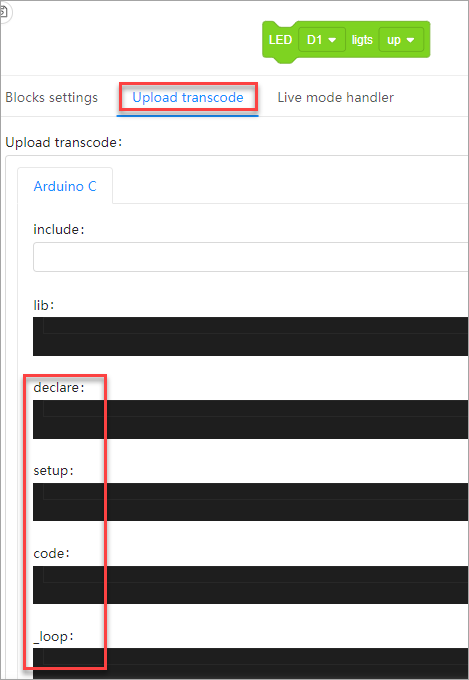
Click Upload transcode, and set the following items:
- declare: The code set here appears before that set in setup() and is used to declare a variable.
- setup: The code set here is embedded in the setup() function of Arduino ONCE.
- code: The code set here appears in the position where the block is used.
- _loop: The code set here is embedded in the _loop() function of Arduino ONCE.
The following Arduino code example is provided in the documentation for the Seeed Studio Grove Starter Kit:
1 void setup() {
2 // initialize digital pin2 as an output.
3 pinMode(2, OUTPUT);
4 }
5 // the loop function runs over and over again forever
6 void loop() {
7 digitalWrite(2, HIGH); // turn the LED on (HIGH is the voltage level)
8 delay(1000); // wait for a second
9 digitalWrite(2, LOW); // turn the LED off by making the voltage LOW
10 delay(1000); // wait for a second
11 }
According to the preceding code, the following configuration is required:
- Set pinMode in setup.
- Set digitalWrite in code.
- Use /*{port}*/ and /*status*/ to indicate the value of the dropdown parameters.
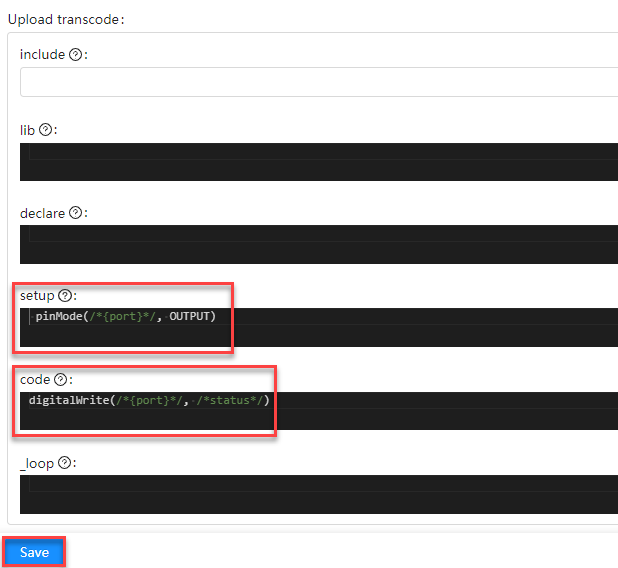
Click Save.
Now you can download the extension and drag it to your mBlock 5 PC client to test the block you have created!
